Crossposted at Politicook.net
Throughout their history, coins have been made using the same basic processes; only the technology to apply these processes has improved. Basically, there are the following steps: design, die making, blank preparation, actual coining, and inspection.
In the first coins, dies were engraved by hand, often by the designer. A blank (a piece of [usually] precious metal was sat atop the bottom die (the "anvil" die), the top die (the "hammer" die) was placed in a fixture on top, and the hammer die hit sharply with a heavy hammer. In Greece and Rome, slaves usually supplied the energy for the process, under very watchful eyes of overseers.
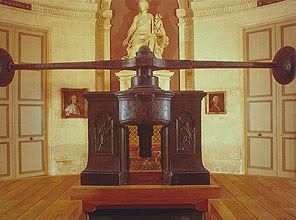
The technology was improved in the mid-1500's by two innovations: rolling the metal stock to a uniform thickness and then punching out the blanks, and using a screw press (similar to those used to print books with movable type) instead of a hammer to impress the dies into the blank. With better blanks and a uniform pressure, better coins resulted. The blanks still had to be adjusted, usually by filing to get to the correct mass, and even some early US coins show filemarks. Here is a picture of an early coin screw press. It took several men on each handle to make a good coin:
In the 1830's the "toggle press" was developed, and modern coin presses are descendants of it. In this device, the dies are rapidly pressed together by a system of levers and drives for the levers that smack them onto the blank sharply and rapidly. Modern units are electrically powered, but in the early days steam with the driving force. It is difficult to find clear pictures. If anyone reading has one, please insert in the comments.
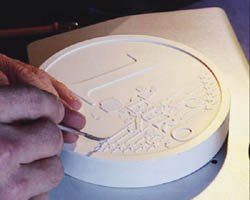
The rest of the discussion will be confined to modern coinage operations. The design is the first step, usually with some sort of a competition. Once the design is approved, a skilled sculptor (sometimes the designer, sometimes not) prepares a plaster rendition of the design, taking care to assure that the relief is correct (see Installment 6: Good and Bad Coins [link below] for the reasons). The plaster master is several times the size of the actual coin so that detail can be inserted more easily. After the plaster master is complete, a silicone material is then deposited on it and cured. This forms a negative image of the finished coin. Here is a picture of a plaster master for a one Euro piece, but the practice is the same for US coins:
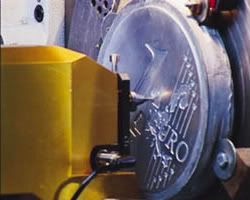
The silicone mold is stripped away from the plaster, and an epoxy cast is made from it. The reason for the silicone step is that silicone is flexible and can easily be stripped from the plaster and from the epoxy. The epoxy positive image is then fixed in a pantograph, which is a reduction engine. A probe from the pantograph scrolls over the epoxy image, like a phonograph needle on a vinyl record, and there is a very hard scribe that reproduces the image in an annealed carbon steel block in the device, at the actual size of the coin. This produces a positive image of the coin, life size. Here is a picture of the pantograph making the master metal die for the same coin:
The mint mark (on all coins but cents from Philadelphia) is then added to this positive image die, and then the die is hardened and polished. This is now called a hub, and the actual working dies are made by punching annealed carbon steel with the hub to form a negative image of the coin to be minted. These dies are then hardened and polished. These are the working dies that strike the coins. One hub can make many working dies, and that is a good thing because after half a million or so coins, the working dies become worn and have to be replaced. Use of a hub assures consistency from die to die.
You can actually buy used working dies from the Mint. Before you get your hopes up, regulations require that every trace of the image be ground off before sale. All hubs are made in Philadelphia, and most dies are. Hubs are never offered for sale, so I suspect they are either destroyed or stored. Here is a picture of the dies available from the Mint:

There is one more component to the working hardware, and that is the collar. The collar is a hardened steel ring that floats above the anvil die that serves to confine the coin to the proper diameter. On coins with reeded edges or lettered edges (the first year of the Presidential Dollar series had lettered edges), the collar also imparts the reeding or lettering.
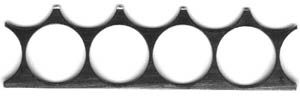
The next step is to make the coin blank. I am not going to go back to the mine here, but I will say that the alloys used are carefully formulated and controlled. The Mint buys alloy in rolls of the proper alloy and in a thickness just over specification, then uncoils it and rolls it to the proper thickness. After rolling, blanks are punched out like cutting cookies or biscuits, except in huge presses with hardened steel dies. Here is a picture of the webbing left after punching. The webbing, along with rejects from subsequent processes, are shredded and sent back vendors for recycling:
The blanks are passed over screens to remove any fragments and otherwise off specification pieces, then tumbled in huge tumbler with ceramic media to knock off the rough edges from the punching operation. All of these operations work harden the blank, so they are annealed in a furnace to soften the metal. If this were not done, the resulting coins would be poorly struck and dies would not last very long. After annealing, the blanks are tumbled with a polishing abrasive and usually given a final chemical cleaning. After rinsing, they are hot air dried. The blank is now ready.
At this point, the processes for regular (business strike) and proof coins diverges. I'll describe the business strike process first, then describe the proof process.
The process is different for US cents. Since they are copper plated zinc, you can not just punch them from a sheet because that would expose zinc edges that are easy to corrode. The Mint buys blanks that are ready to upset from suppliers, who are responsible for accurate size, thickness, and mass.
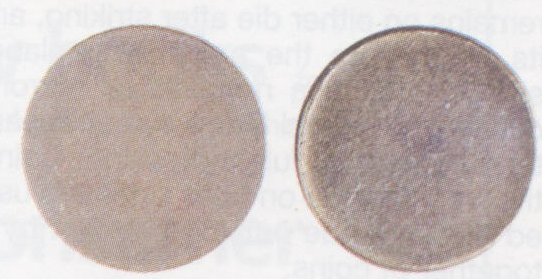
Once the blanks are ready, they go through an upsetting press that raises the rim around each side of the coin. This serves two purposes: it work hardens the edge so that the metal is less apt to flow when the coin is struck, and also serves to protect the images and lettering on the finished coin by being thicker than most of the rest of the coin. Here are pictures of blanks and planchets (they are illuminated at around 10 o'clock, so the raised part does not show all over):
After upsetting and inspection, the blanks are now called planchets and are ready for coinage. The planchets are fed into the presses, where the dies strike the coin within the collar, producing the finished product. The capacity of the Mint is incredible. in 2000, for example, the Mint produced 14.3 BILLION business strike cents alone. That is, on average, assuming 24/7/365 operation at Philadelphia and Denver, over 39 million cents per day. Of course, the Mint has multiple presses, and each press can turn out hundreds of coins per minute.
After striking, coins are inspected with digital cameras as they leave the presses and any defective one is rejected and placed in the recycle bin along with defective blanks and the scrap webbing from which the blanks were punched. The coins are counted, bagged, and readied for shipment to the Federal Reserve.
For proof coins, the process is pretty much the same up to the polishing stage after annealing step for blanks. For proofs, the polishing is done much more carefully to produce a mirror surface on the blank. After that, the blanks are handled manually, literally with white cotton gloves. The upsetting press dies are highly polished so as not to distort the mirror finish. The actual coinage dies are also highly polished, and are produced by special hubs that are also highly polished.
Most modern proofs have a mirror background and frosted, or matte, images, produced by sandblasting the image producing areas. Past proofs have been matte all over, or mirror all over. Some proofs have been "reverse", where the background is matte and the images mirror.
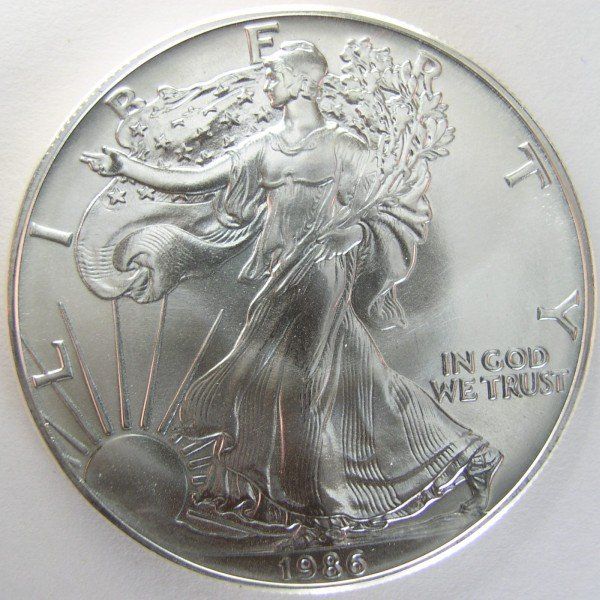
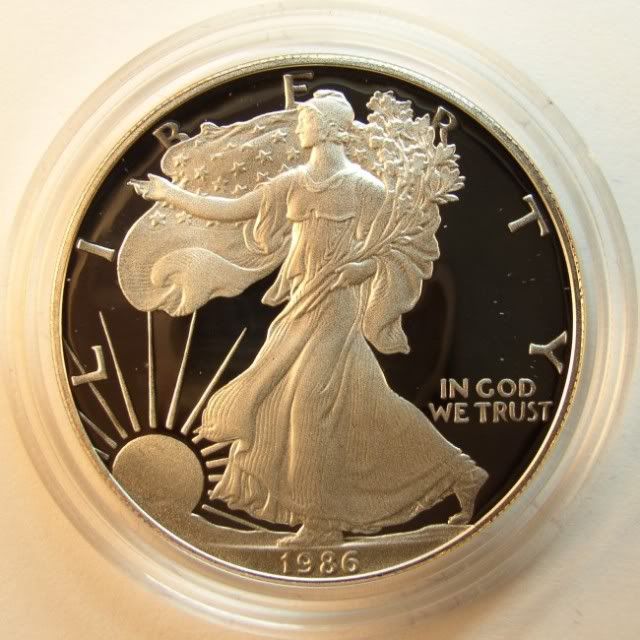
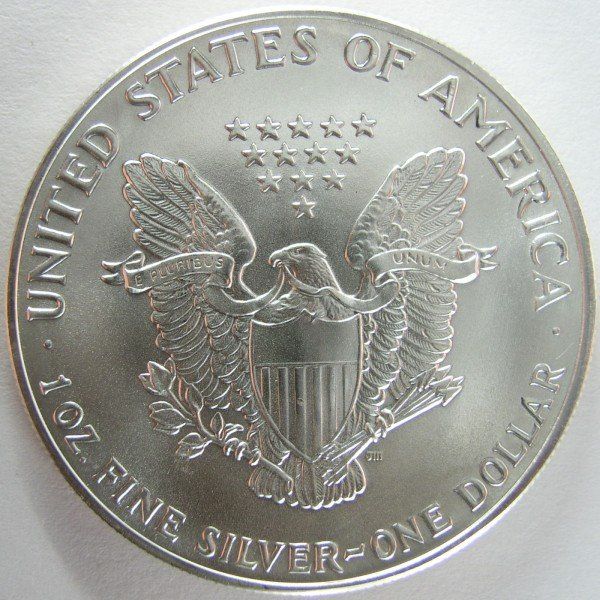
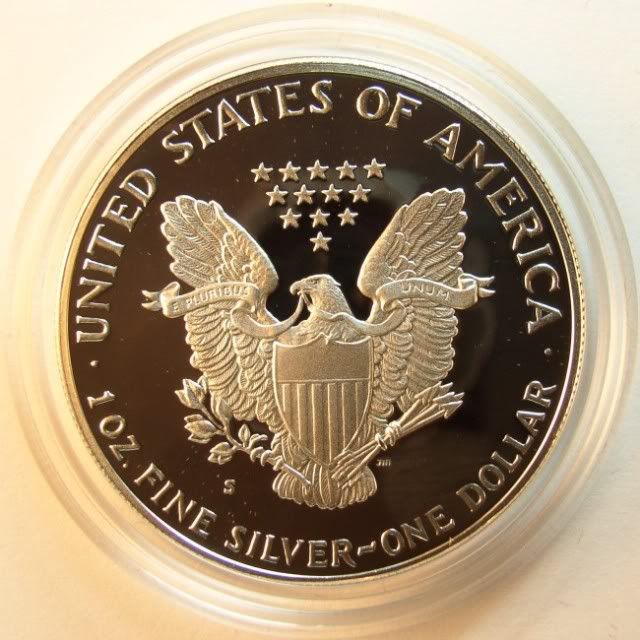
Planchets are hand fed into the presses for proofs, and struck at least twice, with a longer duty cycle and higher pressure than for business strike coins. They are visually inspected and handled in such a manner that they never bump into each other or anything else hard, so are free of nicks like business strikes often have even when they are uncirculated. Proof sets are available from the Mint directly, and selected dealers can buy individual strikes in "bulk". They in turn sell them to other dealers, where they are available to the public. Here are some pictures to show the difference in business strike and proof coins (each is the business strike, followed by the proof stike):
Until recently, all proofs were struck in Philadelphia. Most proof coins are now struck in San Francisco (SF does not do business strikes much any more. The last time of which I am aware was in the 1980's during the transition to zinc cents. Those coins carried no mint mark, making them appear to be from Philadelphia). A few proofs are struck at West Point, but mostly West Point strikes bullion coins.
For previous installments of this series, you can look at these posts:
Pique the Geek: The US Cent
A Primer on United States Coins, Part 1.5
A Primer on United States Coins, Part 2
A Primer on United States Coins, with Silver Content Value as of Today, Part 3
The US Mint Ran out of Gold Today (part 4 of a series on coins)
A Primer on US Coins, Part 4: Modern Coins
A Primer on US Coins #5: Bullion Coins - Final Update
A Primer on US Coins #6: Good and Bad Coins
Any comments, questions, or other remarks are always welcome.
UPDATE: Unless someone has a better topic, I think that I will make the next installment about my picks and pans about the most attractive and least attractive coins minted by the United States. If there are better suggestions, I am open for them. I expect this to be a continuing series, unless interest falls away from it.
Warmest regards,
Doc
