Good morning! CJB here while claude is on the road today. Welcome to Saturday Morning Home Repair Blogging. SMHRB is where we gather on Saturdays to share frustrations, questions, possible solutions, and general wisdom about keeping our houses in good shape. Everyone is welcome. Feel free to ask questions. Hopefully, the collective professional expertise and DIY experience here can help you out with your projects. (Thanks to Milly Watt for the intro. I stole it.)
Today, we're back in the basement. I wrote another diary a while back asking for advice on jacking up the main floor which has settled in the middle of the house. We took all of your great advice to heart, went down with levels and lasers and various implements of enlightenment. Puttered. Squinted. Measured. Gauged. Thought. Discussed. Eventually decided to follow the sage advice, "Make sure that what you want is really necessary." We decided that the slightly sloping floors would be considered "character" for the foreseeable future. We put away the levels and lasers and various implements of enlightenment, cracked some beers and toasted our wisdom.
We could not make the same decision for the stairwell. That had to have some help. Here's a current pic of the setup we've put in place:
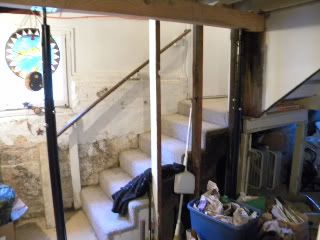
Two jack posts on supports with a 4x6 at the top. We ratchet the right side up 3/4 of a turn every other day or three. This is slowly taking the weight off of the old 2x4s that were holding the wall up. They will be replaced with 4x4s, new stringers, treads and risers will be brought in. The center beam of the stairs (to the right of the right jackpost) will be sistered with a 4x and the whole thing covered up for another 90 years. That's the plan, anyway. As for the rest of the basement: here are some pictures of the progress. The south wall (and Mr CJB,):
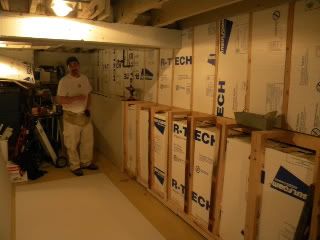
framed, insulated and then sheetrocked. (The sheetrock "shelf" is just there to stack stuff on while we move around the room. It will be replaced by something more substantial.)
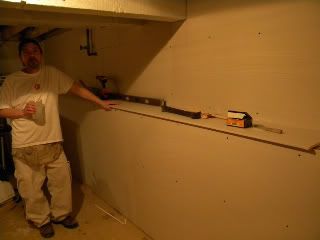
The east wall:
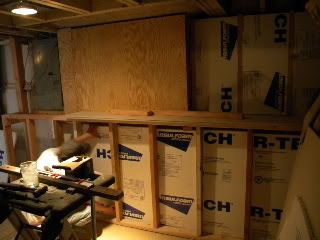
framed, insulated and plywood put up under what will be sheetrock so we can mount a flatscreen there.
The area that was a bedroom down there (to the left of the above picture) will be taken out. (It's not legal. The ceilings are too low.) and shelving will be put up in the northeast corner before it's walled off as storage.
The questions I have for any who may be able to help:
What is this:
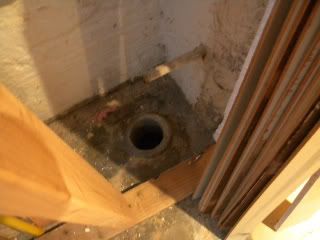
There is obviously an intentional hole in the floor and a pipe sticking out of the wall. Water drips from this pipe occasionally into the hole. The whole thing is right under the place where the fireplace was upstairs. (There's a woodstove there now.) We don't know why there seems to be a drain there - nor do we know what's draining. It's on the opposite side of the house from all of the plumbing. Wierd. To us, anyway. (If it helps, the house was built in 1916 from a kit. Sears? Alladin? Keith? Don't know. Thought it was a Sears kit, but I'm not so sure at the moment.)
Next, this:
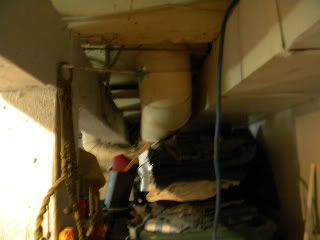
Between the main beam and the furnace intake duct from the livingroom is the warm air outflow back to the living room. That's the round one, of course. I want to know if there is a way to bump that outflow up. Can it be replaced with a square or rectangular duct like the intake ducts? That would allow us to tuck it up between the two and enclose it all in one wide soffit. Here it is from the side so you can see how far down it comes. Just enough to make it a problem (and, yes, we do currently have stuff stacked 5+ feet high under there. It had to go somewhere. :-)):

I know that messing with airflow can be tricky, but this system is seriously primitive. Two intake and 4 outflow, all in a very limited footprint. The one that we would be "compromising" is one of three on the main floor, so there'd be two other heat sources in a very open floor plan. Any ideas?
Thanks for all the help this group gives! We really appreciate it and, more importantly, we definitely use it!
