Happy Sunday Bread Heads!
This week we’re going to do something a little nice for your Sweetheart, we’re going to go make chocolate covered cherries!
As with just about every recipe I am going to tell you that there really is nothing very hard about this, and it is true! The big thing you need to make these treats is a candy thermometer. If you have that and this recipe you can make one of the all time great “I Love You” treats and you don’t have to buy it from the store!
Part of the trick of chocolate covered cherries is getting the fondant to melt from the liquid in the cherry. There are several different types of fondant that will do this. I like one that does not completely melt because I have found it stores better. What you get is a liquid center around the cherry then a bit of white fondant and then the chocolate. I like a rum flavor with this, so I buy cherries in the summer then store them in dark rum in a canning jar to be ready for use. Since that means we should have been talking about cherries in July for this, you can substitute with maraschino cherries.
But enough talk! Let’s make some candy!
Chocolate Covered Cherries:
Ingredients:
1 cup whipping cream
½ cup milk
1/3 cup light corn syrup
4 cups sugar
¼ teaspoon salt
50 cherries (pitted and soaked in rum or maraschino)
½ lbs dipping chocolate (you can order this on line or find it at your local cake decorating store)
Special equipment: A candy thermometer a 6 quart pan and a 9”x13” baking dish
Method:
In your 6 quart pot, combine the cream, milk, corn syrup, sugar and salt. Place over medium high heat and stir occasionally until it comes to a boil. Clip on your candy thermometer and let it bubble away until it reaches 238 degrees. NOTE: that temp is for sea level, if you live as little as 1000 feet above sea level you should check what temperature water boils at before starting. At my house it boils at 200 degrees because we are 5200 feet above sea level. As a result I reduce the temperature by 12 degrees for all of my candy making.
When the mix has come to the right temperature, pour it into the 9”x13” baking pan and put in the refrigerator to cool. It is ready when the bottom of the pan no longer feels warm, about an hour.
If you have a stand mixer this next part is going to be a lot easier than if you don’t. You can do it by hand, I do about half the time, but it is a bit of a slog. If you are doing it by hand, take a wooden spoon and start stiring the mixture. You don’t have to beat it just keep it moving.
If you are using a stand mixer fit it with the flat paddle attachment and scrape the cooled fondant into the work bowl. Set it for a medium low speed and let it work.
Both methods are going to take between 30 minutes and an hour. Eventually the fondant will loose its shine and start to look like stiff frosting. When it gets to this stage it is done.
If you’re doing this by hand your going to need a break. Scrape the fondant out of the pan and wrap in plastic wrap. Just leave it on the counter, you don’t want it to stiffen up too much like it will if your refrigerate it. If you used the stand mixer, just cover the bowl with plastic wrap you lazy scoundrel you.
Pour the dipping chocolate into an oven proof dish and put it in the oven. Turn the oven to the “warm” setting and go take a load off of your feet for the next 20 to 30 minutes.
When the chocolate is nearly ready, you want to form the centers. Lay the cherries out on some paper towels and cover a sheet pan with parchment paper. Take about a tablespoon of fondant and flatten it in your palm. Wrap it around one of the cherries, so that the fondant completely covers the cherry. Using the palms of your hands roll it between them so it is completely round. Set on the prepared sheet pan and repeat until you have covered all your cherries.
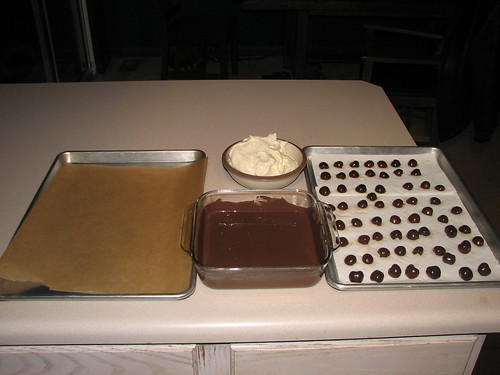
Now it is time to dip them. Chocolate covered cherries need to be double dipped to make sure none of the liquid center escapes. You want to have the station set up so that the centers are on the side of your non-dominate hand. The pan of chocolate will go in the middle and the landing space (another sheet pan covered with parchment paper) is on the dominate hand side. I am left handed so my dipping station looks like this:
When the chocolate is ready, wash and completely dry your hands. If you get any water in the chocolate when it sets it will have white streaks, and no one wants that. With the fingers of your dominate hand give the chocolate a stir. It should be very warm but not too hot to keep your fingers in it. If it is too hot to keep your hand in it, then the chocolate is too hot to dip. You want somewhere around 105 to 90 degrees for dipping.
Take one of the centers in your off hand and place it in the chocolate. Make a cage of your fingers in your dominate hand and use that to swish the center back and forth. Pick it up with your dominate hand and let any excess chocolate drip off. Check the center to see that it is completely covered and if there is uncovered spot, just rub a chocolate covered finger over that spot. Set on the landing tray and repeat for all the cherries.
When they are dipped for the first time you will have about an hour before they are ready to dip again. Just let the unused chocolate in the pan harden and then reheat it for about 20 minutes before the second round. This is a good time to clean up the kitchen as it is probably a big mess by this point.
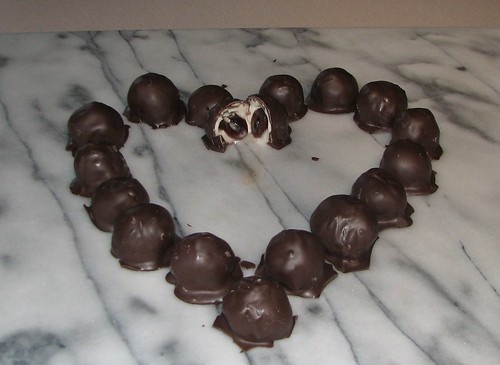
Repeat the dipping process for all the cherries. You will now have a nice thick coating of chocolate around them. If you have a heart shaped box to put them in that is very traditional but I have found that it really is not needed. One word of warning: Don’t be wearing anything complicated to remove when you give this love gift to your special someone, clothes tend to fly in all directions after this is homemade gift is presented, no need for them to be torn as well.
The flour, or in this case sugar, is yours!
