 Sometimes I think knitting is an exercise of moving from goof through disaster, interspersed with periods of calm, relaxing creation.
This weekend was not one of the calm periods.
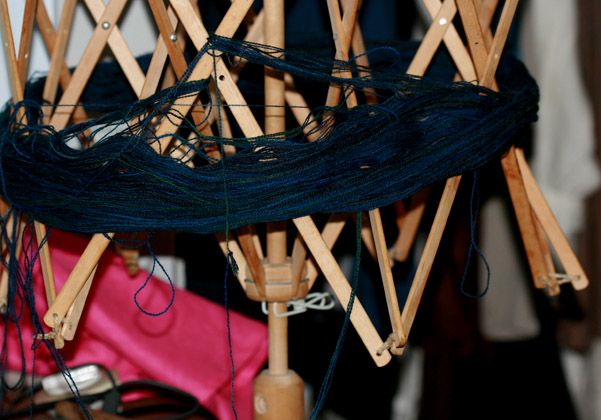
Before I could start working on the knit along shawl, I needed to wind the skeins of yarn into balls. I haven't needed to use my yarn swift and ball winder in years -- I've been knitting with sewing thread, or with yarn that I purchased already in balls.
However, I have boys. Boys who can't resist fiddling with stuff they find, taking it apart, walking off with cool-looking pieces. Thus, I discovered that the wooden screw which holds the swift open was missing. I had to figure out how to make do with what I had on hand.
Hilarity did not ensue. Frustration did.
My first thought was to put a binder clip on the rod under the block which supports the arms. I couldn't find a large binder clip, but the medium-sized one barely fit around the rod. I put the skein around the swift, started winding the ball and... the binder clip was under just a little too much pressure and popped off, flying across the room (I still haven't found it). Of course when the swift collapsed the skein fell off and tangled, never to be pristine again. So I straightened it out as best I could, and I ended up using the little white clip you can see in the photo to hold up the swift -- also barely adequate, but at least it held.
Plus that I really don't have good table tops with nice deep, square edges upon which to clamp the swift, and the ball winder, at angles and distances which make for easy use. The swift was pretty stable on my sewing machine table (barely clearing the sewing machine, but it made it); the ball winder had to be attached to the arm of a the futon-couch we have in the room. But, as I wound the ball, the winder would jiggle loose as the arm wasn't quite deep enough or square enough to allow a secure clamp.
I ended up winding with my left hand, holding the ball winder steady with my right hand, and having to stop every minute or so to straighten out the skein of yarn.
But, the mission was finally accomplished.
I am (or was) nearing the end of a Herbert Niebling round lace piece -- just 3 rounds to go then the bind off.
And then... Caligula jumped up in the middle of it, jerking the piece and causing 3 sets of faggotting stitches to pull off the needle. The tension caused by his fuzzy body meant that the stitches ran down (no chance to do my usual "drop immediately and find the Elmer's glue to stabilize it" trick). Faggotting is simple to knit (y/o, k2t, y/o k2t), but because it is so regular, it is not forgiving about hiding errors across an expanse of several sets of knit pairs. Rule of thumb: the simpler and more repetitive the lace stitch, the more perfect the execution must be.
Faggotting is also very hard to repair over more than a couple of stitches and rows -- all the y/o's create a twisted mess that has to be sorted out. So, despite spending a couple of hours trying to repair a couple of inches of knitting, I decided the best option was to give it up, pull the needles, and rip it out. So I did -- then I sprayed it down with quilt basting spray to stabilize the stitches, wrapped it up in a smooth towel, and put it aside. This week I'll pick at picking up the 1,000+ stitches, then finish it up.
So... I started working on the Irtfa'a faroese shawl, our first knit along project. Here's what I found in the first section -- the "neck band" and "shoulder shaping" section.
Because I think it's likely that many of you haven't had to use a provisional cast on before, I did a little research so I could explain it correctly -- and found several methods beyond the way I knew; the final method I'll list is one of the coolest things I've ever seen, and can also be used for starting out knitting in the round on a small number of stitches.
First, the method I learned: the invisible/provisional cast on. This video is the best explanation I've ever seen. But it -- like every other method -- leaves out a helpful bit of information -- when doing a provisional cast on, it helps a lot to use a needle a size or two larger than called for. A little extra room is extremely helpful in picking up the stitches later. Additionally, when knitting lace I like to put a row of plain stitches in to stabilize that first row and define the stitches.
Next, we have a lovely British woman explaining the crocheted provisional cast on. I really like this one, as it would give a nice, solid base to knit onto. You can get a similar effect by doing a long-tail cast on, using waste yarn for the "tail" which could be pulled out later.
The final -- and coolest IMO -- method is "Judy's magic cast on", video here. The magic cast on was developed for seamless toes for socks, and you end up with two sets of stitches divided onto two needles. By knitting on only one set, you'd end up with a perfect set of live stitches, already on a needle, ready to go when you're ready to use them. Well, watch the video and you'll see what I mean.
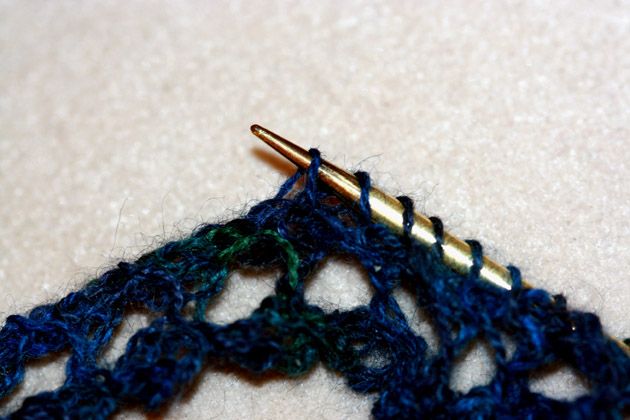 Now, on to the edging. The pattern calls for 21 repeats of the 4 row pattern, for a total of 84 rows. After you're done, you're supposed to pick up 43 stitches, every other row, along the edge -- but that's a really tight fit and overly difficult. I ended up just adding another pattern repeat; that way you can get the 43 stitches without crowding on either end.
The other oddity on the edging is that the odd-numbered rows start with a slipped stitch, followed by a y/o which ends up leaving a single diagonal strand showing on the wrong side PJEvans has a suggestion for correcting for that. I found it useful, though -- you use that diagonal to pick those 43 stitches along the edge, which pulls the diagonal back into place.
Moving on to the "shoulder shaping section", I found the arrangement of the pattern to be... convoluted. The designer has provided charts, and written out the stitches by rows. Except the charts don't go pattern 1, pattern 2, pattern 3, pattern 2, pattern 1 -- patterns 1 and 2 are on page 5, and pattern 3 is on page 10! 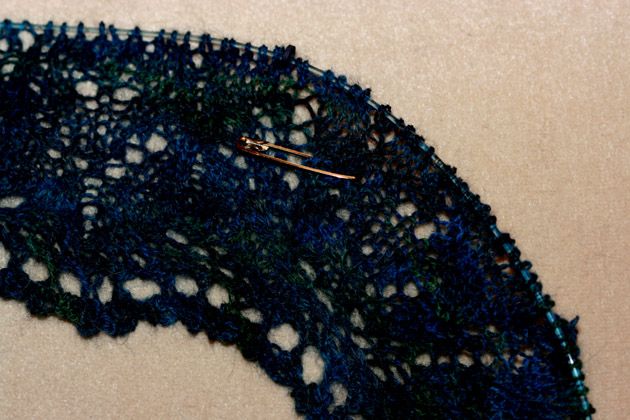 It took me a while to figure out just what the hell was going on. In any event, you will want to work off the charts as it's easier to see how the row you're on lines up with the row below. Just remember that on the wrong side row what is marked as "purl" stitches are knit stitches. It's easy enough to get the hang of it, as the chart will show you whether you should be doing the same stitch as the row below, and your knitting will show you whether that stitch should be a knit or a purl.
But because there are both knit and purl stitches on the right side of the knitting, you'll likely want to put a marker of some sort -- I just use a coiless safety pin -- on the right side so you don't get confused as to which side is which and whether you're on an odd or even row.
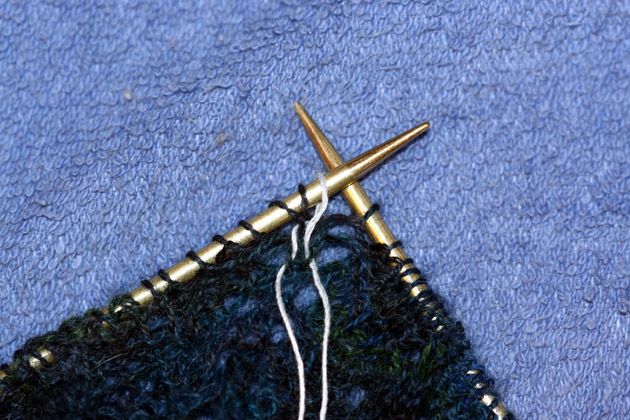 I also found it helpful to mark the center stitch on the side sections -- it's easy to forget that stray purl stitch hanging out on the edge of the chart so the marker serves as a reminder. A good way to mark a center stitch is to use a short piece -- 3" or 4" -- of contrast yarn (I use crochet thread), drape it over the needle and knit through the loop as you knit the stitch. In future rows, just pull up on the loop and knit through it again; because the yarn is short and not tied together, it will move up with you.
Besides, you'll need to know exactly where the center stitches are for row 28 -- the next place where I got confused. The designer has put in the chart that on the last row, there's a make 1 left, knit, make 1 right. Which is all well and good, except in row 27 there's a yarn over before and after the middle stitch. I've always considered left and right increases as being lifted bar increases: you pick up the bar between stitches, knitting through the front for a right twist/right slant increase, and twisting the other way for a left. But with a yarn over in the pattern, that bar is already in use.
A little digging led me to this conclusion: the designer is a disciple of Elizabeth Zimmerman, so she is referring to the Zimmerman make 1 -- basically a twisted y/o. (Which also explains a lot of what I see as unclear and fussy instructions and charting; Zimmerman did revolutionize knitting in America and I appreciate her work, but I'm definitely not in the "disciple" category).
In any event, you can do the Zimmerman make 1, or even easier, do a 1 to 3 increase: without slipping the stitch from the left needle, knit in the front leg, y/o, knit into the back leg -- and then you don't have to worry about whether you're doing a "right" or "left" increase.
To help me keep track of where I am on the charts, I use alternating-colored highlighters to mark each row that I'm working on -- odd rows are green, even rows are yellow. Because of cat and boy factors, I've found it too easy for post-it notes to get knocked off and then I have to spend a half hour trying to figure out where the hell I was. Luckily with a pdf pattern, I can easily make duplicates of one or another page when I "use up" a chart and need another of the same one (as will happen with page 10).
Updated by Frankenoid at Thu Mar 24, 2011 at 03:21 PM MDT
I've charted the body portion onto an Excel sheet; I've had enough switching my focus between charts. Let me know if you want me to email it to you when you get there.
