Note: much of the material in this diary was published previously in this WAYWO diary. This is an update and shows the finished quilt, just in time for Son in IA's graduation.
I almost always have multiple projects in process, so the question of WAYWO (What Are You Working On?) usually stumps me a little. Sure, a project will take the forefront for a while, but few are done start to finish with no intervening work on other items.
Take, for example, my son's graduation quilt. I started designing it in fall of 2010 at the beginning of his senior (fourth) year in college. At the time he was on track to graduate with a bachelors in mechanical engineering in May 2011.
But plans changed. He decided to enter Air Force ROTC, though most students enter the sequence of classes as freshmen or sophomores. There was no way he could finish school in four years and fulfill the requirements of AFROTC.
No problem! Besides finishing the BS, he would also enter and finish a masters in engineering, a plan approved by the engineering college, AFROTC, and the parents. Ultimately, this led to a date for his bachelors degree of May 2012, and the masters degree and commissioning into the Air Force of December 2012.
The Design
When I design quilts as gifts, I try to incorporate symbolism that represents the recipient to me. Whether or not they understand it, I do, and it helps me to "love on" every cut, press, and stitch. It was easy to decide what kind of symbols to use for his gift, especially once he'd decided to enter the Air Force. Propellers. Airplane propellers are appropriate, but so are wind turbine propellers, as he spent a couple of years working with a professor on wind energy projects.
There are lots of ways to include spinners into quilts, lots of windmill and pinwheel variations. I drew dozens of designs using blue and yellow, the Air Force colors, before settling on this:
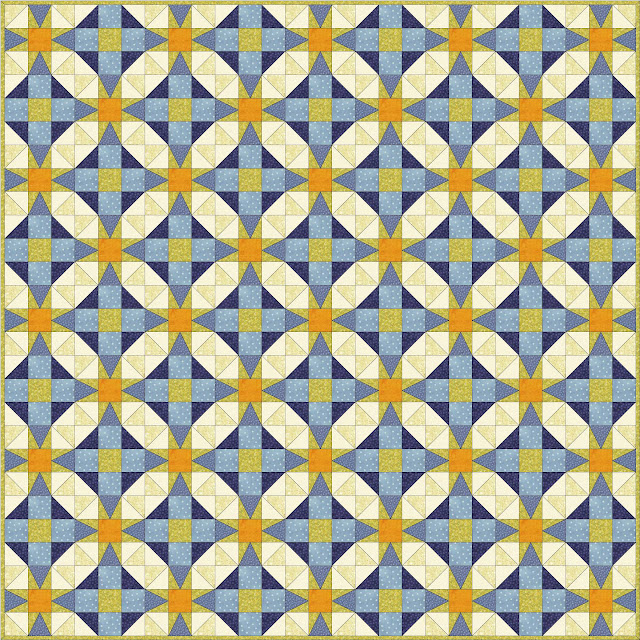
This is a 9x9 layout using 2 blocks that create a secondary pattern. Only straight lines are used, but the combination gives the illusions of curves and circular motion. I also like the plaid effect that comes out from the block arrangement, giving reference to our Scottish heritage on my side of the family.
Putting it Together
With blocks that "finish" after sewing at 9", the finished quilt is 81" square, big enough to dress a queen-sized bed. There are 41 of the more complex block (21 patches per block) and 40 of the "simple" block (only 13 patches per block.)

Doing the math and not counting the binding, I count 1,381 pieces of fabric. As a friend said, "THAT'S a Mother's Love right there...."
With a completed design, I started energetically, making the simple blocks in February 2011. Then I put all the fabrics and components in a project drawer for "later." In the meantime I worked on and completed several other projects both for friends/family and for donation. One of the projects I finished in the meantime was the fiancee's quilt, also shown below.
But I still had the complex blocks to do. I cut and sewed them this past December and January.
The photo below shows the stack of completed patches. Once all the patches were cut and sewn, I was ready to sew blocks together.

Because all the blocks are made from the same fabrics, the assembly was simple and didn't require laying out blocks for design effect, the way a scrappy quilt would. Once I had all 81 blocks done, I arranged them on the floor and started stitching them together in rows. Once I had 9 rows sewn, I sewed them together. Then I "loaded" it onto my long-arm quilting machine, to quilt the layers of top, batting, and backing fabric together.
Once I finished quilting, I machine-stitched the binding (edging) all around, and then hand-stitched it to the back to finish. That's 27 feet of hand-stitching. Remember the last time you mended a hem on slacks and sewed a few inches? Twenty-seven feet around.
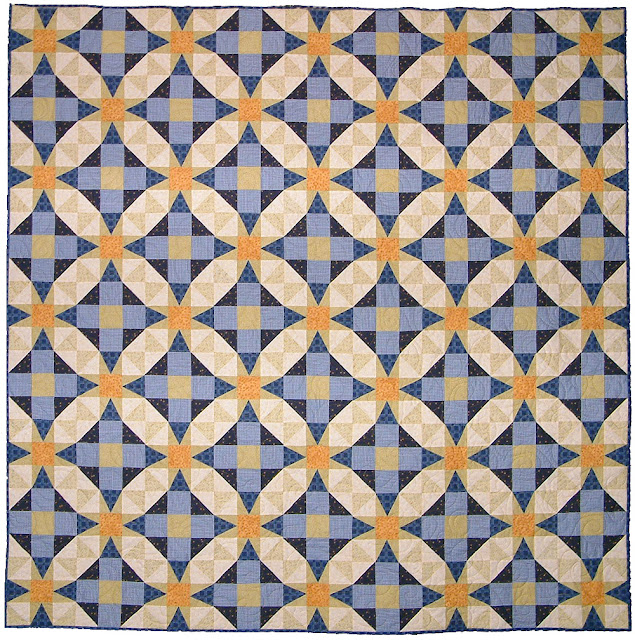
The Finished Quilt
Here's a view of the finished quilt, which I've titled "[Son's] Flight":
Here's a close-up of the quilting:

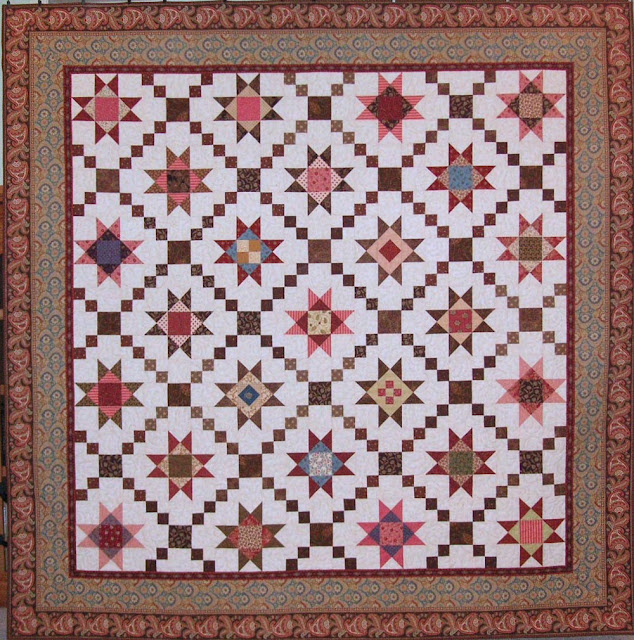
The Fiancee's Quilt
A year ago I presented Son's fiancee with her own graduation quilt, one of my favorite projects of all time. It's approximately the same size as his, and the background cream colored fabric is the same in both quilts, linking them together. In addition, both use paisley fabric for the backs, symbolic of her time in India, his master's thesis work there, as well as the fact that he proposed to her while they were in India together.
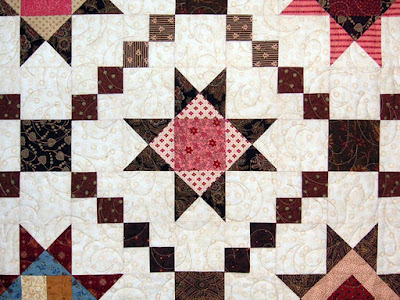
Here is a close-up of hers:
Congratulations
Congratulations are in order, of course, to Son in IA, as he completes this degree. We're really proud of him, his work, his choices, and how he treats other people. He has a bright future in the Air Force (starting with pilot training next spring!), with his fabulous fiancee, and in the rest of his life as well.
Special Thanks
Special thanks to Jim in IA for his enthusiastic support and encouragement of my projects. He always pushes me to try new techniques and ideas, making it easy for me to enjoy my work. Thanks to him, also, for taking photos of the finished products. We hang my quilts from a steel pipe in our utility room to get the pictures. With a quilt this large, it was just too dim. He bought a flood light to get better lighting and it made a big difference.
I enjoyed making the quilt, but the real satisfaction is seeing how the design turned out, and knowing it will be a gift he will cherish as he moves into his future.
If you'd like to see other quilts I've made, enjoy these diaries:
Like Jewels in a Treasure Chest
Large Prints
Stone Soup
Baby Quilts
Wedding Quilts
