Today we are going to start the process of putting together the layers for the quilting. Some people like to call this "quilt as you go." This is really just quilting in sections. It is a great way to machine quilt a large quilt. Come join us.
DK Quilt Guild: A place for quilters to gather, share ideas, projects, and to make the world a better place, one quilt at a time. Join us and share your thoughts, projects, questions, and tips. Quilters here are at many different levels of skill. Beginners and non-quilters are welcome, too!
Many of us don't have the money to have our quilts professionally quilted. Usually this is reserved for a show quilt. It is also difficult to quilt a large bed quilt on a home sewing machine. There are many solutions to this and one of them is quilting in sections. I have selected a technique that will work well with this sampler quilt. The section size is going to be 16 inches square which is a good size for learning machine quilting. It is easy to handle and move around.
The sampler quilt is going to be queen size and has 30 blocks. The blocks are going to be quilted in different ways to go with the design of the block. This will give us an opportunity to learn several techniques such as free motion and straight quilting. But today we are just going to talk about adding the sashing and layering.
The blocks are 12 1/2 inches square so to make them a 15 1/2 inches square after quilting to sew together we have to do some math. I want to work with a 16 inches square while quilting so I have a little extra to square up afterwards. Also quilting can draw up the square a little or the layers can shift a little. This way you are sure you will still be able to correct that with squaring up. For the sashing I will need to cut strips 2 1/4 inches wide. This will give me a 16 inches block that I need. I figured in the 1/2 inch for the seams and 1/4 inch for each side to be able to square up on.
I have chosen unbleached muslin for my sashing because that was usually the fabric of choice during the 19th century for back ground and shashing. I prewashed all seven yards of it to shrink it. Then I pressed it as I went along to cut my strips. I folded it in half the same way it came on the bolt and then folded it one more time to have it folded in quarters. I then cut it in strips. After a few strips are cut then I folded it again and adjusted it. This keeps you from making peeks and valleys in your strips. I don't worry about cutting 12 1/2 inches by 2 1/4 inches strips and 16 inches by 2 1/4 inches strips. I just pin the strip to the block and trim.
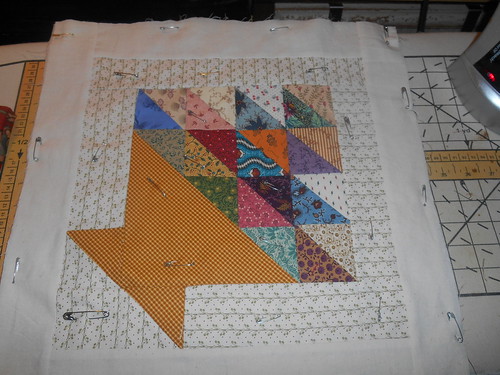
Make sure your pieced blocks are 12 1/2 inches squared up. I used a large 12 1/2 inches square up ruler. You can use what rulers you have to do this.
Pin the sashing strip to opposite sides of the pieced block. Trim leaving a little extra to square up on after sewing. I was able to get three short sides out of one strip with the width of this muslin fabric. Muslin comes in many widths and it has a very high shrink rate so this in one fabric that you have to prewash. Sew these sides on first. Always sew with the pieced block on top so you can line up your quarter inch foot to the perfectly squared up block. This will give you a very straight seam. Press your seam in one direction. Always press to the dark if is possible. I have light sashing so some of my blocks are pressed that way so the dark seam allowance don't show through the very light muslin.
Square up the corners to be able to add the longer strips. I was able to get two longer sides out of strip. I saved all my very short pieces to use in a future scrap quilt. I figure you pay for every inch of the fabrics so I try to use every inch of it. Small squares of muslin are always useful in projects.
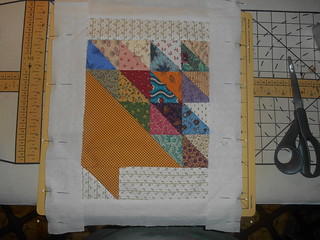
Now sew these longer sides on next. Press the seams in one direction and square up the corners to trim off the little extra off. That is all the squaring up that is done at this time.
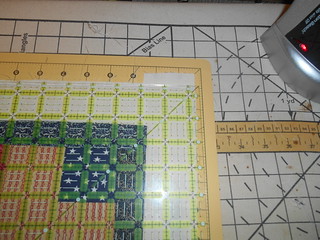
At this point I check to make sure I have at least a 16 inch square. It should be just about perfect. I just eye balled mine using a 15 inch square. I wanted to make sure the block would center nice. I used the lines to check that on the square up ruler.

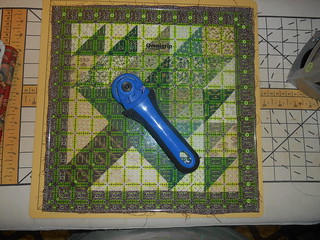
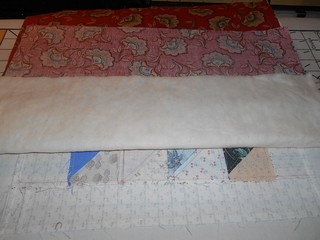
I cut 16 inches squares of backing fabric and batting. Layer it with the backing fabric right side down then place batting on top. The pieced block goes on top of that with the right side up. I folded each layer back so you could see them in the picture.
I pinned the layers together using safety pins. I made sure the edges were lined up and pinned straight. Normally you would pin from the center out but these are small sections and this keeps the sections from shifting as you place your hand under it. I don't tape these small sections down. I don't have the table to do that on. I learned to pin baste so many years ago on a bed and I can do it well with out taped down. Sometimes you have to adjust your pins on the edge. Most of the time you would place you pins apart evenly about a fist width apart. I did not on this block because I am quilting this block a 1/4 inch from the seam with a straight stitch. I did not want my pins in the way so I put some in the center of the blocks. The size of the sections don't require a lot of pins. You won't be rolling these up like you would a whole quilt that is layered.

Next time I will get into the quilting of these blocks. It takes a while to get the prep work done to quilt 30 blocks. I am piecing together scrap batting also for this project. I always use 80/20 batting from the same company and have saved the extra from past quilts. Some of the pieces were large enough to make 16 inch blocks others will have to be sewed together to make the right size block. I will show this also the next time. It is really a good technique to have in your skills.
