A few days ago I made a comment in a diary by Green Mother in which I told about a bird bath I had made that consisted of a reservoir and pump that recirculated the water thus keeping it a bit cooler than the water in my other bird baths. In this terrible heat that so many of us are experiencing this year a lot of people, including myself, are having trouble with the water in our bird baths heating up to the point that it's too hot for the birds to drink and/or evaporating faster than we can fill them. With a lot of the normal water holes dried up this summer, a place for the birds to get a cool drink is more important than ever. Several people showed an interest in it and asked how I had built it. I promised to do a short diary on it and will attempt to do so here.
.
I started this diary trying to explain every step in detail but when I went back and re-read what I had written it sounded confusing so I decided to hit the delete button and start over. I'm just not very good at explaining things so I think I'll just go with the KISS principle in way of explanation. That's also the method I went with when building this bird bath. I'll just post some pics accompanied by a brief description and see how that works. If you have any questions please ask and I'll answer them the best I can.
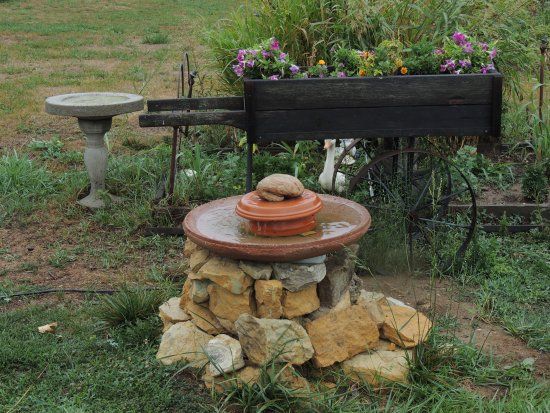
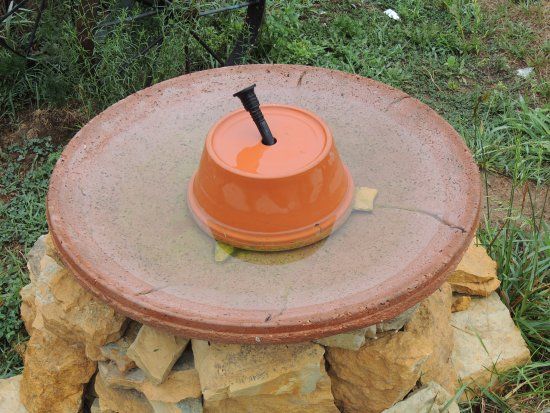
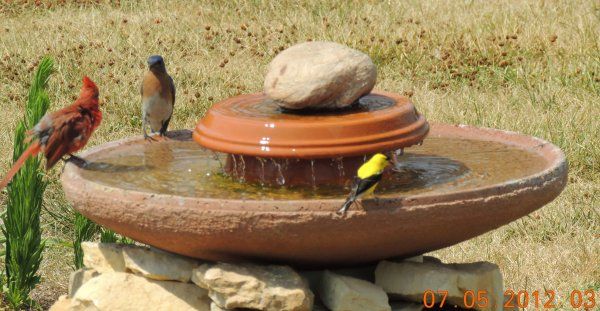
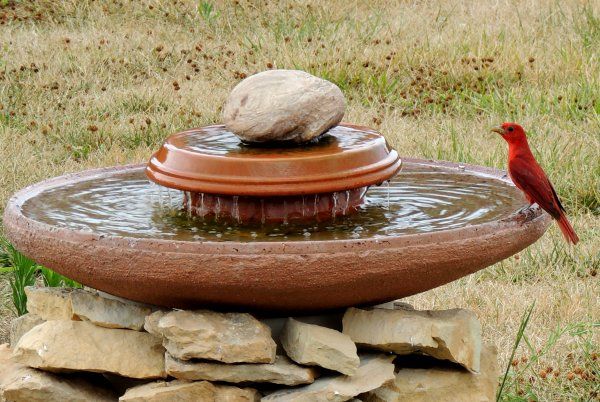
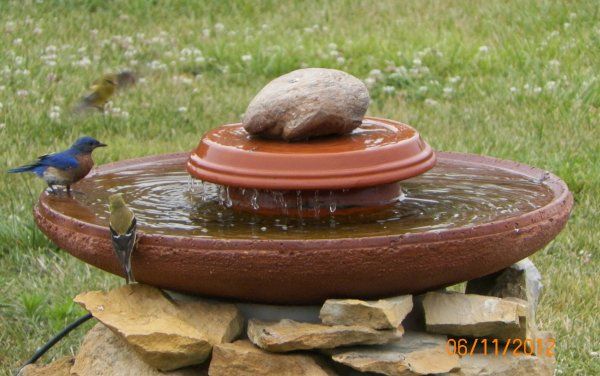
I guess the first pic should be the finished product and then I'll go back and outline the process to get there. This is what it looks like when all put together. I still have a few things to finish up yet but with the extreme heat that we've had this year I got in a hurry to put it into service so pushed things a bit and will go back and tie up the loose ends later.
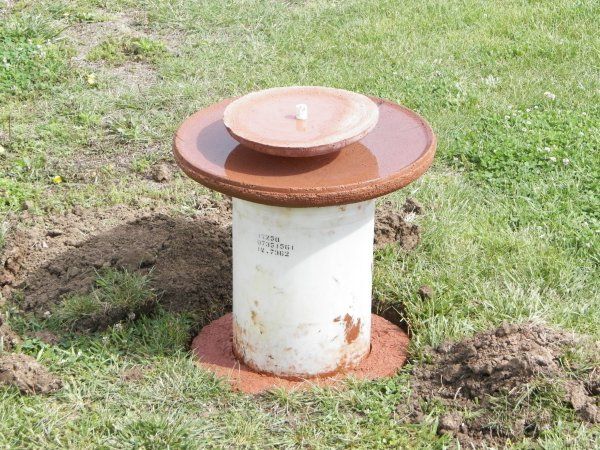
Under that stack of rocks is this 15 gallon plastic drum that I got free from a local business that was glad to get rid of it once they had used up the ingredients. Ask around and chances are you can find a free one too. You could even do this with a five gallon bucket if that's all you could find. All I had to do was to cut the top off with a reciprocating saw and give it a good cleaning.
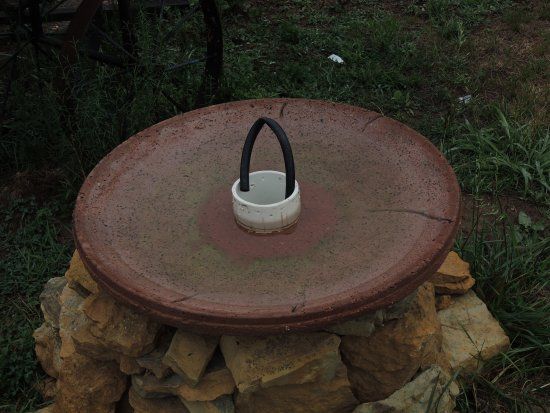
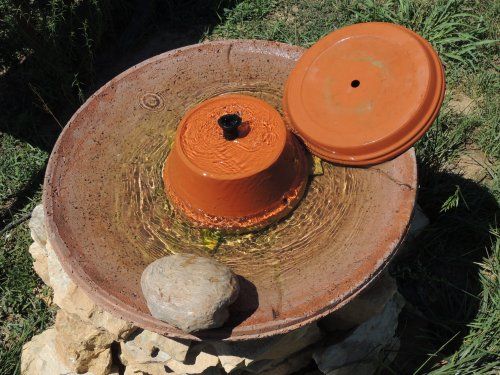
I went out this morning and took the top center pieces off to give you a view of the bowl and to show you how it was put together. The four inch PVC pipe in the center serves three purposes. It allows me access to the pump without taking the whole bowl off. I've had to pull the pump twice to clean the filter since I first put it in service a couple months ago. Sunflower seeds and such are what I found clogging it both times. I intend to put some screen wire over the drain holes and that should solve that problem.
I also fill the drum with water through this pipe. It saves me taking the whole bowl off just to add water. I've had to refill it twice but the first time was because I had the water level set a bit too high and it was dribbling over the back edge and I didn't realize it for awhile. I filled it for the third time this morning since I already had the center piece off but it was still almost half full and could have went another couple weeks or more.
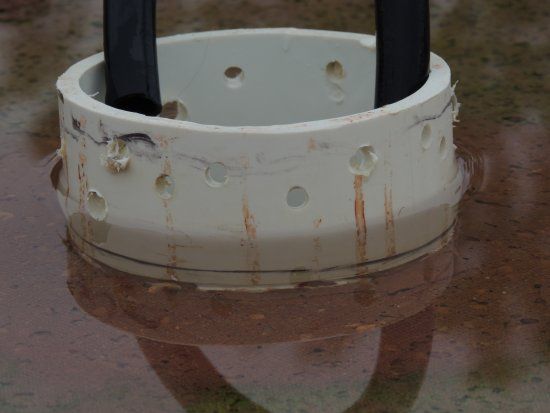
I said the PVC pipe served three purposes . The third thing it does is to give the water a way to get recirculated back to the drum. The holes you see are drilled at whatever height you want your water level to be. You can see that I have a lot of holes, of varying sizes and varying heights. That's just due to poor engineering on my part. That's what I get for being in a hurry.... The first set I drilled were too high and the water overflowed and ran over the edge of the bowl. Then I drilled some more at a lower position but they were too small and didn't keep up with the pump and it still overflowed. So I got a bigger drill bit and put in a couple more holes and now finally have it about right. You'll just have to experiment with it a bit until you have the right amount of holes for your pump. Go slow, it's easier to drill them than to plug them if you get too many. I'm sure that an engineer could come up with a formula using the pump volume output numbers to find the exact size and number of holes to drill but my way works too.
I placed a terracotta planter over the pipe, both to hide the pipe and also as a raised platform for the saucer to sit on. You could use all kinds of things for this but most people probably already have a couple of these clay pots laying around. The height isn't critical, whatever you have on hand or whatever you like will be fine. A couple of old red bricks would work as well.
I placed a few small flat rocks under the planter too raise it up off the bottom of the bowl to allow water to pass under it. I plan to make something a bit more stable for it to stand on but haven't got around to it yet. Actually I have a few things to do before it is completely finished. The screen filter that I mentioned for one and the rocks that are just stacked rather precariously need to be mortared in place, and right now I am just using an extension cord run from the house to power the pump and I intend to bury an electric cable if the ground ever gets soft enough that I can dig without using a pick.
On top of the planter I put a terracotta saucer. I could not find one with a center hole so I had to drill one. It can be done but slow and easy is the word. Terracotta pots, as everyone probably already knows, are brittle and crack easily. Use a sharp masonry bit and don't push too hard while drilling.
I originally put it right side up but found that when the water filled up and ran over the edge that instead of dripping off, it clung to the saucer and followed it all the way back to the pipe where it then ran down the side of the pipe and back into the bowl. I expect if my pump had a bigger discharge volume that wouldn't be a problem. But actually it wasn't really a problem as far as the work ability of the system except that there was no sound of the water dripping and I believe that that watery sound helps to draw the birds to it. So anyways, I turned it upside down and lo and behold it worked that way. Strange, but true. I'm not satisfied with that though because I'd like to have the top serve as another drinking/bathing area for the birds. Working on solving that problem but haven't come up with a solution yet, but I will. I'll probably end up making a new bowl with a bit different design. Meanwhile the upside down saucer will have to do. You may have noticed in one of the pics above that there is a different bowl for the center piece. It was one that I originally made for that purpose but the water clung to it just like it did the saucer. I tried inverting that also but it didn't work with that one. Puzzling....
Here is a pic of all the top center pieces.
This is just a hollow rock that I robbed from one of our rock gardens. I put it on top of everything to hide the end of the hose. Not necessary, just thought it looked better.

I made the bowl out of concrete. It is a bit tricky but if I can do it, so can you. I used an old saucer sled for a form to help me shape it. I had one that's hung in the barn for several years but if you don't happen to have one, they are cheap, though they might be hard to find this time of year, especially if you happen to live in an area that gets no snow..... But look around and see what you can come up with. Old unwanted satellite dishes are everywhere these days. The lid of a large trash can would work too. If nothing else you could just mound up some dirt, with your short length of pipe in the center, shape it into an inverted bowl and pack it down real good and pour your cement right on top of it.
The tricky part is getting the mix the right consistency. Too dry and the concrete will be weak and crumbly, too wet and it will sag downwards before it drys. Mine was just a bit too dry and because of that it's got a lot of tiny voids and looks a little rough but it seems to be strong enough, at least I haven't broken it yet. Follow the mixing directions on the bag and go easy on the water additions. Add a bit of water, mix, add a bit more, mix some more, etc. etc. until you can work it and yet it doesn't slump .
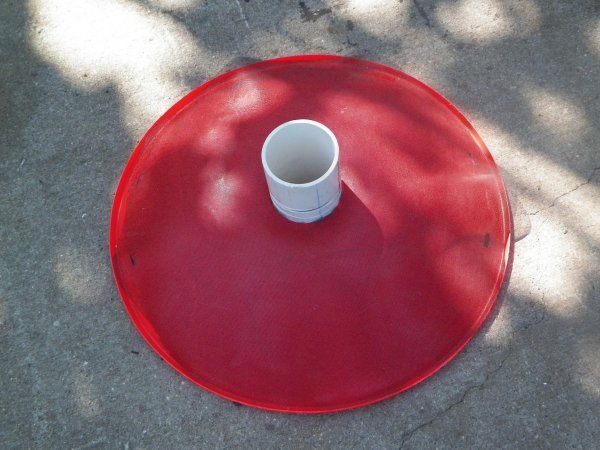
Here is a pic of the saucer sled with a hole cut in the center with the short end of pipe stuck through the hole. I simply laid this on a flat surface and covered it with concrete. The saucer sled forms the inside of the bowl and you just free form the outside using a small hand trowel and your own hands. Try to keep the thickness as uniform as possible, though it's not critical as long as you don't end up with it being so thin in parts as to weaken it. Wear some rubberized or latex gloves.
It's not hard to do this if you have the concrete the right consistency, impossible if you don't. If you get the mix too wet you can add some more cement to dry it up a bit. I laid a piece of burlap over the sled before putting the concrete on. I did that thinking that the imprint of it would leave a rough surface that would make it less slippery for the birds but that turned out to be unnecessary and won't do that on the next one.
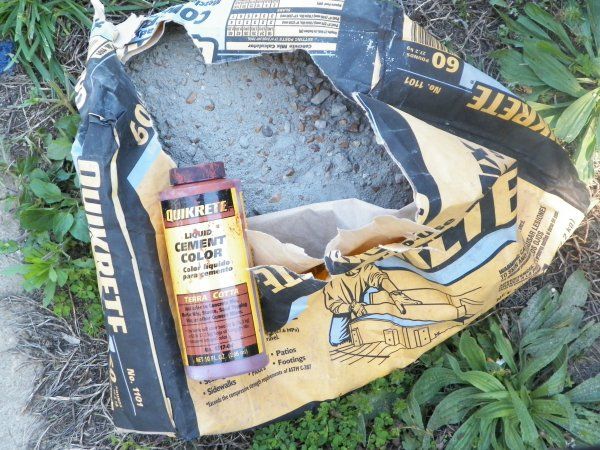
This is what I used. It's available at any hardware store. Or you can buy straight cement and add sand to it. About six parts sand to one part cement should do it.You can probably get a smoother finish going that route if you'd prefer that.The dye isn't necessary, in fact now that it's done I think I prefer the natural grey concrete color, but you can use it or not as you wish. I think there are a few other colors available too.
That's all there is to it. Basically it's a barrel with a bowl on top and a pump inside that pumps water up to the bowl where it drains back when it reaches the desired depth, Don't hesitate to ask if you have any questions. I know my explanation probably leaves a lot to be desired.
If I had it to do over again I would use a six inch pipe as it's a tight fit getting my pump up through the four inch hole. It just barely fits. And a bigger pump would probably be better too. I used what I had on hand.
It's not artwork and it's not going to win any beauty awards and may not be something you want cluttering up your back yard. I don't like the look of manicured lawns myself so it fits right in with my scruffy one, and it does what I wanted it to do, brings in the birds and gives em a cool drink.
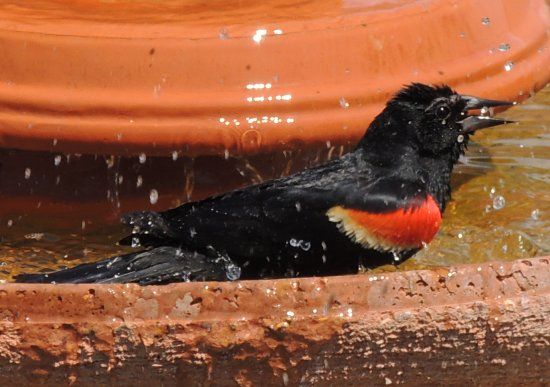
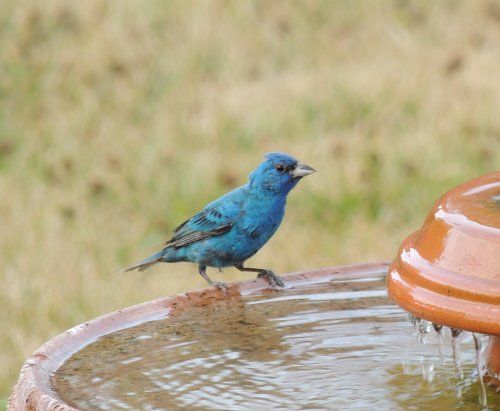
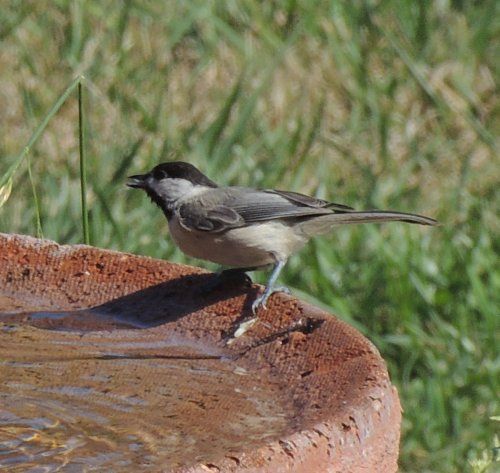
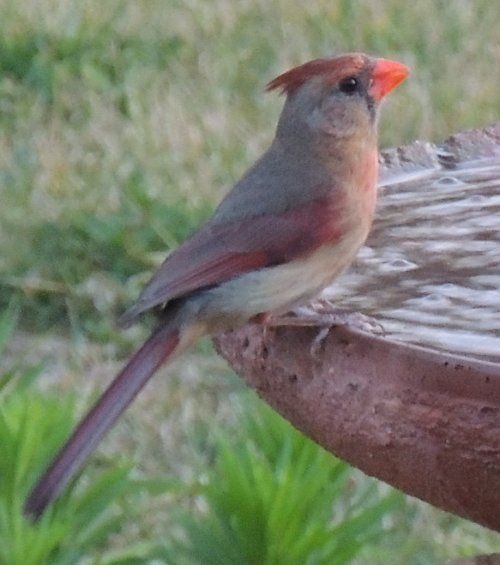
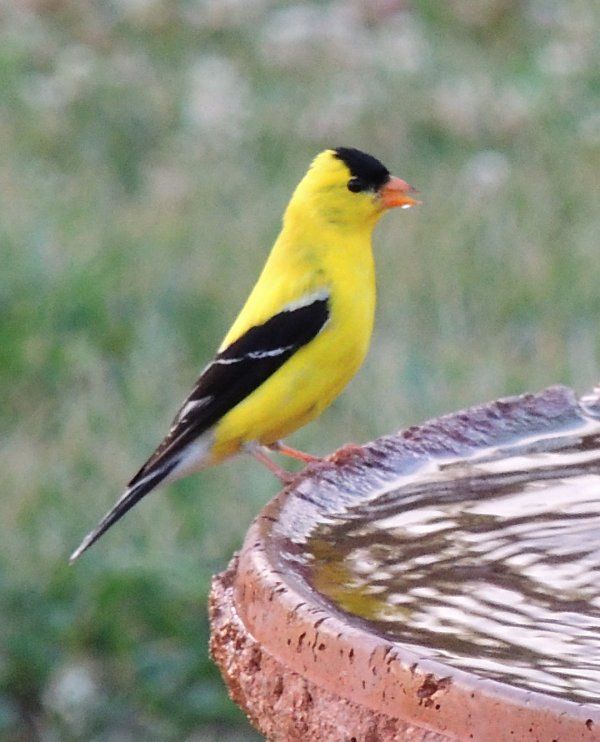
Hope I haven't made it look more complicated than it is, because it really isn't. I'll try to answer any and all questions. I'll close this diary with a few pics of the birds that use it.
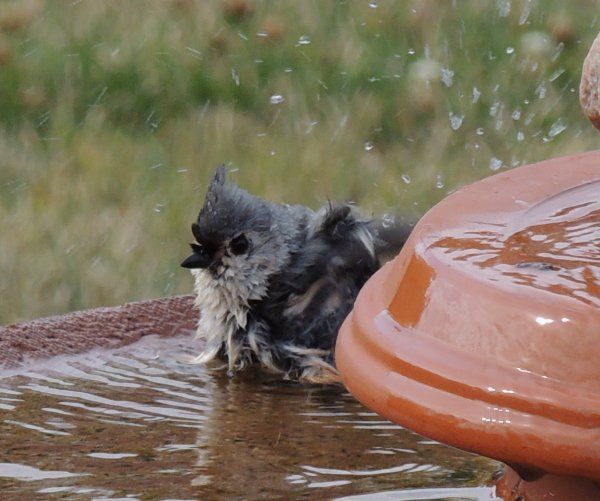
I want to add that it was a comment and pics by enhydra lutris back in April of a fountain birdbath overflowing with cedar waxwings that inspired me to build this in the first place. Haven't got a flock like that in mine yet but there's always tomorrow. So thanks for the inspiration enhydra!
One final note; if you decide to build one and you have a problem or a question pops up in the middle of the job, message me here and I'll get back to you as soon as I see it.
Thu Aug 09, 2012 at 4:52 AM PT: KenBee chastised me, and rightfully so, because I had not mentioned the importance of powering the pump through a circuit containing a Ground Fault Interrupter, or GFI as they are commonly known. For anyone who doesn't know, a GFI is basically a circuit breaker that is designed to trip instantaneously in the event of a short or ground. It's to protect you from being electrocuted.
I apologize for neglecting to talk about this very important point in the diary and wish to thank Ken Bee for bringing it to my attention.
