I didn't originally plan to post this here but I changed my mind after writing it because it does deal with the thought process that goes into getting the shot. Sometimes it is just a matter of waving the camera in the direction of the subject and pressing a button but more often than not a little more thought is required.
Yesterday I received a request from my one permanent client for a photograph of a flaming Christmas pud. That was it- she was to supply said pud and I was to capture it ablaze. On the surface this may seem like a really straightforward request, a lump of something that doesn't move with its own light source - what could be easier? As it happens just about anything without a fast moving object in it...
Seriously, photographing stuff on fire can be very tricky, especially when the burn is only going to last a short time and the scene is going to be shot in the dark. This one required a bit of thought and forward planning.
Crossposted on my blog Minimalist Photography 101
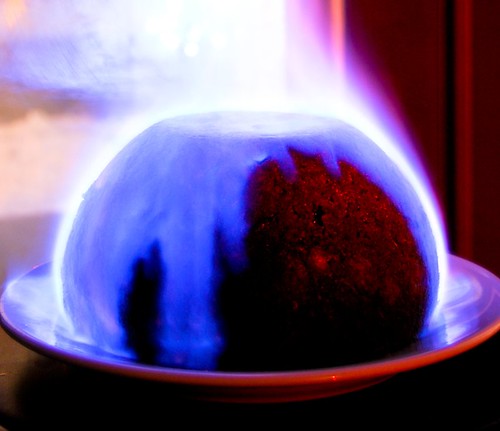
The flame produced by alcohol burns very blue and all but disappears if any ambient light is present so it has to be shot in the dark. Obviously flash is out of the question. The amount of light given off by said flame is very low so long exposures are a must. I considered using candles in shot to illuminate the pudding a little but decided against it because that would have sent the image in a Hallmark card direction (to be avoided -always) and would have cluttered the shot. The pud has a shape that is distinctive enough to be recognizable even in silhouette and this meant that the flame could be emphasized and the shot a dramatic as opposed to a cosy one.
Timing is of the essence here as the pudding only burns for so long and one good shot, possibly two is about all that can be hoped for so the trick is to have as much planned before lighting anything. I set up two cameras, a point and shoot and a dSLR both on tripods ready to go. I decided on the settings and checked and double checked them - this is what I came up with:
Camera Settings
ISO: 1600 to keep exposure as short as possible on the dSLR (Noise reduction switched on)
ISO: 400 with the compact to keep exposure shortish but keep noise in check as this is much more of a problem with the smaller sensor.
Aperture: as big as possible, again to keep exposure time as short as possible. Nothing to be gained by making it smaller in this case.
Exposure: Center weighted as opposed to whole image evaluative (default). I wanted to expose the flame correctly and wasn't worried about what happened close to the edges of the image.
Tripod or some support is a must - (Image stability should always be turned off when using a tripod)
Timed release to stop camera shake caused by pressing the button is what I should have done on both cameras. did it on the compact but not the dSLR- whoops!
Image Background
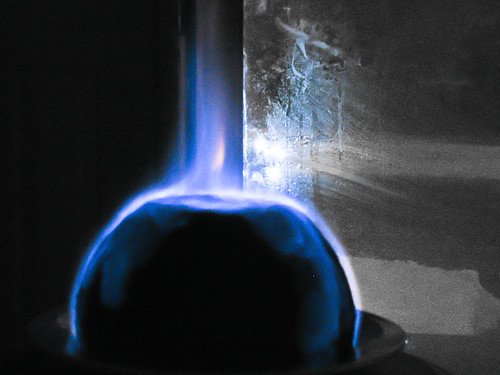
This gave me heartburn because I knew that the background would be dark but I didn't want it completely black otherwise the end result would have looked like a graphic as opposed to a photograph. I decided to go with the glass screen door as I hoped that this would reflect a bit of light and as we were having a very damp foggy winter's day here in NW Indiana I knew that there would be some condensation to do interesting things with light - what exactly I didn't really know but some room has to be left for the unknown. One camera was pointed at just the glass screen while the other had half screen and half wall in it's field of view.
Same Scene - Very different Results
The photograph at the top of this piece is one of the ones from the compact camera the one below was from the dSLR. I prefer the more sparse look of the former but the latter is certainly ummm.. interesting in a post apocalyptic radioactive kind of way. The funny thing is that they both turned out completely differently from how I expected them to but there would have been no way to get this shot at all without the preplanning, Shooting in the dark and a very short window of opportunity make this the case. Anyway, It is good to be surprised by what appears on the view screen sometimes. The best photography is about pushing the envelope or at least building on the results of a pushed envelope.
I am still intending to post a diary about tabletop/product type photography on Friday. This will contain enough information to enable posting a professional standard product type image on a website and will be a good lighting primer.
