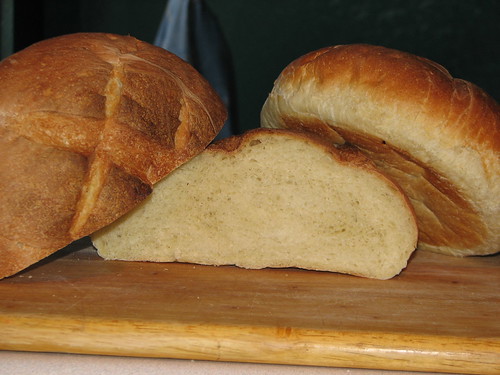
Happy Sunday Bread Heads! This week we’re going to be making French Bread in the boule style. Also, since you all have been so good, there will be a recipe to turn your French Bread into French Toast!
French bread is really old school. It has four ingredients, flour, water, yeast and salt. That is it. But from those basic ingredients you can get one of the all time best breads, if you are willing to take the time to do it right.
This is one of the few recipes where for the very best results you should go and find some hard wheat bread flour. This flour has more gluten in it which is important for forming the large bubbles in the dough that give it the distinctive texture and flavor of French Bread. Because of this it will take extra time, so plan ahead!
The other important factor is the three risings as opposed the normal two of most breads. This combined with the high cooking temperature make this simple bread so distinctive.
So, away we go!
Ingredients:
6 cups bread flour (you can use all purpose if that is all you have on hand)
2 packages (4 ½ teaspoons) dry yeast
2 ½ cups hot water (120 to 130 degrees)
2 teaspoons each salt and warm water
Baking Pans – One sheet pan greased or covered in parchment paper.
Special needs – A very large bowl
Method:
In a large bowl combing 4 cups of flour and the hot water and yeast, if you are using a stand mixer, beat with either the paddle or the whisk attachment. Beat by machine or hand for 10 minutes (it is a good work-out by hand!).
Dissolve the salt in the two teaspoons of warm water and mix into the mixture for about 30 seconds.
If you are using the stand mixer, attach the dough hook. Add flour ¼ cup at a time, until the dough has formed under the hook and cleans the sides of the bowl. If it is sticky add sprinkles of flour until it is not. Once you have gotten it to this state, let it knead at medium speed for 10 minutes.
If you are doing this by hand, mix in the flour ½ cup at a time, until the dough is a shaggy but solid mass. Flour your hands and turn it out onto a well floured work surface. Begin kneading it with a strong and aggressive push-turn-fold motion. If the dough is sticky, sprinkle it with flour. When your arms get tired, break up the kneading by picking the dough up and slamming it down on the work surface a couple of times. This will really encourage the formation of gluten. Knead for 10 minutes (you will get a good enough work out that you won’t feel guilty about eating the bread!)
First Rising:
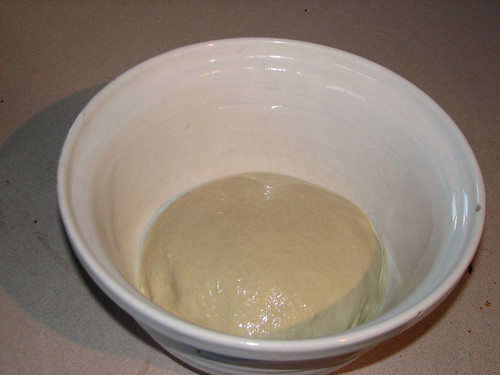
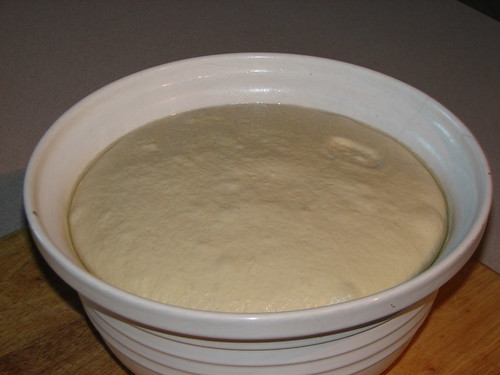
Place the dough in a large bowl that has been greased with vegetable oil. Turn the dough over so it has a thin coating of oil on the surface. Cover the bowl tightly with plastic wrap. Let rise for 1 ½ to 2 hours or until it has tripled in volume. Below is a picture of the bowl I use. You can see how little the dough looks. In the second picture it is 1 ½ hours later and the dough has filled the bowl.
Punch the dough down and turn out onto a well floured work surface. Knead for 30 seconds or so. Return it to the bowl and let it rise again for about 1 to 1 ½ hours or until the dough has tripled in volume again.
Shaping:
By now the dough will be light and fluffy. Turn it out onto a well floured work surface and punch it down. For the round boule loaves divide the dough into two equal halves (don’t get all anal retentive about it, just eyeball the cut). Shape them into nice rounds by holding one in both hands and pushing the edges towards the middle of the bottom.
Place them on the sheet pan and cover with a towel. Leave them to rise for about 45 minutes to 1 hour or until they have doubled in volume.
Baking:
20 minutes before baking the loaves, set your lower rack at the lowest setting and place a broiler pan on it. Pre-heat the oven to 450 degrees.
Five minute before baking, pour a cup of hot water into the broiler pan and shut the over. This will provide the steam that you need for your curst. Wear your oven mitts while doing this, it will protect you from the chance of getting burned by the steam (I have never been burned by the steam doing this, but why take any chances? ).
Right before slipping the loves into the oven, cut a tic-tac-toe patter in the top and brush them with a little water (this will make your curst even better!). Slip the loaves into the hot oven and bake for 25-30 minutes.
The loves should be golden brown when they are done. Test for doneness by lifting one of the loaves and thumping the bottom (use oven mitts for this, they are 450 degrees after all!) if it is hard and sounds hollow your loaves are done, if not put them back in for five more minutes.
Place your loaves on wire rack to cool completely.
There is your French bread. It is one of the easiest breads to make, but one of the most worthwhile. If you don’t want the French toast recipe, out of some healthy eating thing, stop here.
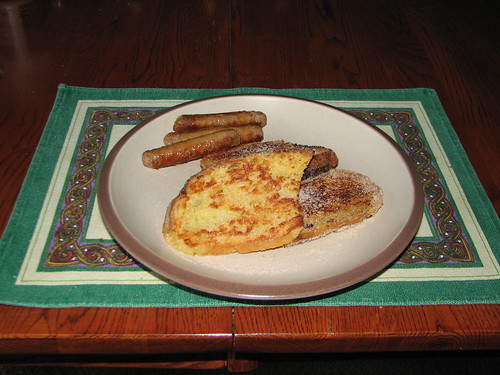
Now, for all those who could not resist lets talk French Toast. Most of the time French Toast at home frankly sucks. There are a lot of reasons for this, but the biggest two are that the bread is not right and the process is rushed. There is no rushing great French Toast, you have to start the night before.
Some folks will tell you that you should have a really eggy bread like Brioche or Challa to make great French Toast (which is not actually from France, but Belgium). I disagree; French bread is a great base for this dish.
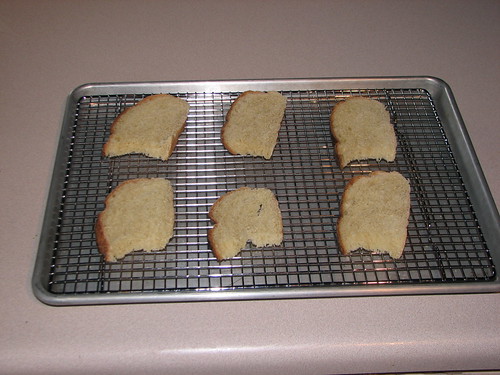
The thing is you can not start with fresh bread of any kind. It has to be stale in order to soak up the custard mix properly. Otherwise you will get some soggy and frankly icky mess. Cut your bread in ½ to ¾ inch slices and lay it out the night before. See the picture below.
At the same time make the custard mix. This gives it time for all the flavors to meld.
Ingredients:
½ cup Whole Milk
½ cup Heavy Cream
3 large eggs
2 teaspoons honey (heat in microwave for about 20 seconds to make it thin enough to pour and mix easily)
½ teaspoon vanilla extract (do yourself and your family a favor, buy the real stuff!)
½ teaspoon almond extract (same deal as above)
¼ teaspoon salt.
Combine all the ingredients in a bowl or plastic container with a lid and whisk to mix and put in the refrigerator over night.
Method:
Pour the custard into a pie or cake pan. Dip each piece in the custard for 30 seconds and then let stand on a tray or place for 2 minutes. Don’t scrimp on this step! The custard will not soak into the bread in less time. If it does not get into the bread you will get a cracker with some custard cooked to the top. Take your time, I promise you it is worth it!
While the custard is soaking in, heat two table spoons of butter (real butter please, no margarine! After all at this point why scrimp?) until it is melted and bubbly. Heat your oven to 350 degrees (to stash the done toast in until the whole batch is done). Cook the bread pieces two or three at a time (depending on the size of your skillet) and then place them on a cookie sheet in the oven to stay warm.
Again, take your time, it will take about five minutes a side for the toast to cook. Go get a cup of coffee or something, don’t fiddle with them! When they are mostly golden brown on the bottom, flip them and walk away again, go!
When they come out of the pan (or oven) lightly sprinkle with cinnamon sugar and serve with real maple syrup (I told you this was not for the health conscious, didn’t I?) and butter.
The custard will make about 12 slices of French Toast, but you should not cut it down to make less, I am always disappointed when I do.
Yes, this all takes a little bit of time, but it is soooooo worth it! They will be crisp on the outside, tender on the inside, sweet with just a hint of almond, which plays off the maple syrup fabulously!
So, who is making French bread today and French toast next Saturday?
The flour is yours.
