Happy Sunday Bread Heads!
This week we’re going to continue on the mini-Whole Wheat binge I’ve been for the last couple of weeks. Almost everyone has made or had Soda Bread before. It is a bread that is not kneaded and uses only baking soda for its leaving. These little breads can be quite tasty but they are often really dense.
This week’s recipe is adapted from a recipe I am told is from the Royal Hibernian Hotel in Dublin. The texture is about halfway between soda bread and a scone .It not only gets a better lift out of the bread (though it is still quite dense) it also allows the baker to present something more interesting than a small hill of bread. The affect comes from deeply (for bread making) slashing the top and a fairly high baking temperature to make it spring apart.
But enough talk, let’s bake!
Royal Hibernian Brown Soda Bread
Ingredients:
2 ½ cups stone ground whole wheat flour
1 cup all purpose flour
2 tablespoons sugar
1 ½ teaspoons baking soda (even if you’re above 5000 feet don’t cut this down)
1 teaspoon salt
¼ cup (1/2 stick) butter at room temperature
1 egg at room temperature
1 ¼ cups butter milk at room temperature
½ cup raisins
Baking pan:
1 baking sheet covered in parchment paper or greased.
Method:
Set a rack in the middle of your oven and preheat it to 400 degrees.
In your large mixing bowl or the bowl of your stand mixer, combine the two flours, sugar, baking soda and salt. Whisk briefly to combine. Cut the butter into six or seven pieces and throw them in the flour.
Using your fingers pick up the butter pieces and rub them with flour. Keep moving from piece to piece so the heat of your hands doesn’t melt the butter completely. Just rub some flour on the butter and move on. They will slowly break up and when you run your fingers through the mixture you won’t find any butter pieces. Take your time there is no rush; it will take about five minutes. Using your hands mix in the raisins.
When you are done the mixture will look a bit like saw dust.
In a small bowl beat the egg for about thirty seconds then add the butter milk and whisk to combine. By beating the egg before hand you get a more even distribution of the proteins which help hold this bread together. Don’t skip this step!
Make a well in the flour-butter mixture. Pour the buttermilk mixture into the well. If you are using a stand mixer, attach the flat paddle attachment and on the lowest setting mix until it forms a stiff dough.
If you are doing this by hand use a wooden spoon to slowly pull the sides of the well into the buttermilk. Keep stirring until a stiff dough forms.
Turn the dough out onto a lightly floured work surface. You may find that there is some unincorporated flour in the bottom of your bowl. Pour that on top of the dough. You do not want to knead this dough but rather just use your hands to mix it all together evenly. This is important if you want a uniform mixture in the crumb of your bread.
Shape into a round ball using your hands and place on the baking sheet. With your palm flatten the top of the bread slightly. Using a very sharp knife make an X on the top of the bread about ½" deep. Slip the bread into the hot oven and bake for 45 minutes.
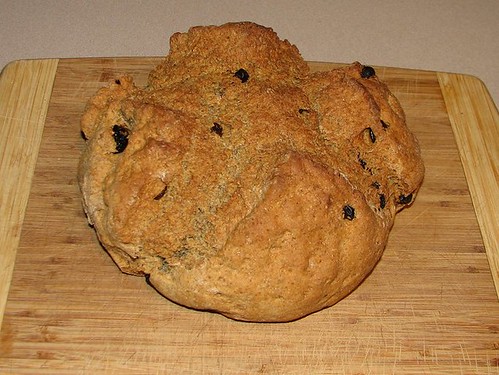
The bread will be a dark brown and will give you a nice hollow sound when thumped on the bottom with a forefinger.
Move the bread to a cooling rack and allow to cool completely. It is best served warm in thin slices (you can use the toaster to warm it but not make it hard) with butter and honey.
The flour is yours.
