Happy Friday and welcome to the sixth and final candy recipe for this year, Bread Heads. In the last six days we’ve made caramels, butter creams, peanut brittle, chocolate dipped peanut butter fudge and now the final recipe, Chocolate Covered Marshmallows.
Now I suppose if you wanted to you could just dip commercial marshmallows. There is really nothing wrong with that but you would miss out on the creamy tenderness of homemade marshmallows and that would really be a shame, considering how easy they are to make.
The important thing in making marshmallows is having a good mixer or beaters. The hot sugar mixture is whipped with partially set unflavored gelatin, to give the candy its airy, for ten minutes. Most of the time I try to give you non-powered alternate instructions, for those who like to do things with their hands alone, this is not a recipe that you can do that with, sorry.
If you are looking for the previous recipes in this Mini-Series, you can find them at the links below.
Chocolate Covered Butter Creams
Perfect Peanut Brittle
Chocolate Covered Caramels
Orange Pralines
Chocolate Dipped Peanut Butter Fudge
Now, lets makes some candy!
Chocolate Covered Marshmallows
Ingredients:
2 packets of unflavored gelatin (almost every grocery store will have this, but you might have to look closely, the boxes are small and there is never a lot of them in stock)
½ cup cold water
¾ cup hot water (120-130 degrees)
1 cup of corn syrup (Note: you’re going to use it in half cup increments)
2 cups sugar
1 teaspoon vanilla
2 lbs dipping chocolate (you want to use the dipping chocolate because about half the time regular chocolate gets streaky with this recipe, while the dipping chocolate never does, I think it is something to do with the reaction of the cocoa butter to the marshmallow)
Equipment:
1 2 quart sauce pan
1 candy thermometer
1 9” x 13” baking dish
2 sheet pans lined with parchment paper
1 Stand mixer or electric beater set
Method:
Butter the baking dish and set aside.
Combine the cold water and the gelatin in a small bowl and stir until it starts to thicken, then set aside.
In your 2 quart sauce pan, combine the hot water, ½ cup of the corn syrup, and the sugar. Place over high heat and stir until it comes to a boil. Clip on your candy thermometer and cook, stirring constantly until the syrup reaches 238 degrees.
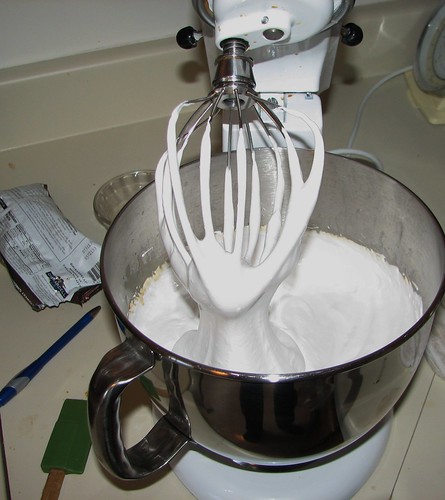
Remove the pan from the heat and stir in the remaining half cup of corn syrup. Pour it into a bowl or the work bowl of your stand mixer. While beating on the highest setting add the gelatin a tablespoon at a time.
Keep beating the mixture for 10 more minutes. It will change from a clear liquid into a light and fluffy white mass, as it about triples in volume. When it is done it will look like this:
Pour (scrape really) it into your prepared dish and allow it to stand for at least 3 hours.
Now it is time to cut the ‘mallows. This is a really sticky job, so you will want to have a knife and a big bowl of really hot water to dip it in. Cut out 1” by 1” squares and set them on one of the sheet pans. When they are cut, you will want to let them stand for a couple of hours to dry. Then it is time to dip!
Let’s take a minute to talk about dipping chocolate. Now, you can temper your own chocolate, but it is pretty hard to do well the first time, and there are acceptable substitutes for that. There are all kinds of “dipping compound” which you can use if you want unnatural colors and a waxy taste. What you are looking for is not compound but dipping chocolate. This is usually a pre-tempered chocolate. Ghirardelli used to make a great one but they took it off the market. Your best bet for good dipping chocolate is actually a wedding cake supply store. You might be surprised at how many there are in any major city, just get on the internet and look for them. I always use a dark dipping chocolate, but you can use a milk chocolate if you like.
The chocolate will be in discs or medallions and usually is sold in 1 and 5 lbs bags.
The ideal thing to melt these or any chocolate for dipping is an electric griddle or frying pan. I don’t have one so I use my oven. You could use a microwave but I find that the oven set on “warm” is just right for melting but not overheating the chocolate.
To prepare the chocolate, pour 1 lbs in your 8”x8” baking pan (or any relatively deep baking pan). Place in your oven and let it sit for at least five minutes. At five minutes give the chocolate a stir with a wooden spoon. It should be partially but not completely melted at this point. Give it another five minutes while you set up your dipping station.
Set up your dipping station so that your ‘mallows are on the side away from your dominate hand, the chocolate in the middle and the landing pad sheet pan on the other side of that. With you non-dominate hand, pick up one of the squares and put it in the chocolate. Make a cage out of the fingers of your dominate hand and use that to move the square around in the chocolate covering all sides.
Lift the covered ‘mallow out of the chocolate and hold it over the pan for a few seconds so that any excess chocolate can drain off. Place it on the landing pad and repeat until you have dipped all your ‘mallows.
Allow them about an hour to fully harden, the place in paper cups and store in an airtight container for up to 6 weeks. Yeah, I know, they are never going to make it that long, but they last that long is stored right.
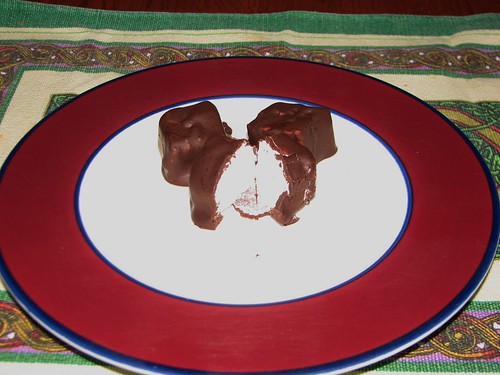
Now you can make one of the all time great treats! You bite through the crisp chocolate into the gooey ‘mallow center, total and utter heaven!
Now one last pitch for the cookbook of the Sunday Bread series!
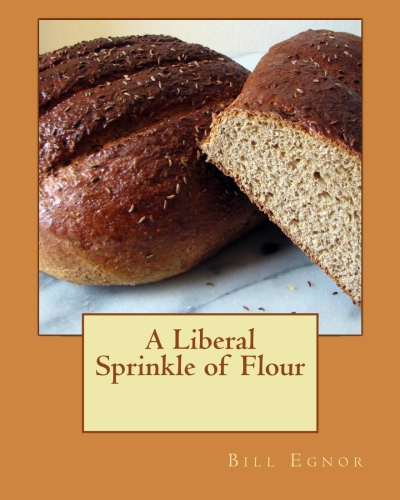
Did you know that there is cookbook of the Sunday Bread series? It is called “A Liberal Sprinkle of Flour" and it available for sale on Create Space and Amazon. The book, like this series, is mostly breads, Rye’s, Sourdough’s, French, Italian, Bagels, Rolls, Whole Wheat’s and White’s, with a few treats thrown in for good measure!
All the recipes have the same kind of step by step instructions and the (to my mind) humorous tone that this recipe has. It is suitable for every level of home baker. All the recipes have been home kitchen tested (and mostly home kitchen developed) and are very nearly no fail.
It does not assume that the reader knows all the common techniques and every recipe goes into strong detail on just how to make fabulous bread right from the word “Go”.
If you’re interested just follow the links and you can order it tonight. As you might guess, it makes a great gift, but if you do give it be sure that who ever gets it makes you some scrumptious bread!
The flour is yours.
