Knives
Along with skewers and pots, knives rank at the top of essential tools for cooking. Therefore, this diary is dedicated to knives.
Let's dive beneath the orange steam cloud to enter a sharp world.
Here are the three knives I use the most:
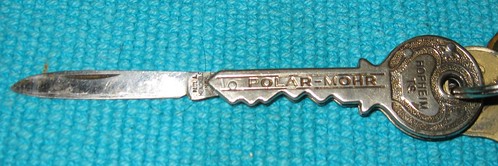
This knife is always with me. I've had it for nigh onto 50 years. I love this knife. I got it for free just for touring a factory. I've used it to slice tomatoes (cherry tomatoes - it's a small knife!), steaks in restaurants where their knives were inadequate (koff koff outback steakhouse koff koff), and for lunches at work.
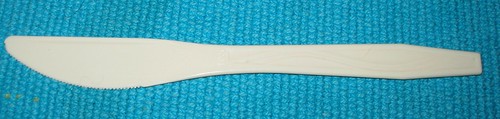
This is the plastic knife that many fast food restaurants give. It's surprisingly useful and can be used many times before it breaks and becomes unusable. I've had this one for 6 years now.
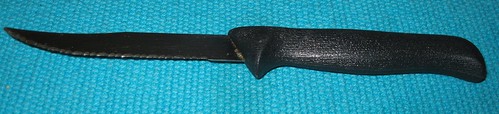
This is a cheap steak knife. I bought a set of 4 of them 8 or 9 years ago for a dollar. I still have all 4 and still use them. This one is the one I keep at work for slicing larger tomatoes, radishes, carrots, breads, peeling apples, and cutting other lunch foods. This is probably the most versatile knife I keep at work. If I had to ever have just one knife, this cheap steak knife would be my choice. With it, I can do virtually any of the cuts in the box below.
Like all knives, these have many of the essential parts of a knife:
Butt: the end of the handle of the knife. If this were a fighting knife instead of a kitchen knife, this is where the pommel would be. Since it's a kitchen knife, it ends at the butt.
Tang: The metal part of the knife that extends through the scales. A good quality knife will have a tang that extends all the way to the butt of the knife.
Scales: The handle material. This can be made of any durable material like plastic, wood, or metal It's often shaped to make it comfortable to hold and use the knife. Some knives have glued or welded on scales, some don't actually have scales because the whole knife is made from a single piece of metal, and some have two scales riveted through the tang to keep them attached to the knife.
Blade: The part of the knife that extends from the heel to the tip.
Bolster: This is the area between the blade and the handle. None of the knives I pictured have visible bolsters, but this area is used to guard and protect the fingers as well as to provide balance to the knife.
Heel: This is located at the rear of the blade, next to the bolster and opposite the tip. I use it on its side to smash garlic and to help scoop food off cutting boards.
Spine: This is the top of the knife blade, opposite from the edge. On kitchen knives, it is dull. The spine is often used as a hold on the blade to help guide the cutting and to scrape food off of cutting boards.
Edge: This is the sharp cutting edge of the knife blade, extending from the heel to the tip. It can be smoothly sharp, serrated, scalloped, or even dull. The edge determines how the knife is used and sharpened.
Tip: Depending on the size of the knife, the tip is the half inch to inch and a half of the blade that ends in the point. It's used for delicate or detailed cutting.
Point: Where the edge and spine come together on a blade, used for piercing.
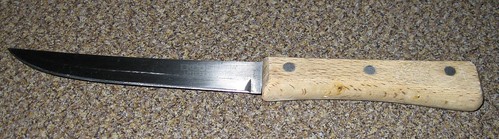
A knife with rivets holding on the wooden scales to the tang:
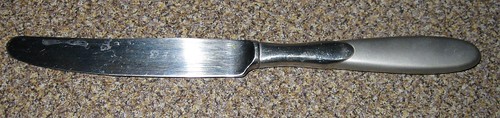
An all metal butter knife - not a sharp knife and never meant to be sharp:
There are basically four kinds of kitchen knives:
Forged: High carbon steel or high carbon stainless steel is heated and hammered into shape, then tempered, polished, and sharpened. Forged blades more often have a bolster than not, and is a thicker blade than a stamped or ceramic knife. It holds its edge better and longer, is more flexible, and lasts better than other types of knives. On the down side, they cost more, are harder to sharpen, and often rust easily.
Stamped: These knives are first cut out of a sheet of high carbon stainless steel or titanium, then ground, tempered, polished and sharpened. They are easier to sharpen and cheaper than forged blades. Titanium blades are thinner, lighter, and retain their edges longer, but beware of titanium edged or coated knives - the titanium wears off after a couple of sharpenings.
Ceramic: Ceramic blades are made of zirconium oxide and aluminum oxide and are extremely sharp. They hold their edge up to 10 times longer than carbon, stainless, or titanium blades, but are also more brittle. They are best used for slicing and detail work rather than chopping.
Plastic: Plastic blades are molded and usually serrated, used for cutting lettuces and other vegetables that might brown if a metal knife was used.
There are several types of knife edges:
Hollow Ground: This is a concave beveled edge created by starting midway or lower from the spine of the blade and grinding or tapering each side of the blade thinner toward the cutting edge by grinding an inward curvature, creating the concave "hollow" area. It is easily sharpened and excellent for slicing due to the sharp edge, but not for chopping since the higher impact of the chopping action dulls or may chip the thinner blade.
Hollow Edge: Also known as a Granton or Santoku blade, it contains evenly spaced vertical indentations or "hollows" that have been ground out of the thickness of the steel blade. This grind reduces food sticking to the blade and has a lower level of friction, making chopping faster. It is a chopping blade.
Convex: The opposite of the hollow ground, this blade has a rounded cutting edge, making it stronger for chopping heavy items like meat, bones, and fibrous foods. Most cleavers have a convex grind.
Taper: The edge is ground from the spine to the edge in one smooth grind. It may be tapered on one or both sides of the blade. This edge is made to withstand slicing and cutting of a variety of foods.
Flat: This is a straight "V" grind on the edge, which may be just a narrow ribbon of grinding or extend halfway up to the spine. It is a stable grind that allows for great versatility in the blade for both chopping and slicing.
Chisel: This is half of a flat grind, where only one side of the blade is ground and the other side if flat. The grind usually extends halfway up the blade to the spine. It is not a common grind, but it is stable and versatile
Straight Edge: This is a grind the moves smoothly from heel to point, with no serrations, scallops, or other indentations. It is a versatile grind for most types of foods. Sharpening a straight edged knife is easy and almost anyone can sharpen them.
Serrated/Scalloped: This is a sharp, saw-toothed type of grind that is ideal for soft, tender, and fragile foods such as breads, pie crusts, tomatoes, peaches, and sandwiches. The type with the pointy teeth is best for crusty breads as the scallop edged knives may slip on the bread crust. The scalloped edge is gentler on tender fruits. Serrated and scalloped knives can be sharpened at home, but are best left to professionals. Some serrated edges are proprietary and can only be sharpened by the company that produced them.
Rake: These blades are deeply toothed and designed for cutting frozen foods. It can withstand very cold temperatures and heavy pressure. It must be sharpened by a professional.
Here are some cuts you can make with these knives:
Flower: With a flower shape cookie cutter, cut the cylindrical food (carrots, parsnips, potatoes, cucumbers...) into slices and then use the cookie cutter to cut the flower shape out.. If you are going to make flower petals manually by carving with a knife, cut a narrow "V" shapes into the food every 40 to 90 degrees (depending on how many "petals" you want the flower to have), remove the "V" strips and slice the food.
Semi-Circles: Cut cylindrical vegetables in half lengthwise and then slice them crosswise.
Matchstick: Cut vegetables into 1 ½ inch lengths. Cut those lengthwise into rectangles of about 1/8 inch thickness. Lay the rectangles on their side and cut them into thin pieces of 1/8 inch thickness.
Bars: Cut vegetables into 2 inch lengths. Then cut crosswise into ½ inch rectangles. Lastly slice the rectangles into ½ inch thick bars.
Gingko, Fan, or Wedge Slice: Cut large cylindrical root vegetables in quarters lengthwise, and then slice them again crosswise. If you want an ornamental top edge, you can cut "V" strips (2 per quarter of vegetable) before quartering and slicing.
Hidden Knife Cut: Cut cylindrical vegetables into 2 or 3 inch lengths. On the circular ends, cut an "X". this helps the food cook faster.
French Door: For thick-fleshed fish and chicken breasts, slice down the middle a little more than half way through, and then slice through to the left and right from the center, like a french door. The meat can be flattened out from there and will cook faster. This cut can also be used to make a roulade, putting a spread on one side of the meat, then matchstick cut vegetables on one edge and roll up. Cook as a roll and slice, or slice and saute.
Slices/Coins: Cut cylindrical vegetables into thin rounds, and other vegetables into thin sheets.
Wedge Cut: Cut spherical vegetables and fruits lengthwise in sixths or eighths.
Smoothing Cut: Shave the sharp angles off of vegetables like daikon, carrots, and potatoes before cooking. If the pieces have sharp edges, then they are likely to break into pieces during the cooking process (from bumping into each other).
Diagonal Cut: Cut vegetables diagonally into oval shaped slices
Rotating Cut: From the end of long rounded vegetables such as carrot, cucumber, or long summer squashes, cut diagonally while rotating the vegetable one quarter turn between cuts.
Paper Cut/Fillet: Hold your knife diagonally, nearly parallel to the cutting board, and then slice meat and vegetables. This method gives the food more surface area so that it cooks faster and soaks up flavor quickly. You can slice all the way through, or leave it attached along one side like a book spine.
The next diary will be about caring for your knives.
An Edge in the Kitchen
Knife Skills Illustrated
Mastering Knife Skills (with DVD)
