Hi again, beer lovers! Here is the next segment in the intermittent series on home brewing.
The previous segments were: Part 1 - ingredients, Part 2 - mashing.
This segment is Boiling the Wort.
When we last saw our hero, he was about 2 hours into the brewing process, and had a kettle full of warm sweet wort, which is the proper name for the sugary solution extracted from the mash.
To brew with malt extract you skip the previous 2 hours of work, add your powdered or syrup extract to a kettle of water, and start here.
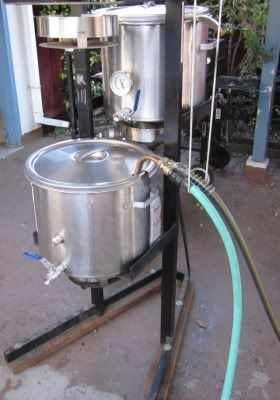
Light the burner under the boil kettle and bring this to a boil. Pay careful attention the closer it gets to boiling because malt solutions just love to boil over. When it boils turn the heat down a little and set the timer. The standard boil time for all-grain homebrewing is 75 minutes; 60 minutes if using extract. At T-60 the bittering hops go in. After this the brewer can relax for a while, work on cleaning and putting away stuff from the early steps, or write his blog :) If I've been brewing regularly I usually have an earlier batch of beer that's ready to rack, and I'll do that now. That process will be described in the next segment.
Boiling the wort for a while has multiple purposes:
-- kills any bacteria that might have been in the water or the grain
-- concentrates the sugars; a higher percentage of sugar will become a higher percentage of alcohol
-- extracts the desired flavor from the hops
-- solidifies proteins so they settle out later, resulting in clearer beer
-- drives off chemicals that might later cause bad flavors
Hop additions can vary widely depending on the recipe. If you only want a reasonable bitterness and not much hop flavor, such as in a wheat beer or maybe an English brown ale, the 60-minute bittering hops might be all there are, as little as 1 oz in 5 gallons. For hop-centric American Pale Ales and IPAs, more more more and lots more. I've seen IPA recipes with 11 oz of hops in 5 gallons (that's a Pliny The Elder clone; the proprietor of the homebrew store keeps the recipe on his counter and LOVES selling $20 of hops!). The famous Dogfish Head IPAs are made using a machine that continuously feeds hops into the kettle during boiling. The longer they boil the more bitterness you get; the less they boil the more flavor. For flavor and aroma you may also add hops at "flameout" that will steep while the wort cools; and more again as "dry hops" added to the almost-finished beer.
 |
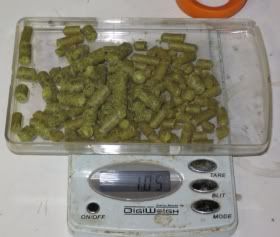 |
Hops are available in two forms: leaf and pellet. I usually prefer pellets, but this time the store had the variety I wanted in leaf but not pellet. They go in a mesh bag to keep them from clogging the valve when you drain the wort after boiling. Pellets dissolve into a sludge that I will strain out later.
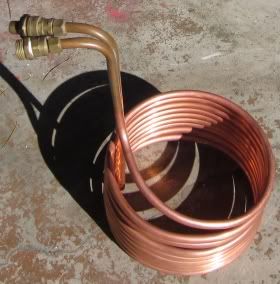
At T-15 the immersion cooler goes into the kettle; the 15 min of boiling will sanitize it. This is just a coil of copper tubing with hose fittings at each end; I will cool the wort by running cold water through this. After 75 minutes of boiling, turn off the heat, turn on the cooling water, and put the lid on.
Once it stops boiling, you have to start paying closer attention to sanitation. Any kind of bacteria or wild yeast or whatever that gets into this sugar solution will ruin it. So the immersion cooler was boiled for several minutes, and the kettle lid was sprayed with sanitizer before it went on. Now you have to cool the wort before adding the yeast. Running cold water through the immersion cooler for about half an hour will cool the wort to around 70F.
During this time I'm sanitizing the fermenter, strainer and thermometer.
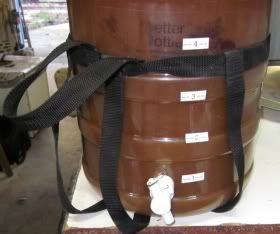
The large glass or plastic jugs used by homebrewers are called "carboys". I have not looked up the origin of that expression. For a while I read the Yahoo homebrewing group, where there were plenty of non-American brewers; I think it was an Aussie who grumbled "What the hell is a carboy? Oh -- it's a demijohn". I like the plastic ones from Better Bottle. Many brewers insist on glass; the plastic could be scratched during racking or cleaning and then bacteria
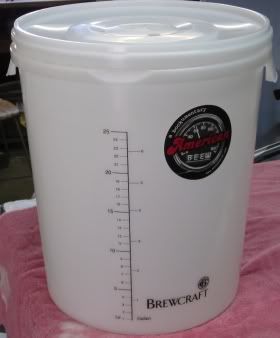
could hide in the scratches and not get sanitized. OTOH, glass is much heavier and of course very breakable -- homebrewer discussion boards have lots of stories of gruesome wounds and trips to the E.R., not to mention the mess when 5 gallons of beer is on your floor. I have broken two of them, happily both were empty and I was not injured. Fermenting beer requires a bigger container than the liquid; the yeast will get very foamy and active and needs a couple inches of headspace. My large carboy is 6 gallons capacity, the bare minimum for a 5 gallon batch. Many homebrewers use these large plastic buckets, which hold about 7 gallons. If you wory about sanitation, they're inexpensive to replace every few months.
 |
 |
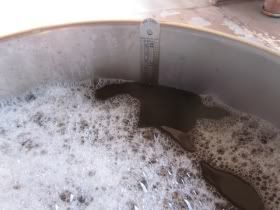
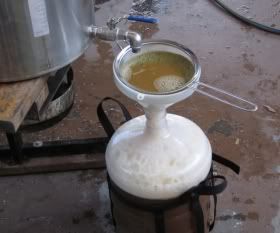
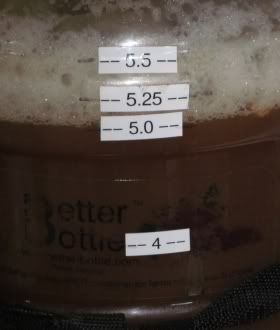
When the wort is cooled, turn off the water. Set the fermenter and strainer under the output nozzle and drain out the wort. For a while I left pellet hop sludge in the wort into the fermenter, now I filter it out first. I will probably have to turn the valve off a couple of times while I empty the strainer. Add the yeast. I've marked the carboy so I can see how much it contains; I want 5.25 gallons to start. Probably the kettle will be empty before then and I'll have to top off with a little water. Starting with slightly more than the desired quantity allows for losses in racking (there will be a thick layer of yeast and other sediment at the bottom soon).
 |
 |
The very last step is to measure the "original gravity". Sugar water is denser than pure water, and we measure that with a device called a "hydrometer". Original gravity will be a number like 1.050, 5% heavier than water, up to 1.070 or even more for a very strong beer. Some craft beers (Lagunitas for one) print their O.G. on the label. The reason to measure this is, it's easy to measure the sugar content, and the easiest way to figure out the alcohol content is to measure the change in how much sugar there is.
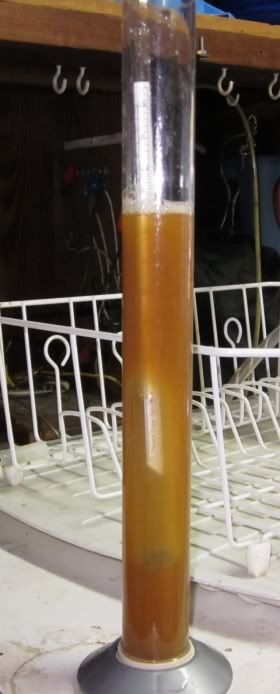
The "Better Bottle" has a little valve at the bottom that is useful for drawing off samples to measure; in other containers you use a "beer thief". It needs about 4 oz, which you taste or throw out but don't put back, just in case impurities got in. Take the measurement. WRITE IT DOWN!
Put a sanitized stopper and airlock into the top of the fermenter (if using a bucket sanitize the lid too). Put the fermenter in the fermentation cooler (I'll talk about this in the next segment).
Another batch of beer is started! By this point I've spent about 4-1/2 hours, and there's at least another half hour of cleanup. If I haven't already started drinking homebrew I certainly want some now.
This concludes Part 3. The next segment will be Fermentation, then I'll finish the series with Bottling/Kegging.
What are you brewing, or drinking?