Some of the people here are interested in photography, and I wanted to take a moment to show that actual film is still useful in this digital world. I recently bought a couple of new 'old' film cameras for my collection and have been testing them out, and thought photo-fans might like to see some results.
'Lomography' has been increasing in popularity in the hipster community - this is a genre of photography which revels in using very simple and sometimes badly made cameras that use film, which give an actually desired effect of light leaks, soft focus, unintentional double exposures, and other serendipitous, unexpected effects.
I find it somewhat funny, as when I learned photography it was drummed into me to avoid all these 'accidents' AT ALL COST, and to have everything on a photograph explicitly planned out, exposure perfect, framing and composition exact. So for me, it's very difficult to get my head around the new style, but I see a lot of worth in what people are trying to do - tear down all the old structure, and build something new. If you're also interested in trying these things out, I highly recommend you DO NOT spend your money on a crappy POS camera (like a Helga) for $50 - $75, but spend the same or a bit more on an actual camera that you can buy used on Ebay, at a camera store, pawn shops etc.
The cameras that I bought for this purpose (and that star in this diary) are a 1950s era Twin Lens Reflex, 'Dejur', which shoots 120mm film (gives you a negative 2 1/4" square)
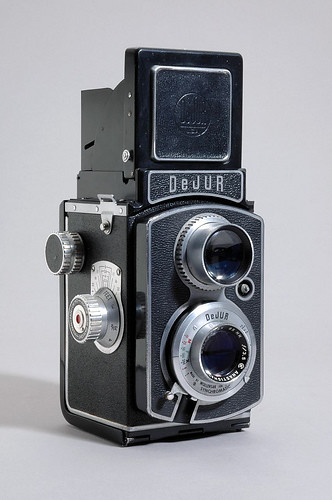
This type of camera holds enough film to give you 12 exposures. Quite different from today's digital cameras, which will sometimes allow you to shoot thousands of exposures! They both have their pros and cons - more shots allow you to really practice and shoot as much as you'd like, whereas fewer shots make you think more about what you're shooting, and forces you to plan more.
Some of the older cameras you might find will use '620' film, which is the exact same kind of film as '120', EXCEPT that '620' is rolled onto smaller diameter film rolls - 120 sized spools will normally not fit properly in these cameras because they're too big. 620 film is no longer made or sold, but that doesn't mean you can't use these cameras, since 120 film can be made to work in them. If anyone would like more information on how this is done, please let me know and it will be a subject for a future diary.
The other camera we'll be seeing is the Polaroid 250 'Land' Camera, which holds Polaroid 'Pack' film, giving you 8 shots total in a pack. These packs are how professional photographers used to test their lighting and composition - a pro camera usually has a special film 'back' which holds the Polaroid film, and exposes the film with the pro camera, showing whether exposure etc. is correct. If so, the Polaroid back is removed and another back holding actual film is mounted, and the fun begins. (Like what happened to Coco in 'Fame' - Tres Jolie, Coco! Tres Jolie!!)
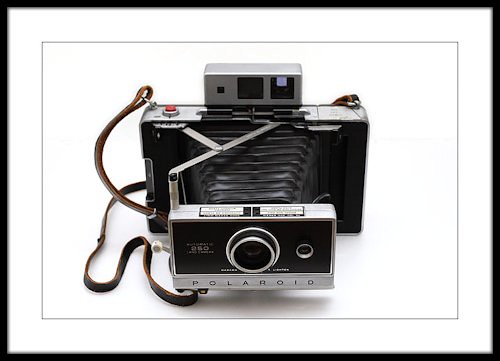
What's interesting about this type of camera is that it not only gives you the peel-away Polaroid print, but also will give you a NEGATIVE that can be cleaned and used to print with! It's a rather complicated and messy process though, if anyone ever decides to do this feel free to contact me and I can explain how to do it, possibly in the same future '620' film diary. Definitely NOT for the casual photograstar though!
Normally I don't do a lot of 'snapshooting', but I wanted to give it a try, so I brought them with me on a gig I did a few weeks ago in the Four Corners area of Arizona/Utah, Capital Reef National Park, Goblin Valley, and a few other places I dragged them along to, including some test photos at home to make sure the cameras worked properly - ALWAYS shoot a test roll before doing anything worthwhile, just to see if shutter speeds, film take-up, and light-tightness are all okay - and to learn how the camera works. To see how sharp the lens is, one of my tricks is to hang a detailed map (road map, geographic etc. - I happen to use a Nat. Geo. map of the Moon) in the sun, take a photo with different shutter speeds and f/stops. A map is good to use because they have words, details, and fine lines that you can see how well they were reproduced. If all this starts to sound complicated, remember that it's how EVERYONE used to take pictures back in the old days - and if I've been able to figure it out, anyone can! 'Cause I is dum. And think of the sense of accomplishment you'll have when you learn how to do it yourself, instead of letting the camera do it all for you.
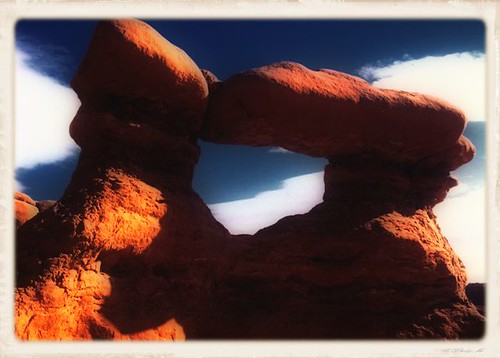
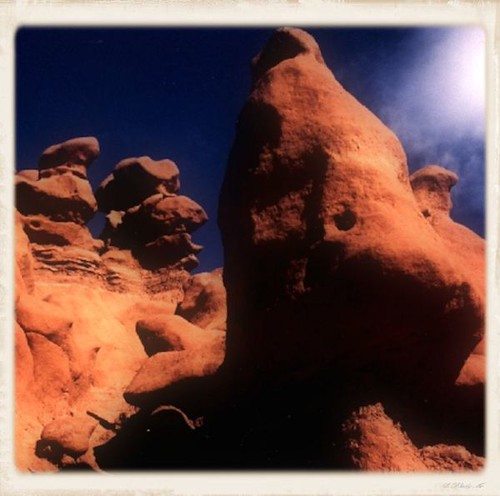
Here are a few examples now - the 'square' format shots were taken with the Dejur, and the 'rectangles' were with the Polaroid.
BTW, did I mention that I bought both of these cameras on Ebay for $75 apiece? Remember, that's the fun of it - good results without breaking the bank!
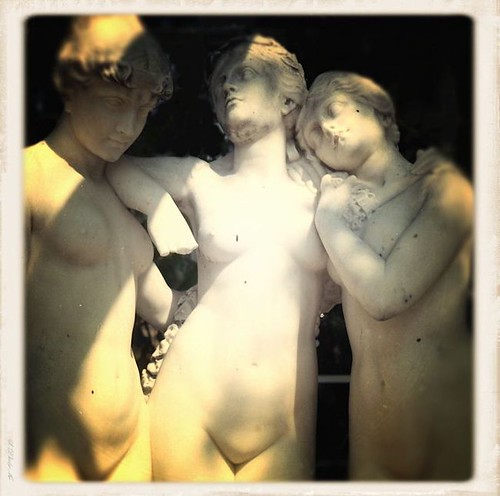

I had a couple of friends 'test pose', with surprisingly good effect. It was a bit more difficult than what I'm used to, but it helps me appreciate what photographers in the past had to deal with!
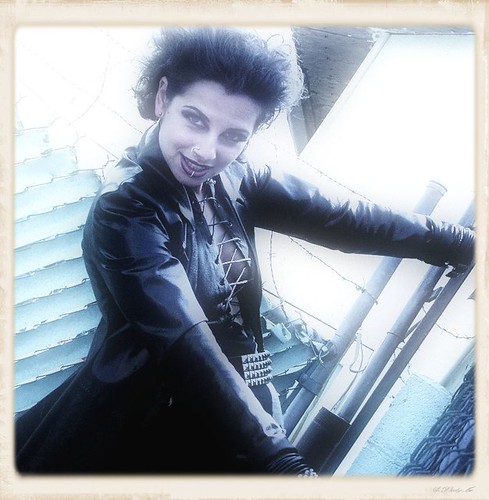
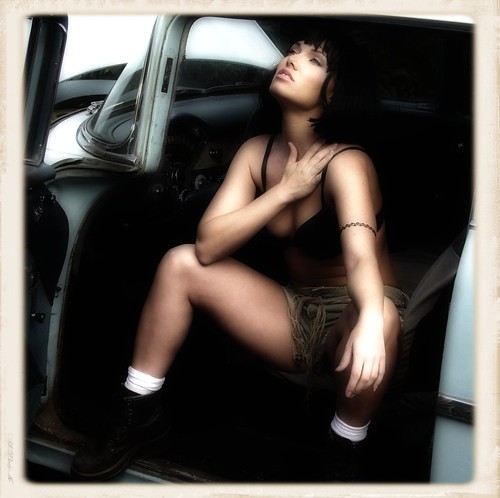
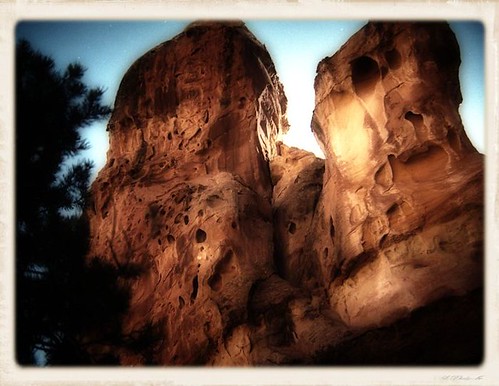
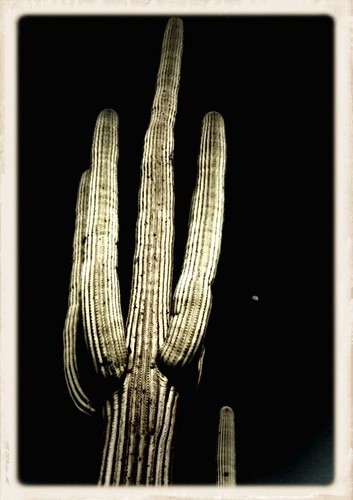
These next two were shot with old 'Infrared' 120 film that I actually had JUST LYING AROUND FOR YEARS, believe it or not! The 'shifted' colors are a giveaway, but this shows that older film is still usable for fun. 'Infrared' is mis-understood by many - a lot of people believe that it's for low-light or nighttime conditions (like the 'thermal' views you see from the Predator!). Really it exposes different wave-lengths of light, giving you color shift effects. Believe it or not, this can be quite interesting to shoot portraits with! The poster photos for Tim Burton's 'Batman Returns' were shot with infrared film, if you'd like to see an example.
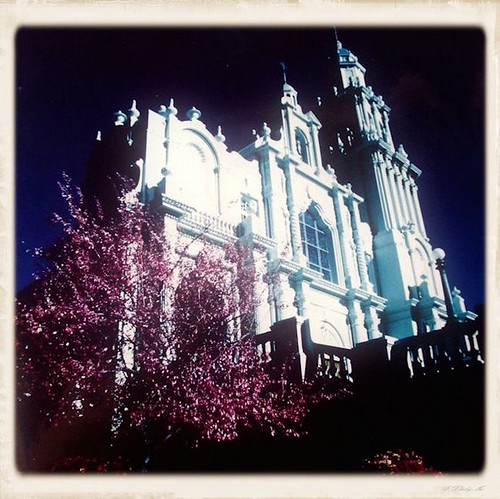
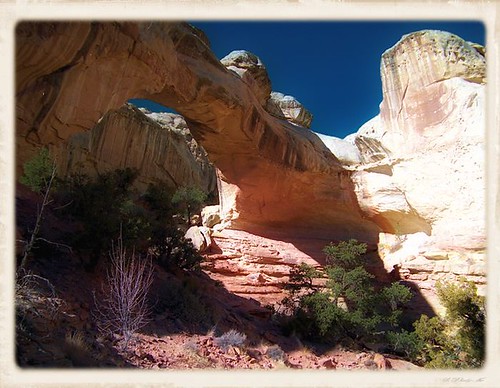
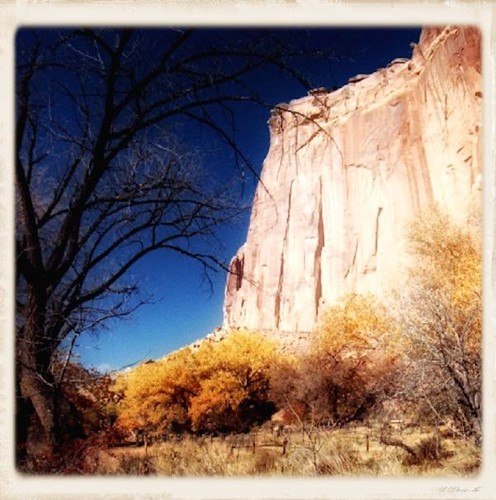
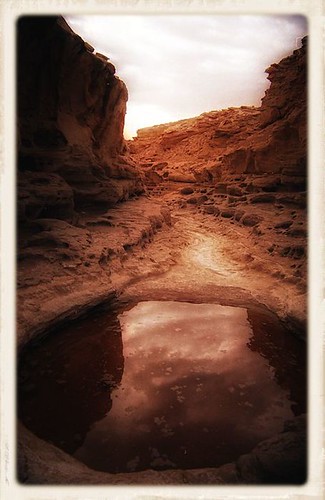
Now we move to Utizona, what's interesting about these next two photos is that they were both shot with the Polaroid camera - but the first photo is a scan of the Polaroid print, and the second is a scan of the Polaroid NEGATIVE that I mentioned earlier. You can see the difference in detail, color and sharpness quite well.

Here's a couple of interesting photos of petroglyphs, that really strained my 'off-road' ability! Another necessary few items for a photographer on 'walk-about' are a small separate flash, and some kind of portable reflector. Fortunately these days there are inexpensive 'pop-up' circular reflectors that fold up into very small packages, and open up into a decent size to give you a little extra 'fill' light for darker areas. It helps if you have an extra set of hands to hold these things where you want them though! 'Fill-flash' with these cameras is a great thing to use, especially with the 'TLR' type camera, as the flash 'syncs' at any shutter speed - in 35mm cameras, you normally have one special shutter speed you can use a flash with, otherwish part of the photo will not be exposed due to the movement of the 'shutter curtain'. Oh man more technical stuff when we're trying to keep it fun! Anyway both of these photos were shot with a combination of flash and reflector, to give more light and interest. The flash and pop-up reflector I had with me were both bought for about $20 each at Amazon - remember, we're working with cheap and fun gear here! But if you don't want to spend the money on a reflector, anything white will work to bounce light in - a piece of paper or cardboard, or even a white shirt you might have along.

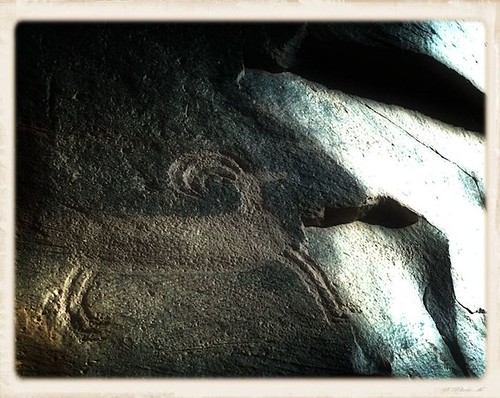
I was shocked that these petroglyphs were basically 100 feet from a main road, with no protection! Being from Los Angeles I could imagine how long they'd last there - I'm glad that apparently people in Utahzona have more respect.


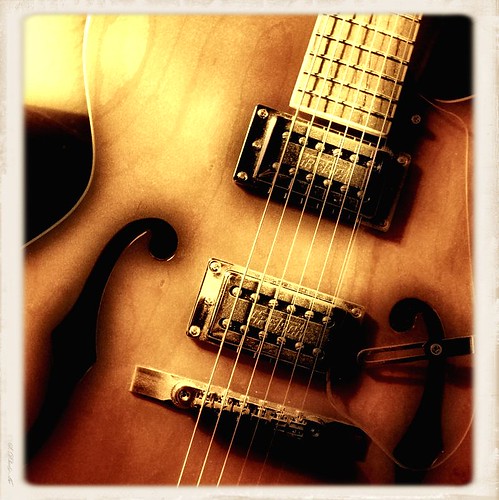
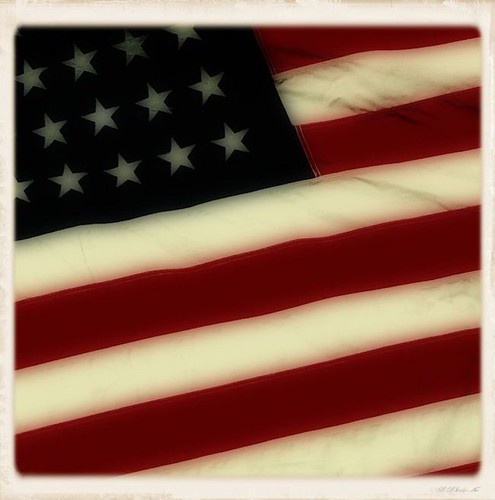
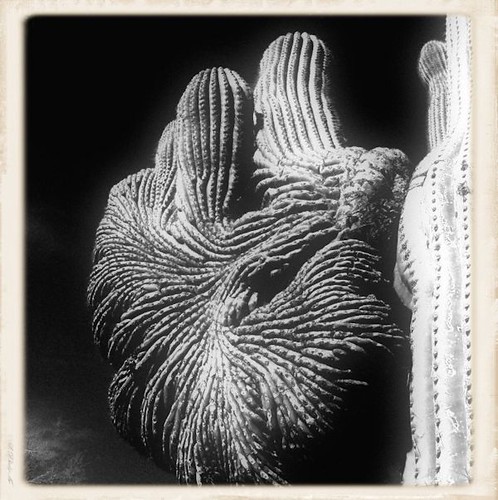
Now, Black and White film is still very useful and effective - but in this day and age, I recommend that you shoot color film stock at all times. 'Photoshop' type programs ALL have a 'B/W conversion' function, and by shooting in color this gives you the option to have the best of both worlds. Once again though, I had B/W film sitting in the fridge for years, so this gave me a good chance to use it up.

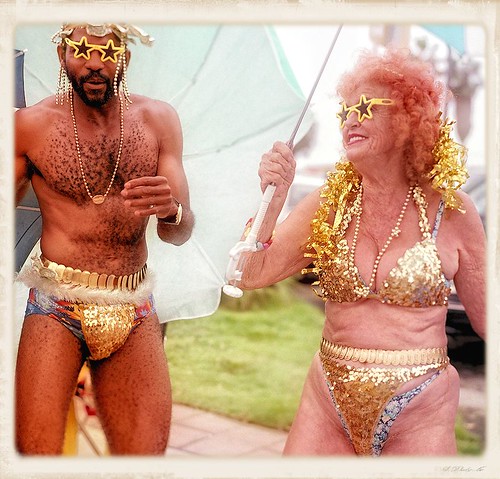
I found out another surprising 'plus' of using the older cameras - people are much more outgoing and relaxed if you ask to take their photo with one! There's not the 'fright factor' of having a modern professional camera pointed at them, mostly they are enthusiastic about posing, and I got the 'oh my grandfather used to have a camera just like that!' a lot. This is a Spanish rider 'extra' in a parade, and some street performers after.
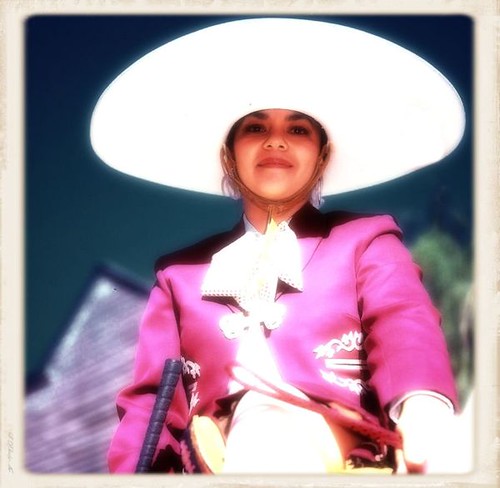
One of the best photo-portrait maxims is - compose your photo, then step TWO STEPS CLOSER! Most people stand much too far back to take photos, learn to break that 'personal/camera space' barrier, get close to your subject. You will almost always get better results from your camera, and from the people you're snapping. Try it as an experiment and see!
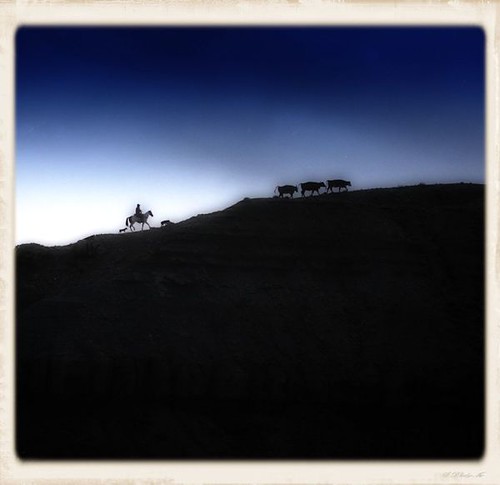
Also, if you want to take good photos you've got to be ready - this photo was taken as we were just waiting around at the end of the day, as the sun was going down. I saw this rider on the ridge above us and only had a moment to shoot 5 digital photos, and this one with the Dejur TLR - and it's one of my favorites.
To wind up, let's talk quickly about today's photographer's Best Friend - digital manipulation! It almost makes me cry to have the ability to do so much with a photo, once it gets into the computer, because I remember how almost ANY special effects took HOURS to do, through chemical processing, exposure, printing etc. And very seldom were you able to do the same thing twice for multiple copies! You can do so very much to change and improve your photos with even the simplest Photoshop-type program, it's an absolute must for anyone wanting to have fun with photography today. You don't have to pay the hundreds (or thousands!) of dollars for the professional Photoshop to get great results - once again, we're working on the cheap here! All of the photos in today's diary were 'sweetened' through the 'amateur' program I use for fun, as opposed to the 'pro' programs I use for my bidness. I recommend it very highly, it's pretty danged user-friendly and comes with a huge suite of effects, it's 'Corel Photoshop Pro X4 Ultimate', which has a price of around $40-$50 at the Corel website or Amazon.
With any digital manipulation program, you can change almost anything you want regarding the photo's size, cropping, color, film stock effects, cut out your ex-wife or husband from the picture and replace it with the current squeeze - almost anything you can think of. Just taking the photo is only the beginning of the adventure! Once you get your base 'master' image, you can spend hours experimenting to get your perfect photo. Even exposure is not so necessary to get 'perfect' anymore, because so many sins can be fixed in the computer. So get out there and make some art.
I hope you enjoyed the diary and that it may have inspired some of you to go out there and have fun with film - it's still a great thing to play with, and you can be proud of being able to use a classic art which is becoming forgotten by the masses! Amaze your family and impress your friends.
