In the early days of the Cuban Missile Crisis, in the autumn of 1962, my Dad’s Naval Reserve unit got called up for a deployment of unknown duration. And as she had so many times before when my Dad was absent, my Mom loaded me and my brother into the green Rambler station wagon (with plaid seats and a fold-down sleeping option) and headed for my grandparents’ farm in Vermont.
The drive to the farm was very long then. I-91, which now passes within 5 miles or so of the farm on the hill where I spent so many cherished childhood days, only stretched to Hartford, Connecticut or so. After that, most of the 300-mile trip was on back roads and then on Route 5. But eight hours after we had left New York, we would turn left off Route 302 and drive up Bible Hill and turn left again, hearing the crunch of cold stones under the tires and seeing ahead the lights in the windows of the farmhouse that I loved so very much. And then we would be there.
Autumn nights in Vermont can be frigid; the air as sharp as icicles. But in my grandmother’s kitchen, it was always warm.
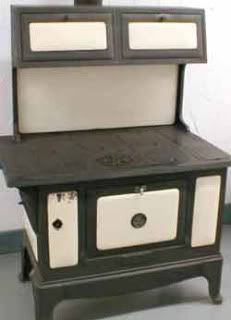
The big wood-stove on which my grandmother created the most amazing food (and which provided heat to much of the house) was always blazing warm, and the built-in cupboards above it always held warm treats – homemade cookies, warm Vermont crackers. No matter how long the journey, it was joy to arrive.
This was the kitchen of my childhood. This was the place where I learned to cook and bake, and learned to love cooking and baking. This was the place where I dug my small hands, clutching a scoop, into the deep flour drawer to add to the cookies or make the base for the kneading of the bread. This was the place where I learned to knead. This was also the place where I brought pails full of blackberries or wild strawberries, picked from the garden, to dump into steaming pots and spoon into jars, which would be boiled in a big rack in an even bigger pot.
At the back of the kitchen was the door to the stone cellar – built with the house in the 1820s, and lined with shelves (built by my grandfather) on which my grandmother placed glass jars of jam and pickles and tomato sauce and so many other good things captured in the garden and put away for the long Vermont winters.
It was in this kitchen, also, that I helped my Nana meld the leftovers into cakes that would be baked for the barn cats.
And it was also here, at the round oak table in the back of the kitchen (under the window where pies were cooled and where a moose once stuck his nose in), that I learned to play hearts and cribbage with my grandfather and, with the radio on, learned that the only baseball team in America worth rooting for was the Boston Red Sox. (Sigh)
My father was gone for most of that fall – flying reconnaissance missions over the North Atlantic, watching for Soviet submarines and ships. We stayed on at the farm, and I attended the same 4-room schoolhouse from which my Mom had graduated (as the entire top 14 percent of her class) in 1947.
It was an autumn of uncertainty, and in times of chill and uncertainty, there are few things as welcome as northern comfort foods – pot roast and turkey the way my grandmother made them. These are adaptations of her recipes for those wonderful dinners (the former of which we are having tonight). I have also included an incredibly easy and absolutely delicious turkey chili recipe for leftovers (if there are any). Finally, though I rarely share it, my Mom's recipe for Vermont Apple and Maple Syrup Pie.
Vermont Pot Roast
1 5-lb. bottom round roast (trim all fat)
1 ½ tsp. coarse sea salt
1 tsp. freshly ground pepper
2 C. rough chopped onions
1 large tomato, cored and chopped
2 cloves garlic, finely minced.
2 bay leaves (Turkish preferred)
6 sprigs fresh thyme
bottle of dry white wine
1 ½ lbs. fresh turnips (quartered)
1 lb. small white onions
1 lb. fresh carrots (peeled and cut into large pieces)
(parsley for garnish, if desired)
Preheat oven to 300 degrees
Rinse roast and pat dry with paper towels. Season with salt and pepper.
Set 4-5 lb. Dutch oven or other large, oven proof casserole over high heat; sprinkle coarse salt over bottom. Place roast (fat side down) in casserole; sear. Continue searing on each side until roast is entirely seared. (This should take 2-4 minutes per side; you can use a large meat fork to hold the roast in place for the ends.)
When completely seared, arrange the onion and tomato pieces, the finely minced garlic, the bay leaves and the thyme sprigs around the meat and pour in sufficient wine to cover. (If the wine isn’t sufficient, add water.) Bring to a boil, cover the place casserole in oven. Leave it there for 3-4 hours, until meat is tender. (Turn meat once an hour.)
Remove casserole from oven. Remove meat from casserole. Place on a clean platter.
Pour the sauce through a strainer to remove the mushy vegetables and herbs. Press these hard with a steel spoon to get all the goodness into the sauce.
Put meat back into casserole. Arrange the turnip quarters, small onions and carrot pieces around roast and pour the sauce over it. Season with salt and pepper. Heat on top of stove to a boil and place back in oven for 1 hour to 1 ½ hours.
Remove from oven. Remove meat to platter and slice thickly. Taste the sauce and correct seasonings. (Put sauce through fat separator if you have one.)
Now, two options:
(1) Arrange vegetables around meat slices, pour sauce over it all. Sprinkle with parsley. Serve.
(2) This is what I do: Place meat in ceramic pan (such as Corelle) that can be heated in oven. Place sauce in a bowl. Place vegetables in a third ceramic pan. (Do NOT place any of these in metal pans or bowls.) Refrigerate overnight. The next day, skim fat off meat, sauce and vegetables. Place meat slices, vegetables and sauce in covered baking pan (such as Corelle), and heat in slow oven (300 degrees) for about one hour. Sprinkle with parsley. Serve.
Make sure to serve with some crusty bread for mopping up the sauce.
(Recipe adapted using my grandmother’s cooking techniques from recipe in Julia and Jacques Cooking at Home copyright 2000 Knopf. Jacques’ recipe also includes frozen baby peas, which are added at the very end, and are heated by the sauce.)
Roast Turkey
One fresh turkey*
One carrot, roughly chopped
Half a bay leaf
1 sprig of thyme
Salt and Pepper
1 stick butter
Water
1 Qt. low salt, fat-free chicken broth
Roasting pan and rack
Cheesecloth
Foil
*Assume ¾ lb. to one pound for each person. If you have a crowd, two smaller turkeys are better than one large one.
Day One: Remove the innards. Set liver aside. Cover neck, gizzard and heart with water (6 C. for a 14-lb. turkey). Add a roughly chopped fresh carrot, half a bay leaf and a small sprig of thyme. Simmer, uncovered, for 2 hours. Strain. Discard vegetables. Refrigerate strained broth. Chop and refrigerate gizzard, heart and meat from the neck. Refrigerate separately.
Day Two: Allow 3 ½ to 4 hours for a 12- to 14-pound turkey, 8-10 minutes for each additional pound. Add 20 minutes for the total to permit juice settling and gravy making. Take total weight of turkey and divide by four to compute cooking times for each part of the recipe.
Preheat oven to 400 degrees.
Rinse the turkey inside and out, pat it dry with paper towels and sprinkle both cavity and outside of bird with salt and pepper. (Hint: put mixture of salt and pepper into a ramekin before beginning this; that way, you are not contaminating the salt and pepper containers with raw turkey-covered hands.)
Butter the turkey rack. Place turkey on the rack. Saturate the cheesecloth with melted butter. (Hint: Melt the butter in a measuring cup in the microwave and then stuff the cheesecloth into the cup.) Drape the butter-soaked cheesecloth over the turkey. Place a tent of foil over the breast, shiny side out. Put the turkey in the oven, breast toward the drawer. Reduce the heat to 350 degrees.
When one-quarter of the time has passed, lift the foil and pour about ½ C. of chicken broth over the turkey. Replace foil and rotate turkey 90 degrees. (If your oven is small, just turn it around.)
When one-half of the time has passed, remove foil and cheesecloth, baste with another half-cup of chicken broth, and turn the turkey again.
At three-quarters of the total time, rub the turkey all over with what remains of your stick of butter. Rotate again.
The turkey is done when an instant-read thermometer inserted in the thigh registers at 170 degrees.
Loosen the turkey from the rack and stick a heavy metal spoon into the cavity to lift the turkey onto a platter. Place turkey in a warm place, but do not tent.
Pour the pan juices through a fat separator. The amount of fat-free juice plus the amount of the broth from Day One equals the total number of cups of liquid. Return one Tbl. of fat to the roasting pan for each cup of liquid. Supplement with butter if there is not enough fat from the turkey. Stir in twice as much flour (e.g., three cups of liquid needs 3 Tbl. of fat and 6 Tbl. of flour). (Hint: bake flour before adding; it will make better gravy.)
Put the roasting pan over two burners on medium low heat. Cook the mixture, stirring often, for 4-5 minutes. Then SLOWLY whisk in the cool broth. Add the reserved pan juices and simmer the mixture until the gravy is thickened and smooth. Add the giblets. Season with salt and pepper.
Carve and serve. (Adapted from a recipe in Yankee Magazine.)
Turkey Chili Veracruz
1 can reduced-sodium chicken broth
1 14-15 oz. can STEWED tomatoes
4 dried New Mexican chiles (stems, seeds discarded, torn in pieces)
1 1” thick crosswise slice of a white onion
2-3 cloves garlic, peeled
½ C. coarsely chopped fresh cilantro
½ C. dry roasted peanuts
2-3 tsp. ground cumin
¼ tsp. salt (or to taste)
2 Tbl. olive oil
3 C. leftover turkey, shredded
1 (15-oz.) can PINK beans
Puree broth, tomatoes with juice, chiles, onion slice, garlic, cilantro, peanuts cumin and salt in a blender until smooth (about 2 minutes).
Heat oil in a large (3-4 qt.) heavy sauce pan over moderately high heat until hot (but not smoking); pour in sauce and boil, uncovered, about 5 minutes.
Stir in shredded turkey and beans (with their sauce). Reduce heat to moderately low and simmer, covered, 10 minutes.
(This tastes even better the next day; just refrigerate and reheat. It also freezes beautifully.)
Based on a similar recipe from Gourmet magazine (April 2007).
Vermont Maple Apple Pie
6-8 large tart apples
9” pastry shell
½ C. sugar
¾ C. gingersnap crumbs
1Tbl. flour
½ tsp. cinnamon
pinch of salt
½ C. chopped walnuts
¼ C. melted butter
1/3 C. maple syrup
Preheat oven to 350 degrees.
Core and pare apples; slice thin. Spread about half the slices in pastry shell. Combine all the remaining ingredients EXCEPT the maple syrup. Mix well; spread about half this mixture over apples in pastry shell. Add remaining apple slices; spread remaining mixture even over the top.
Bake in oven about 50 minutes.
Heat syrup to boiling. Pour over pie. Bake 15 minutes longer.

