Happy Thursday and welcome to day five of the Sunday Bread Candy Mini-Series!
The idea is to get folks the chops they need to be able to make some fabulous candy for the holiday season. Sure everyone thinks cookies and such, but it is the hand-made candy that always disappears first, assuming that is it quality candy.
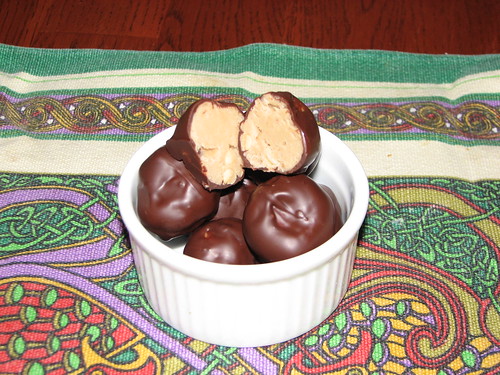
Tonight we are going to make Chocolate Dipped Peanut Butter Centers. And as an added benefit (and at a request) we’re going to walk through the process for tempering chocolate for dipping!
So bear with me Bread Heads, as this is likely to be a bit of long post. But when it is all said and done you’ll be able to make a great candy and you’ll have leaned some fudge skills as well as dipping skills.
If you are looking for the recipes from earlier in our candy-palooza this week you can find them all at the links below.
Chocolate Covered Butter Creams
Perfect Peanut Brittle
Chocolate Covered Caramels
Orange Pralines
So, enough chit chat, let’s make some candy!
Chocolate Dipped Peanut Butter Fudge
Ingredients:
1 ¼ cups whole milk
¼ cup corn syrup
¼ cup ( ½ stick) butter
1/8 teaspoon baking soda
3 cups sugar
1 cup packed brown sugar (dark preferred)
1 cup peanut butter
1 teaspoon vanilla extract (accept no substitutions!)
1 lbs bitter sweet chocolate (I like Ghirardelli)
1 1oz square bitter sweet baking chocolate
Equipment:
1 4 quart sauce pan
1 candy thermometer
1 9” x 13” baking dish
2 sheet pans, lined with parchment paper
1 double boiler
1 electric griddle or fondue pot
Method:
For Centers:
Okay, this recipe is a bit of a cheat because it is peanut butter fudge that we are dipping in the chocolate. There are easier centers to make, but they usually involve just loading up peanut butter with tons of powdered sugar. I don’t really like the taste that you get from that much powered sugar, so I go with the fudge.
This particular fudge recipe is a good one because it gives you a “fudge base” that can then be flavored. In this case we add the peanut butter and the vanilla after it has completely cooked. After you get the hang of it you could add other nut butters (Almond butter and almond extract make for an awesome fudge!) or even other flavors.
Get out your 9” x 13” baking dish and set it aside, in a spot convenient to the stove.
In your 4 quart pot, combine the milk, corn syrup, butter, baking soda, sugar and brown sugar. Place over Medium-High heat and cook, stirring occasionally until it comes to a boil, about 5 minutes. When it starts to boil brush down the sides of the pan with a pastry brush dipped in water. Smaller seed crystals mean a finer texture to the fudge.
Clip on your candy thermometer and cook, stirring constantly until the temperature reaches 234 degrees (if you are above 1,000 feet in elevation, test what temperature water boils at before you start this whole process, then subtract that number from 212. Where I lived in Denver at 5280 feet, water boils at 200 degrees).
Remove from the heat and then the hot candy (carefully!) into the baking dish. Do not scrap out the pan, just pour in what will come out easily.
Set aside to cool at room temperature. When the bottom of the baking dish feels warm but not hot (about 15 to 20 minutes), it is time to add the peanut butter and vanilla. Just glob them in and using a wood spoon stir them in until the peanut butter is completely absorbed and the fudge becomes thicker and loses some of its gloss.
Now, if you were just after fudge, you could spread it out about an inch thick on a sheet pan lined with parchment paper and then cut into cubes when it sets, but that is not what we’re after is it?
Just let the candy, uncovered, in the pan for another hour so it is complete set.
When the fudge is set, it is time to make it into ball. I like to use a teaspoon and dig out a heaping teaspoon for each center. You can make them bigger but resist the urge to make them huge as they will over power the chocolate and you won’t get the full affect of this candy.
Roll each teaspoon between your palms to make a ball. Set them on the sheet pan. You should get 50-60 centers.
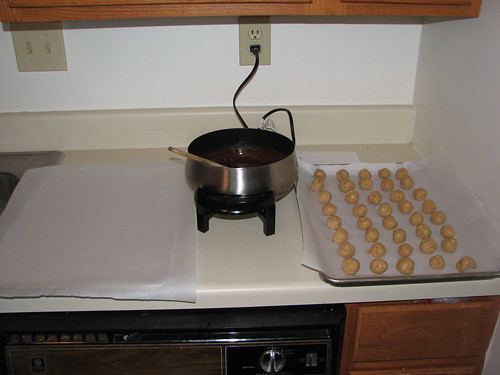
Set up your dipping station with the centers on the opposite side of your dominate hand (your going to use that for dipping), I am a lefty so the landing place is on my left, and the candy’s are on the right, then the fondue pot or electric frying pan or small sheet pan. Finally set a parchment covered sheet pan as the landing space for the dipped chocolates. It should look about like this:
For Tempering and Dipping:
Okay, time to talk about tempering chocolate. First off, what is tempering? Well it is this neat thing that happens when you melt chocolate and hold it at 88 degrees. You see if you just melt some chocolate and then let it cool, the cocoa butter forms these lose crystals as it cools. The chocolate is dull, sometimes has blooms of grayish colors and feels a little bit greasy.
Tempered chocolate on the other hand has a tighter structure. The process of tempering is adding already tempered chocolate to 90 degree chocolate for the seed crystals. Now, there is a method where you use a cold surface (marble slab or the back of a chilled sheet pan) and spread hot chocolate around and then fold it over itself as it cools until you have those seed crystals. Then you add it to other hot chocolate and let that cool and temper.
It is a giant freaking mess! If you were going to be a Chocolatier it would be a skill you’d want to develop, but you have to practice and practice and practice. It is just not worth it when there is a way to cheat.
What way to cheat is that, you ask with huge doe eyes and fluttery eyelashes? Use some commercial chocolate. I like to use bakers chocolate, but just about any chocolate you buy at a grocery store, even just a Hershey bar, is going to be tempered and have all the seed crystals you need. Even chocolate chips (assuming they have a polished and not dull look to them) will work.
Now let’s talk about melting chocolate. You can do it in the microwave, if you like, but for this particular application I like to use the double boiler, that way you can keep most of the chocolate hot while tempering and dipping smaller amounts. But there is the issue of water in chocolate makes it really streaky and ugly.
The way to avoid this is as follows. Put 2 cups of water in the bottom of your double boiler (a metal bowl over a pan that it won’t fall in works just fine) and put it over high heat until it comes to a rolling boil. Turn the heat off and when the water stops bubbling, that is the time to put your bowl over it.
Add all the chocolate to the bowl and stir it as it melts. We are looking to get the chocolate up to 105 degrees or so, but not much higher.
To temper the chocolate, ladle two good ladles full of the hot chocolate into your electric frying pan or fondue pot or small sheet pan, the pan should be OFF, we are just using the heat conducting properties of it, not the heating elements.
. Using your finger keep the chocolate moving as it cools. When it feels cool to the touch it will be about 90 degrees. Shave the baking chocolate over the chocolate in the pan and using you fingers in an S shaped motion mix the two together.
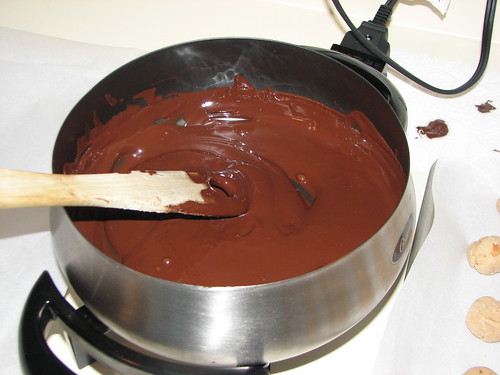
Keep working the chocolate until it thickens. You’ll know, it will not be warm at all, but neither will it be cool. It is now tempered chocolate and it is ready to dip! It will look like this:
To dip the centers, pick one up and place it in the chocolate. Make a cage with the fingers of your dominate hand and roll the center back and forth in the chocolate a couple of times.
Pick up the center and hold it above the pan with the tips of your fingers and let any excess chocolate dribble off.
Turn your hand over and put the chocolate on the landing tray. Repeat until you run out of chocolate, or until the chocolate gets really thick and clumpy. If that happens just add more of the hot chocolate in the double boiler and work it with your hand until it is cool again (it will already have the seed crystals in it).
Let the chocolates dry and harden for about 30 minutes. Then place in small paper cups and store in an air tight container in a cool dark place until it is time to blow the socks off of your guests!
Okay so there you have it. Tempering chocolate is a bit of drag, but if you master the art of it, you will always have very professional looking candy.
Now the good folks at “A Liberal Sprinkle of Flour” have a couple of words for our audience at home.
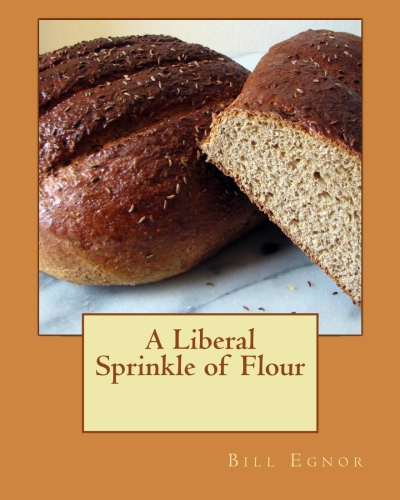
Did you know that there is cookbook of the Sunday Bread series? It is called “A Liberal Sprinkle of Flour" and it available for sale on Create Space and Amazon. The book, like this series, is mostly breads, Rye’s, Sourdough’s, French, Italian, Bagels, Rolls, Whole Wheat’s and White’s, with a few treats thrown in for good measure!
All the recipes have the same kind of step by step instructions and the (to my mind) humorous tone that this recipe has. It is suitable for every level of home baker. All the recipes have been home kitchen tested (and mostly home kitchen developed) and are very nearly no fail.
It does not assume that the reader knows all the common techniques and every recipe goes into strong detail on just how to make fabulous bread right from the word “Go”.
If you’re interested just follow the links and you can order it tonight. As you might guess, it makes a great gift, but if you do give it be sure that who ever gets it makes you some scrumptious bread!
The flour is yours.
