DK Quilt Guild: A place for quilters to gather, share ideas, projects, and to make the world a better place, one quilt at a time. Join us and share your thoughts, projects, questions, and tips. Quilters here are at many different levels of skill. Beginners and non-quilters are welcome, too!
Are you wanting to quilt your own quilt but it looks to difficult to pull it through your machine after it is layered and rolled? All those pins to get in the way and sore arms after sewing for a hour pulling and holding a heavy quilt. Not only that, to have the pieced top quilted by a professional long arm quilter is to expensive for your budget. But there is a tub of scrap fabric from making the kids play cloths that could be used to make a quilt for the back of the couch. Something to wrap up in and not have to worry about spending to much money on the project. I am going to introduce you to a type of every day quilting that is easy to do on your machine. You can do it yourself from start to finish in a short time.
When I grew up in the 1950's and early 1960's, my neighborhood had several women that quilted. Some quilted by hand but my next door neighbor quilted with her machine. She called this type of quilting utility quilting or city quilting. The only quilts she quilted by hand were applique kit quilts. She considered them her good quilts. All the other quilts were sold or used for everyday. Everyday quilts were utility quilts which were made from scraps. I was fortunate enough to be able to help her in the summer time with her quilt making.
At the time, I was looking for something to do and found helping her fun. On sunny days we would sit just inside the garage door and cut blocks from scrap fabric. Her friends would give her their scraps from sewing. Our tools for this was scissors, pencil, ruler and a card board template. The template was usually cut from a cereal box and several was cut the same size because they would wear out after many times tracing around them. Quilt patterns usually came from the newspaper, that she had saved over the years in a box. Some block patterns were traded back and forth. If a friend made a quilt that she like, she would copy the block by making it. The block was then kept in the pattern box for future reference. Left over blocks was also saved in the pattern box to be offered in a block trade.
After we finished cutting out all the blocks that were needed to get started, the blocks would get sorted to sew together on the machine if they were simple blocks. If the blocks had curves and sharp points we would sew them by hand. When I got good at hand piecing I was allowed to take the pieces home and work on them there. There was not many rules to quilting at least she only followed the ones she wanted to follow. The seam width rule was that you sewed only on the lines that were drawn from the template. Color was what ever you thought was pleasing and looked nice. The blocks where laid out on the bed and arranged until they looked right and the colors were not bunched up in the same area. The rows were marked with a paper pinned on the first block of every row and the blocks were picked up in order. Now the machine quilting would start by layering each block, then quilted on the machine. When all the blocks were finished she would put them together using strips of sashing.
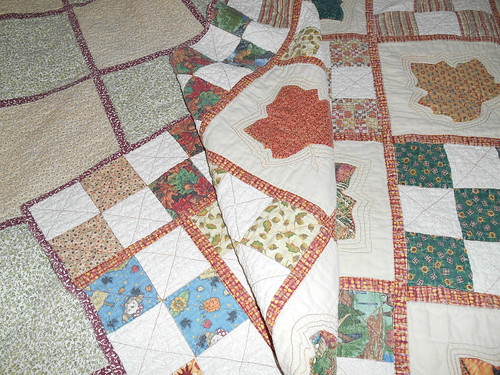
This is a queen size quilt I made about 18 years ago the way I was taught as a kid. Moreover this quilt has been in continual use on my son's bed ever since. It has been washed a zillon times. It is still in good shape, just a little faded.
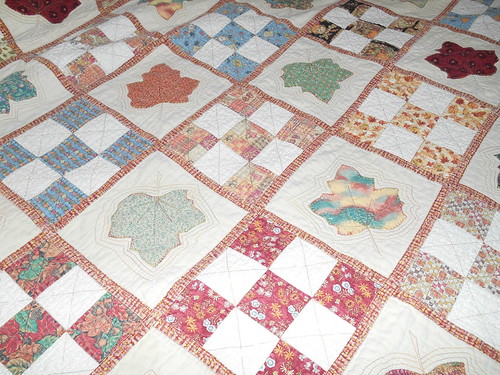
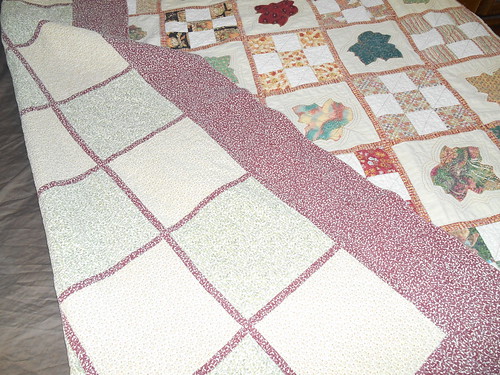
The back is as pretty as the front and makes it reversible.
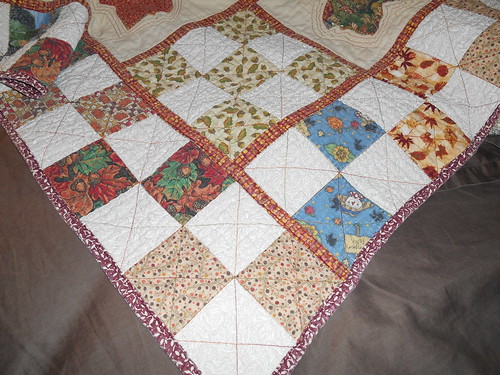
Here is a close up of the quilting done on my domestic machine one block at a time.
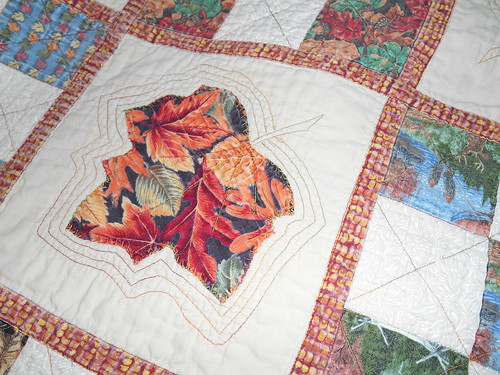
Close up of the boarder and corner. I am soon going to need to put a new binding on it to give it new life.
I found this quilt as you go demo on you tube. This is the technique I was taught as a child to machine quilt.
To review the size of strips that was used in the demo.
Bottom strip is 1 inch wide.
Top strip is 2 inches wide folded in half and pressed.
I measured the strips on my quilt and I must of used 1 1/4 inch wide strip on the bottom and 2 1/2 inches wide strip on the top. This is a very forgiving technique and you have room to adjust to the block batting thickness.
If there is some fabric that is calling out to you that would make a nice inexpensive quilt, consider trying this technique. It is also a stash buster for experienced quilters that have a box of left over fabrics and a hoard of fat quarters.
If you have any questions, please ask.
