In the gallery devoted to the art of French sculptor Auguste Rodin at the Maryhill Museum of Art near Goldendale, Washington, there is a display detailing the steps used by Rodin and others in the lost-wax bronze casting method. While the lost wax method is expensive and time-consuming, many artists prefer it because it results in an accurate reproduction of the original work.
With regard to the designation “lost-wax”, the Museum display explains:
“The name derives from a moment in the process when a ceramic mold containing a wax model is heated until the wax melts and runs out of the mold. Thus the name, lost-wax. Molten bronze is then poured into the space left by the wax to create the work of art.”
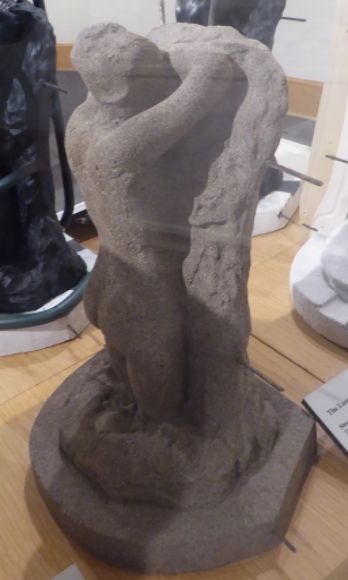
The display at the Maryhill Museum of Art shows the steps involved in casting Rodin’s Sorrow.
Step 1: The Work of Art
According to the Museum display:
“The artist first sculpts a model from clay, plaster, stone or wood. At the foundry, this is protected by a thin sealer before a plaster cast is made of the model. After making a number of clay studies, Rodin would sculpt the final concept in clay.”
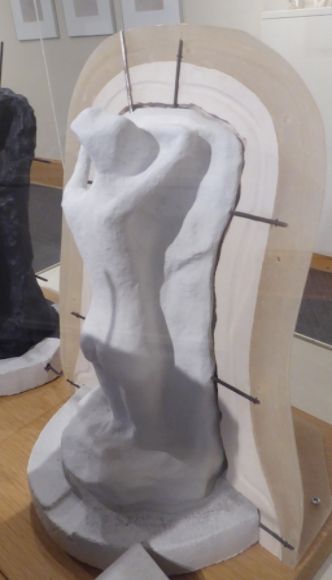
Step 2: The Impression
According to the Museum display:
“Next, an impression of the plaster model is made by putting it into a very fine elastic material supported by a rigid outer mold. The rigid outer mold will better resist the pressure of molten wax that will later be poured into the mold. When the plaster is removed, a mold is created, revealing a negative impression of the plaster. Although the synthetic rubber and fiberglass materials shown here were not available during Rodin’s lifetime, they are the preferred materials today.”
Step 3: The Fire-Proof Mold
According to the Museum display:
“The sharply defined mold is then used to create a core of a refractory, or heat-resistant material, that is identical in every respect to the artist’s original model.”
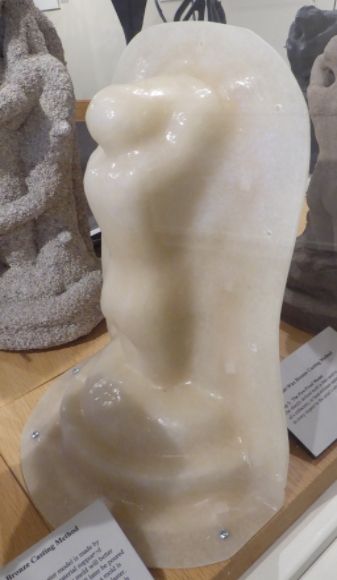
Step 4: Creating the Wax Mold
According to the Museum display:
“The surface of the refractory is then scraped, reducing it by the desired thickness of the final bronze. When the scraped model is placed back into the mold, it creates a gap between the model and the mold.”
Step 5: The Wax Model
According to the Museum display:
“Molten wax is poured into the space between the scraped model and the mold. This crucial step produces a perfect reproduction of the original work in wax. The resulting model is hand finished. At this point, the artist may make changes and sign the work, and the foundry may stamp its mark on the piece as well.”
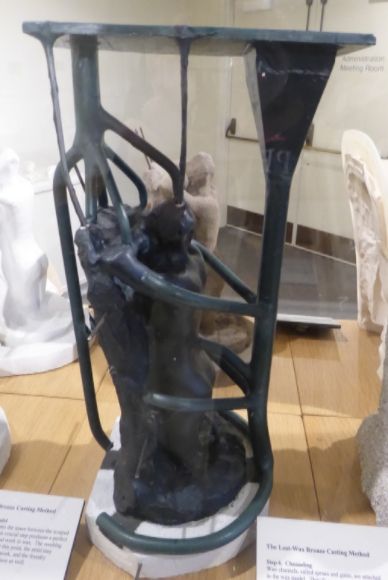
Step 6: Channeling
According to the Museum display:
“Wax channels, called sprues and gates, are attached to the wax model. They form a network of channels through which the molten wax will escape and the bronze will be poured. They will also help to vent the air as the bronze is poured into the mold.”
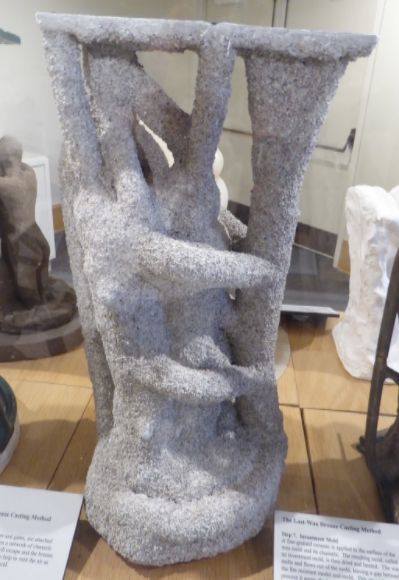
Step 7: Investment Mold
According to the Museum display:
“A fine-grained ceramic is applied to the surface of the was mold and its channels. The resulting mold, call an investment mold, is then dried and heated. The wax melts and flows out of the mold, leaving a gap between the fire resistant model and mold. This gives the casting process its name, the lost-wax method. The mold is then hardened at a high temperature (550-600° C), covered with a layer of heat resistant material called cladding, and completely dried. The cladding layer, not represented in this series, looks very much like a taper cylinder surrounding the ceramic mold.”
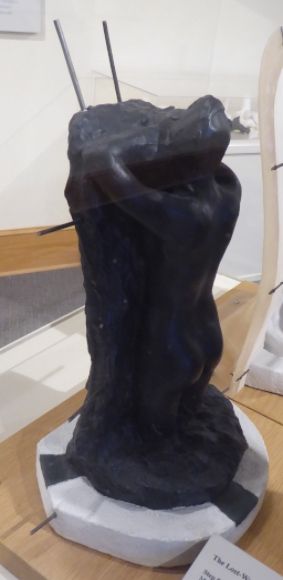
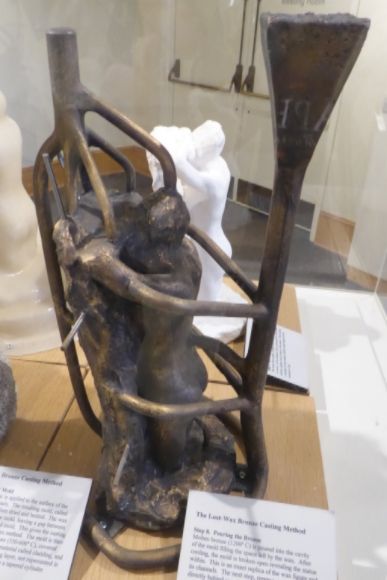
Step 8: Pouring the Bronze
According to the Museum display:
“Molten bronze (1200° C) is poured into the cavity of the molding filling the space left by the wax. After cooling, the mold is broken open revealing the statue within. This is an exact replica of the wax figure and its channels.”
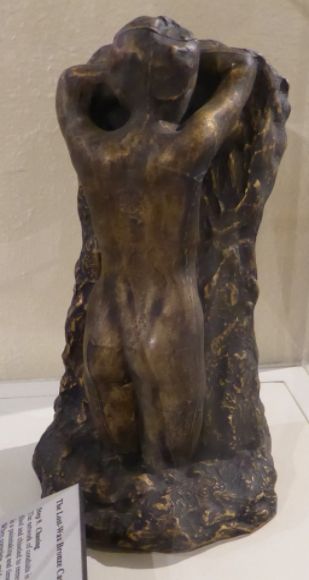
Step 9: Chasing
According to the Museum display:
“The network of conduits is cut away, and the surface file and chiseled to remove all traces of them. This ia a painstaking and time-consuming task called chasing. When complete, oxides are applied hot or cold to the surface of the bronze to produce a thin layer of corrosion called patina. The final model of Sorrow, shown her, is ready for the patina. Rodin preferred his patinas to have a rich dark color as exemplified by work elsewhere in this gallery.”