Good morning DIY'ers
The Saturday Morning Home Repair Blog (SMHRB) is where we gather to discuss the many and varied aspects of home repair. Some here are trained professionals. Some, talented DIYers. All are welcome. Please feel encouraged to ask questions, share successes, lament sags, drips and cracks and, as always, share any advice that you have for the rest of us.
Well that's odd! 21 comments from last week?
Turns out I posted this last Saturday, only to be bitten by the spam monster.
The ban hammer came down, and I had to wait til Monday to plead my case.
Thanks to elfing, I was reinstated which resulted in my diary being published
on Monday. My guardian angel cjb took me under her wing, and republished
this most awesome (;-) diary for today. So without further ado!
Oiled fired boiler! What in the heck is that? I'm sure that is what many on here are asking, If you do not live in the northeast, and I think Alaska also you are probably not familiar with one of these. Heck some Alaskans shove an oil fired burner into an old 55gal drum to ah, burn their human byproducts. I shit you not!
Anyway, here goes nothin, and appreciate I am not a pro at anything I do, while I am pretty good at drinkin beer tho.
So here she is, a 1964 New Yorker wet based, oil fired boiler. She ain't pretty, but she can pump out some BTU's. Originally this boiler had what was basically a flame thrower bolted to it. As technology had gotten better, a Beckett retention head burner was put on.
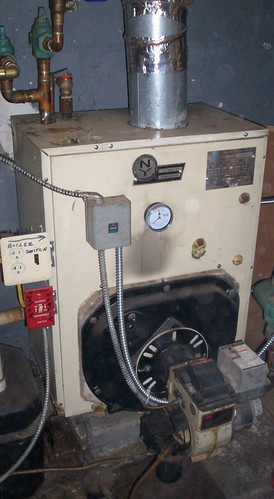
The problem was, they never sized the nozzle correctly. There was basically no specs to go by, so I had to do trial and error til I found what worked best for this boiler. Six nozzles later, I had it purring with low oil consumption.
Now to the dismantling to clean this beast.
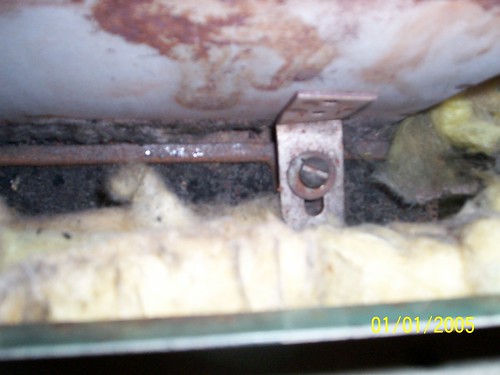
In this pic you will see five screws that hold the top of the outer jacket on.
I've already removed the stack pipe for a better view.
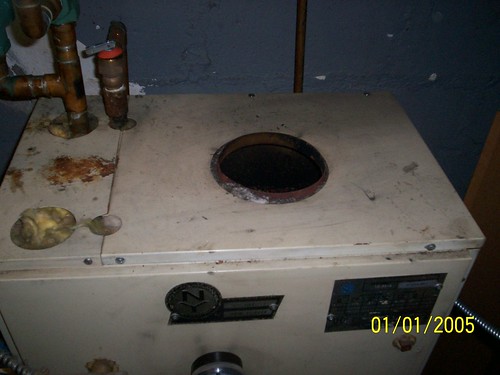
Under the jacket is a bunch of insulation that needs to be removed carefully in order to put it back later.
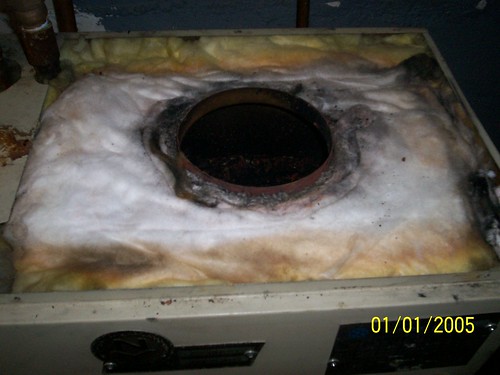
For lack of a better word, the next thing you see is the collector. This is held on by four tabs, that machine screws bolt to the water jacket.
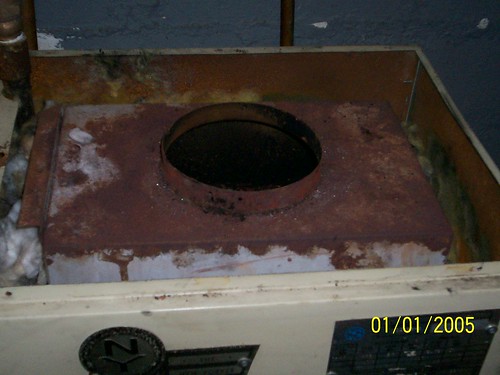
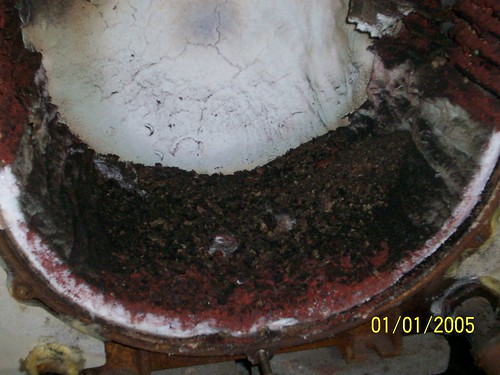
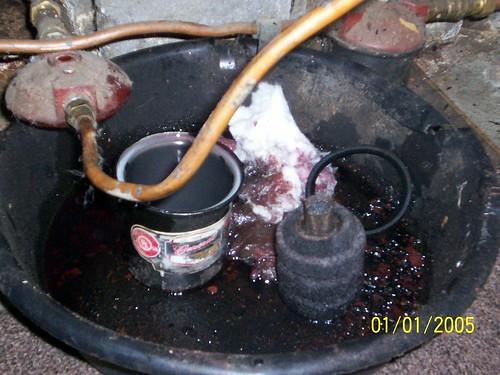
After the collector is removed we get to the heart of the whole operation. "Cleaning a years worth of crap"
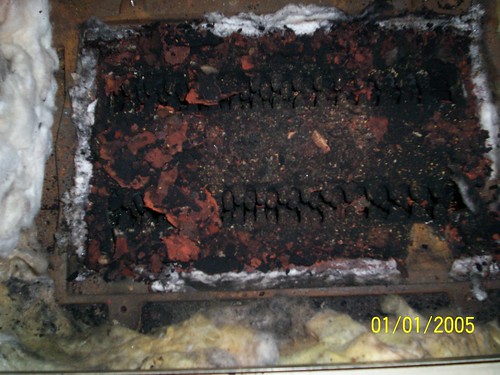
I have one utility vac that I only use to clean the boiler, and water heater. This is what I used to pre-clean the the top of the water jacket. Now comes the bottle brush.
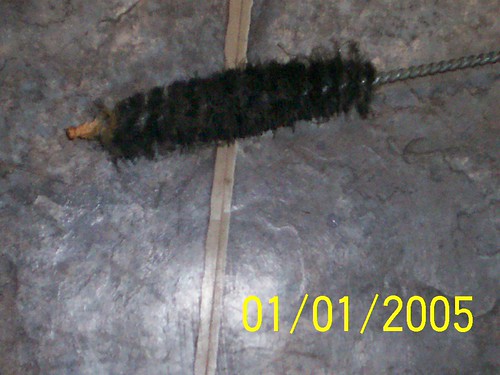
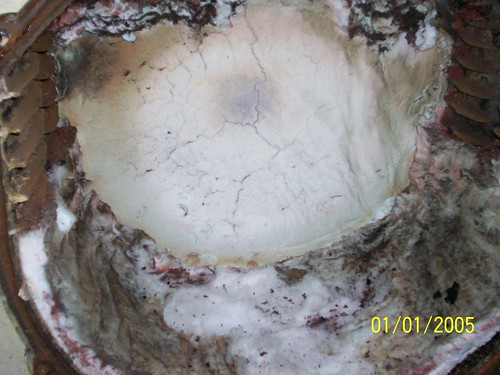
I'll be using this to get deep into the bowels of the water jacket. It's a lot of work, as the brush needs to be a tight fit to get all the crap out. there are little fingers that protrude, which helps heat the water more quickly. I wish I could have gotten pics of this process, but the area was just too tight to work, and click at the same time. With no further ado. Here is what a clean boiler looks like.
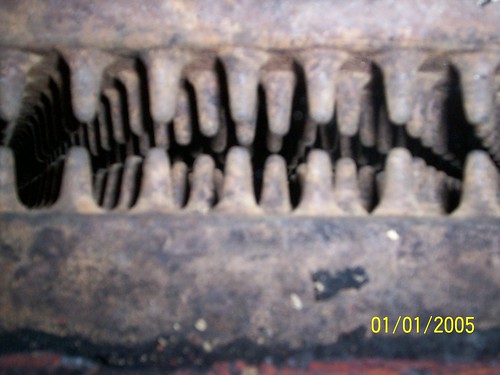
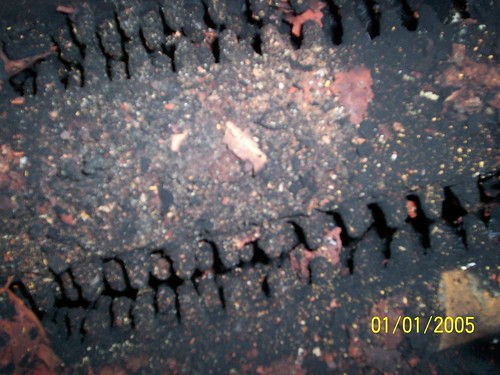
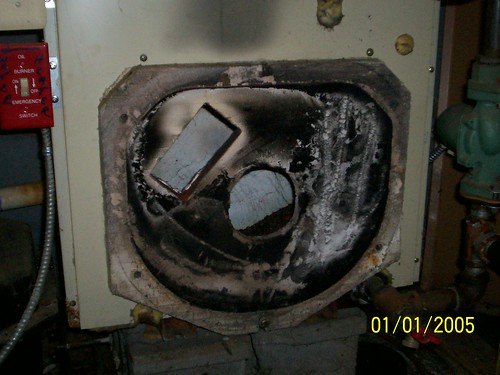
Okay, so where did all that funky stuff go? The fire chamber would be the correct answer.
Normally I would just pull the gun, and vacuum the inside. I decided to completely open the front so everyone could see how much junk is in there, and to get an actual look at the insulation that is a must in this part of the boiler. After pulling the front shield you are left with a 1" thick insul board. I replaced this two years ago along with all the internal insulation. After awhile this can get pretty fragile, but I felt confident I could remove it with with little or no damage.
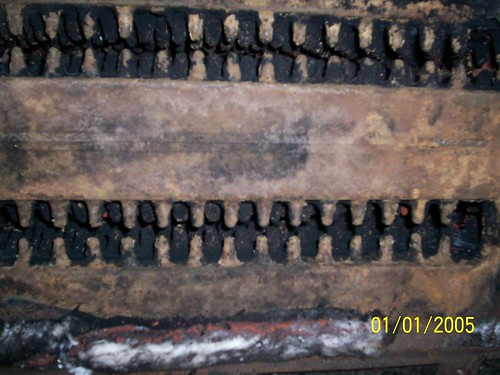
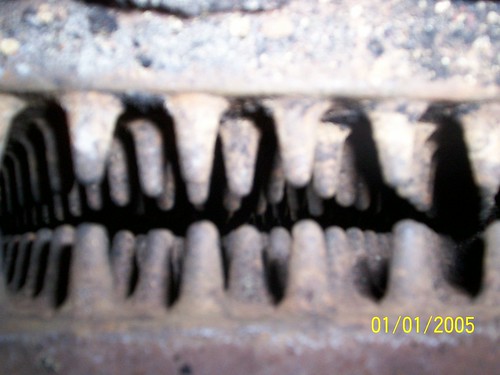
Okay all clean!
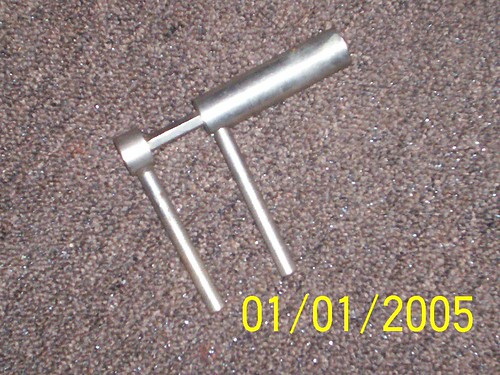
Next step is to change the nozzle. There are two ways to do this. One is to take apart the whole gun to get at the nozzle, and the other is to have one of these tools.
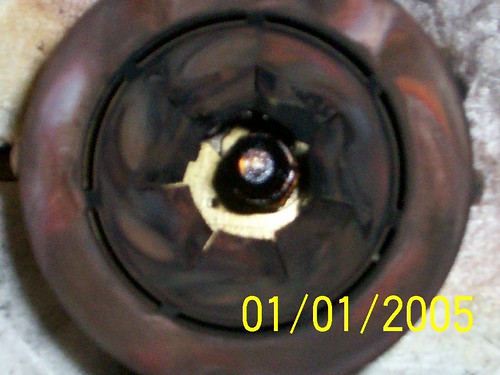
In the next pic you will see the nozzle itself. What you don't see is another nut behind it.
This wrench has two different sizes that slide over the nozzle, and then the locking nut. When the wrench is properly set, you can then spin the outer handle to unscrew the nozzle without disturbing the ignition electrodes, that suspend right above the nozzle.
Last, but not least is to change the oil filter. Pretty basic really. Close the fuel valve to the filter, and the firematic valve on the burner, so as not to lose the prime, and have to go thru an unnecessary fuel pump bleed. Unscrew the top bolt to release the canister. Pull the old fiber filter out, and shove a new one in. Install the new canister gasket that comes with the kit. Last is to open the fuel valve to the filter. Then open the small bleeder screw on top of the filter. This will allow the canister to fill, and purge all the air out. Retighten bleeder, and open the firematic valve. If no leaks are found, it's time to fire it up.
Okay I'm gonna end it with this. After readjusting the air mixture, you should have a clean crisp flame, that just licks up before hitting the back wall with no signs of black sooty flame tips.

That's it in a nutshell.
Any comments/questions, professional feedback, or your own projects will gladly be accepted at this time.


