Until just recently it was a sure thing that natural gas prices were on the way up, way way up. Which made me wonder how I could best avoid blowing more $$$ on heating the house. I looked at solar power but the initial investment on the panels is huge (and quality inverters are really expensive,) and then the payoff is measured in decades, ridiculous. Maybe one day solar power will be affordable for the masses..
I decided to go with a simple technology that wouldn't require a second mortgage and a deal with the devil to make happen. Hence, the simple pop-can solar heater :-)
If you've never seen one of these before then I'll explain because it's really easy. Get some pop-cans, cut holes in the top and bottom, paint them black, glue them together somehow.. stick the column of cans in the path of sun.. Presto, you now have a solar heater.
Pretty simple stuff.. The heavy cold air at the bottom of the black pop-can column is slowly heated and then rises towards the top.
So, anyways. After seeing this video on the CBC I decided to put one together for myself.
(ya, that's right he lives in Dildo, Newfoundland.)
I started this project by experimenting with a smaller-prototype (throwaway) unit just to see what kind of temperature gain I might expect.
And the results were not too bad. On a mild October day with roughly 55F degree temperatures I was reaching nearly 100F.
That convinced me it was time for the real deal.. the big-time solar heater, 240 cans, 15x16.. So I started it up, here's a few pictures from the construction...
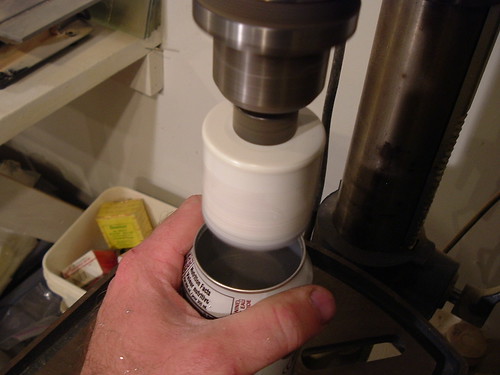
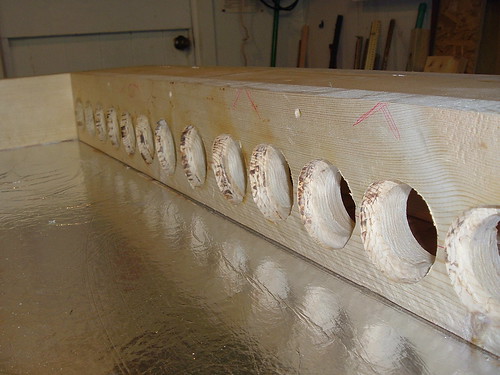
I start off by cutting the top of the can out. There is a small mistake here. The size of hole-saw that I used was perfect for making a clean hole at the top but, I think next time I would use one slightly smaller hole-saw so that it would leave a lip for the silicone caulking to rest on.
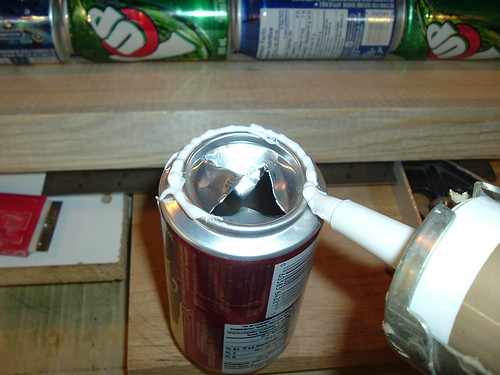
Here I am caulking each pop-can with silicone (warning: do not use the silicone/latex or pure latex mixtures.. the fumes may go away eventually but it will take a long long time. The trade-off is that the silicone is not nearly as strong in it's binding and not nearly as stiff when it cures.)
Also you might have noticed that on the bottom of the can where I'm laying the silicone is strange looking hole. I did this with each of the cans on the bottom. Cut an X with a stanley knife, push two of the resulting fins inwards and pull the other two out. The idea being that as the air rises and heats up, the fins should turbulence in the air and force it to come in contact with the hot surface of the can (instead of flowing straight up and avoiding this process.)
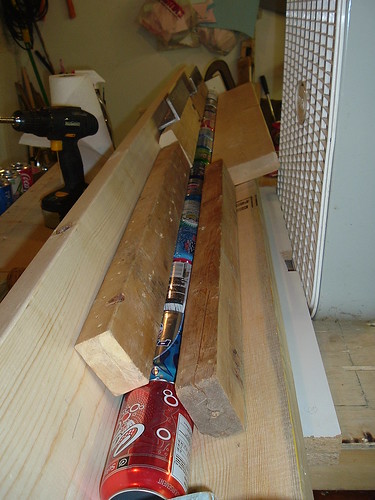
Here I have the glued cans in a make-shift jig, squeezing them together and holding them tight from all sides.
If you're thinking that the silicone doesn't have enough strength to hold a standing column of pop-cans together then take a look at the next picture,
It does take a few days for the silicone to cure. During the first 48 hours it will be very soft and wobbly (the cure & set times are crucial, becareful here.)
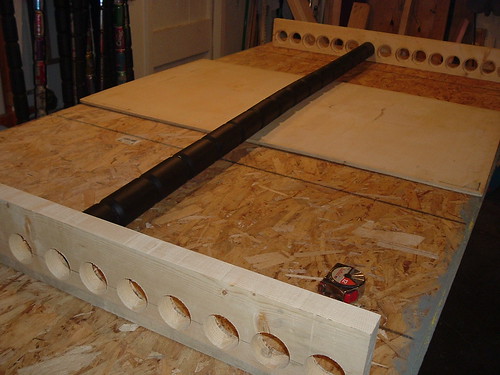
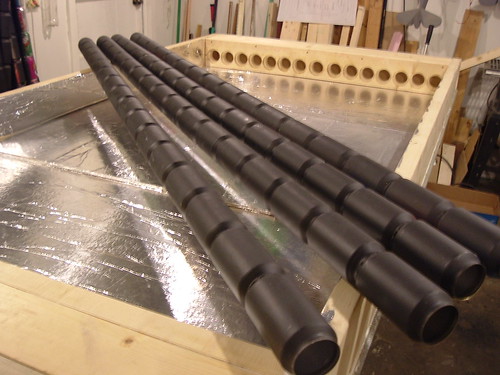
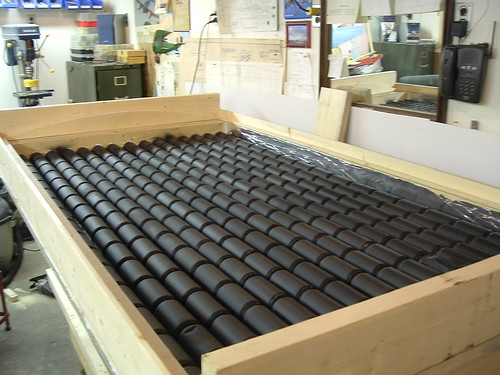
Here's the basic plan that I had in mind. The columns of pop-cans would sit inbetween two wooden manifolds (2x6's.) The base is chipboard.. but I would go with plywood next time because of it's lighter weight. But no harm done.
Here's a better view of the manifolds.. (don't ask how I made these, it was long and arduous task made possible by my refusal to spend $10 for the right sized hole-saw.) The can's do fit in there nice and snug though!
Here is the nearly completed unit.. Looks pretty good. Just one more step and that will be installing the lexan shield.
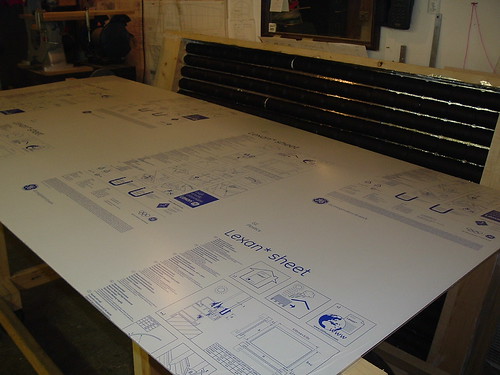
Here is the sheet of lexan.. good god this stuff is expensive.
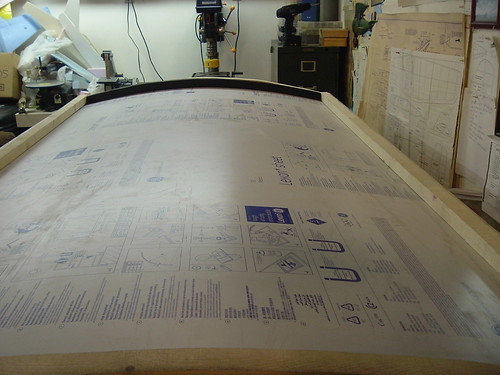
Here it is installed temporarily but you get the idea. I did have to trim the lexan and it went surprisingly easy. I used a hacksaw but a jigsaw will work too, just make sure it has a lot of teeth.
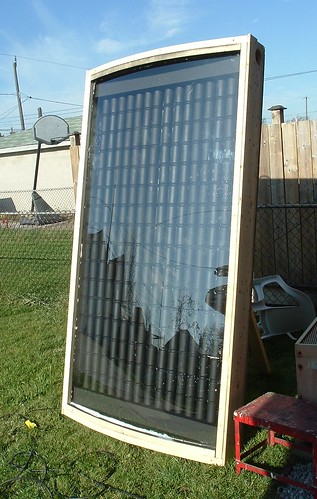
So anyways, here's the finished unit as you saw at the beginning of the diary,
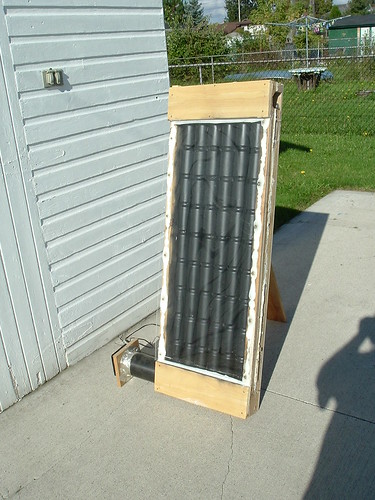
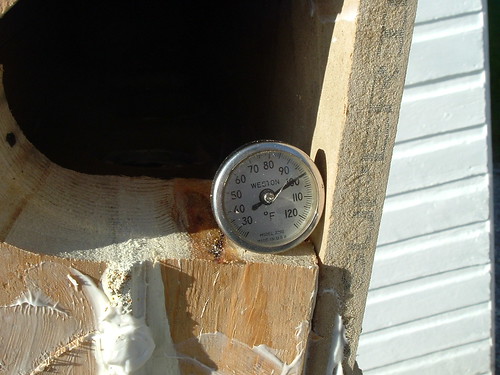
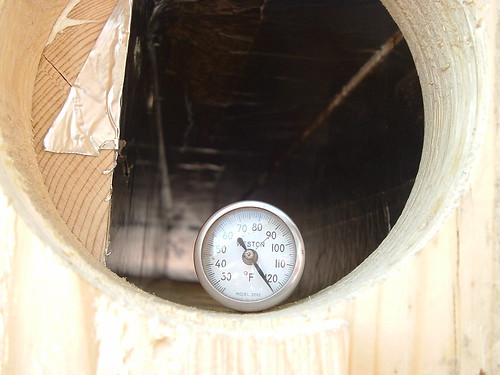
And how did it turn out? Pretty good. I took it outside today for the first time and let 'er rip under the blazing sun. (BTW it was roughly 38 fahrenheit when I took these measurements.)
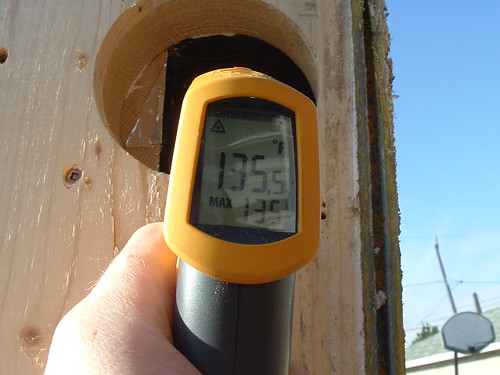
Not bad. Tomorrow I'll be hooking it up to the house with two 4" pipes (with fans on each end.) One to pull cold air from the basement into the unit and the exhaust will pump the hot air into the main floor.
I plan to install a thermostatic switch at the top of the unit to turn the fans on automatically (here's an example of the kind of thermal switch I'm considering on ebay.)
I suppose the fans could be powered by a few small solar panels from wal-mart or wherever.. that might be worth looking into, depending on how much they charge for them.
