Welcome to the Halloween Haunted Gingerbread House edition of WAYWO, also my first diary! To me, Halloween is the best time of the year. People go crazy decorating and dressing up, but without all the ridiculous stress of other holidays.
Halloween 2010 is special this year because I am on maternity leave from school and have to keep myself busy until IBaby comes (due November 3rd). This is the story of too much free time and the crazy work of art that has taken shape over the past few weeks. Thanks for taking the time to read my first ever diary!
Welcome to the Halloween Haunted Gingerbread House edition of WAYWO, also my first diary! To me, Halloween is the best time of the year. People go crazy decorating and dressing up, but without all the ridiculous stress of other holidays.
Halloween 2010 is special this year because I am on maternity leave from school and have to keep myself busy until IBaby comes (due Nov. 3rd). This year is also the first of hopefully many annual Halloween parties that will likely evolve into his birthday celebrations.
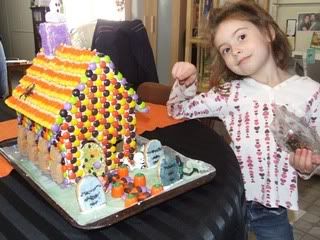
As of last year, I decided to kick my normal Halloween festivities up a notch but also to gear them more toward IGirl, so we started the tradition of making a haunted gingerbread house. Here’s our creation from last year, which is overly bright and diabetes inducing, but rather simple structurally.
Pic of last year’s gingerbread house
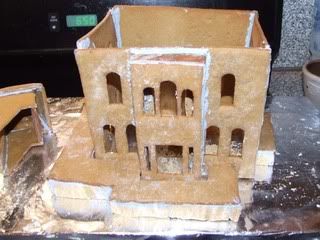
This year, IMan suggested something a little more... epic. After thoroughly searching the interwebs, I found my template at Haunted Dimensions.com I must admit, I had doubts about my abilities and the time frame I had to work with. Still, I took on the challenge and printed out the template.
First I used my favorite site to find a suitable gingerbread recipe and doubled it just to be sure I had enough dough.
All Recipes
I find that one of the hardest things about making a gingerbread house is getting the gingerbread pieces to maintain their shape and proportion during transferring and baking. Haunted gingerbread houses are ideal for this reason as the seams do not have to be perfect to achieve the desired creepy effect, while Christmas gingerbread houses just look sloppy if they are not precise.
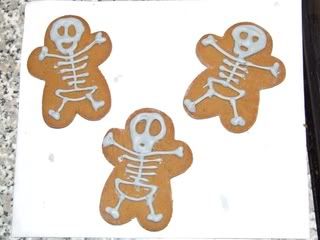
Having the extra dough available allows for a large margin for error. I make an effort to cut extras of complicated pieces as well as creating some of my own custom additions like tombstones, gates, arch ways, doors, shutters, gingerbread skeleton men, or a chimney.
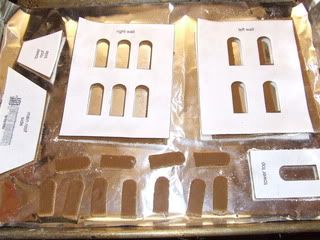
Heavily flour your surface before rolling out the dough to give your cut-outs a better chance at maintaining their shape. For a project with this many intricate little parts, I found it helped to lay my templates on the cut-outs and take pictures so I remember what each piece is.
Even when being extremely careful with gingerbread, warping usually occurs. Some corrective options I used this time around involved microwaving, pressing flat, and trimming the excessively warped pieces as much as possible. When it is time to assemble the house, keep in mind that royal icing can be rather fickle. Here are some royal icing tips:
-It works like cement in that it dries when exposed to air. Submerge the tip of the pastry bag in water between uses to avoid drying out.
-Keep the end of the pastry bag sealed tightly with a twisty tie or elastic.
-Kneed the pastry bag after icing has been sitting for a long period of time as it tends to separate.
-Practice with the pastry bag on some extra, broken, or unnecessary pieces of gingerbread to get a feel for the medium.
-mess around with consistency and shapes by piping it out on a piece of waxed paper, allowing to dry, then peeling them off. You will quickly see how thick piping looks blobby and thin piping is too brittle.
- It WILL stick to aluminum foil but NOT to wax paper.
-It is stronger than the gingerbread itself. For this reason, I used a generous amount to reinforce the difficult angles of the roof and hold together the warped sides, front, and back of the house.
-It can be used as mortar to fill gaps, cracks, and crevices, especially helpful when trying to make warped pieces fit.
Assembly of the larger pieces is often the most frustrating and the use of supports is recommended. Supports can be anything from an extra pair of hands to graham cracker boxes or jelly jars. It helps to have a few items with angles similar to the ones on the house on hand before you begin. Be patient and always hold a joint secured with royal icing longer than you think you should just to be sure and allow for overnight drying for maximum stability. It is also not a bad idea to go back over the royal icing connections inside the house adding another layer of icing if not just for peace of mind.
My roof pieces did not fit together very well which really started to frustrate IMan who was assisting in the initial assembly. I was unhappy with the results but by slowly layering royal icing into gaps and using a paring knife dipped in hot water to smooth it out, I was able to build a solid roof in the correct shape.
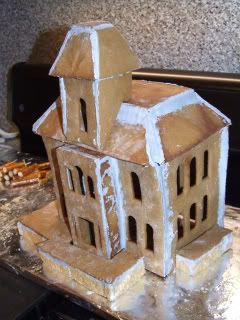
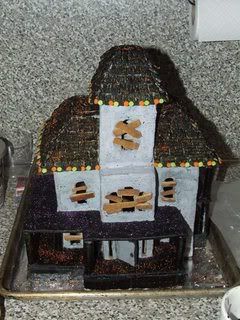
It was after this that I realized I was using far too much icing for the house to remain its original gingerbread brown color and began contemplating my options. I settled on coating all the walls with my gray royal icing in hopes it would not look like complete crap. In my mind, gingerbread is a warm, inviting brown that is suitable for Christmas, but for an eerie Halloween look, a cool gray is better. Lucky me, it didn’t look half bad and with the help of IGirl, we moved onto attaching the porches and shingling the roof with Life cereal.
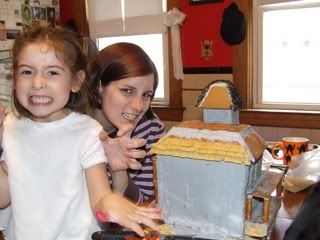
Life cereal is great for that thatched roof feel, but for something a little creepier, I went over it with watered down black food coloring gel and decided to do the same for the porch and it's pretzel rod supports. At one point, the wrap around porch roof broke in two, but was easily repaired with royal icing and ample drying time. The pieces I cut out for the windows were originally going to be tombstones, but I ended up using them to board up all the windows of the house. I prefer a haunting glow to come from inside the house when it is lit, but I don’t want the light source to be easily seen from the outside. Halloween confetti sprinkle "lights" were also added very carefully with royal icing, tweezers, and a steady hand. In the future I will wait to add these until very near the end as they keep popping off.
It was about this time that I dropped a can of refried beans off the middle shelf of my cabinet onto the roof. Damn you, taco night! It hit the royally enforced top corner of the roof, rolled down, then bounced onto the roof of the side porch, then into a plate of dried royal icing spider webs. Lucky me, the damage was so minimal and I actually liked it and left it as it was with the exception of reapplying thinned black food coloring gel and confetti sprinkle "lights".
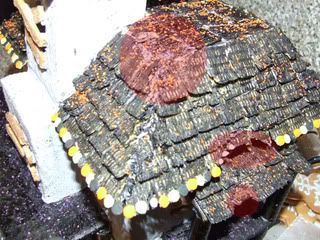
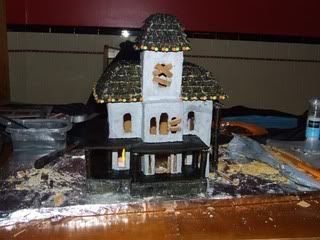
After another coat of black food coloring gel to the roof, I sprinkled orange and purple colored sugar over the house for a glittery effect that wasn't too overwhelming. I realized at this point that while painting the roof, I had splattered black food coloring onto the gray walls. Fortunately, it made them look aged so I went with it and did the whole house that way, then finished up the windows, and added a door.
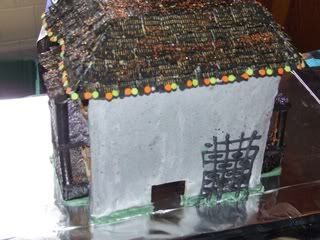
Now all the messy stuff was done and with my fingernail I traced the foot print of the house into a piece of fresh foil that was covering a piece of plywood. Thankfully I remembered to cut a small hole in the back of the house to accommodate the battery operated tea lights. A thick, muted green line of royal icing was piped along the inside edge of the footprint and the house set into it. Another happy mistake came from my first attempts at piping out the iron work. I used a bigger tip than necessary and ended up making a sweet trellis by accident which I added to make the back a little less boring.
Next I piped out all the details onto waxed paper. The iron work for the roof and the gate was done very slowly with a tiny tip to control the thickness of the icing. Then I piped out thick "strings" and placed ghost and pumpkin sprinkles in then very carefully. Spider webs were piped out and tiny spider shaped sprinkles placed in them. These details are incredibly fragile and are easy to break, so try not to get frustrated and just accept that you will likely have to make more. I left them to dry for 2 days, which is actually a little excessive but certainly didn’t hurt anything.
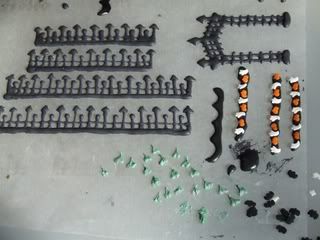
The house itself being fairly close to finished, I set to work on the yard area. Using a large leaf tip and green icing, I made a garden bed for a marshmallow crème pumpkin patch, then went over them with the tiniest possible tip to make the vines in the patch and on the trellis. I even took the time to pipe out tiny little ivy-like leaves then press them into the tops of the pumpkins and along the vines. I finished up the patch with a sprinkling some orange and black nonpareils. I made a grave yard on the other side the same way with sugar cookie tombstones. For a super cool granite look, I used the black food coloring wash on them. To finish off the grave yard, I used purple sprinkles with tombstone shapes and leaned my little coffins in front.
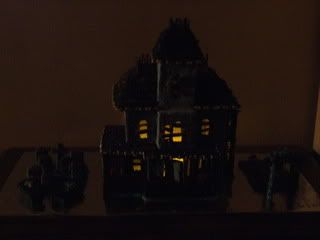
Had I more time and less feelings of "OMG the baby is coming!", I could probably have done a little more on it, but honesty, it's good enough for me. Hope you enjoyed my little tutorial and first ever diary! Here it is lit up!