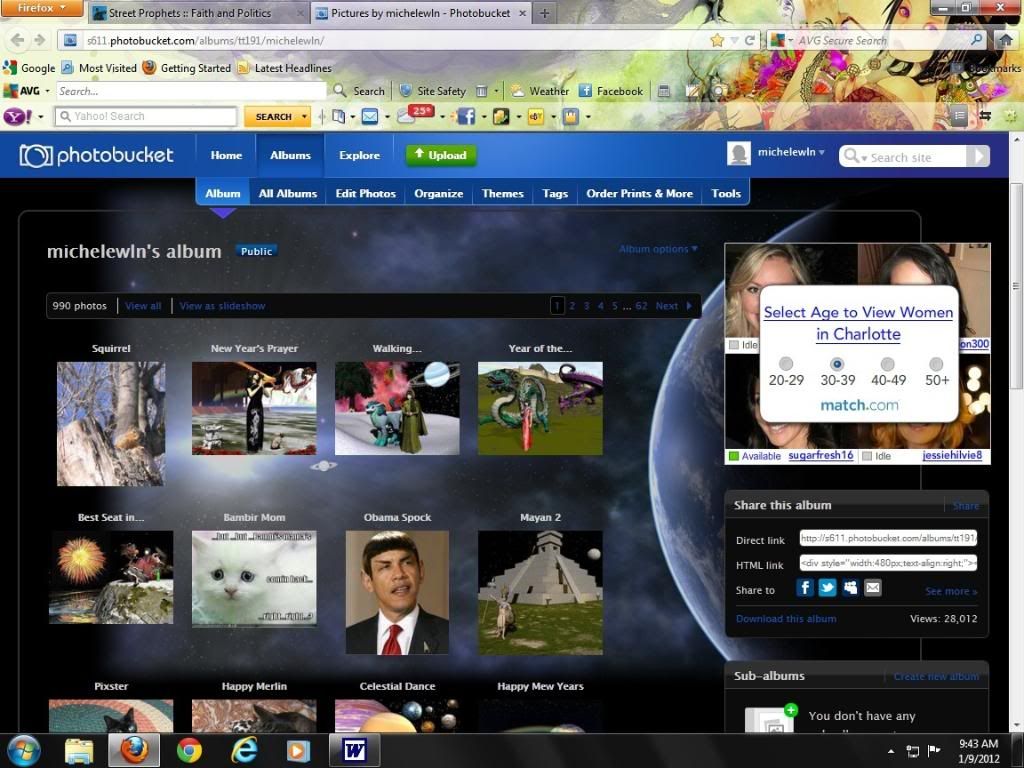
I use Photobucket when I want to put graphics in my diaries. As I was doing so today I thought maybe a screen capture diary showing how to do this might come in use for new diarists here. I was doing my Breaking Bread diary and wanted a salad picture. These are the steps to use. Photobucket is free so the first thing to do is set up an account.
While your diary is in the writing stage open up another window and pull up your Photobucket account.
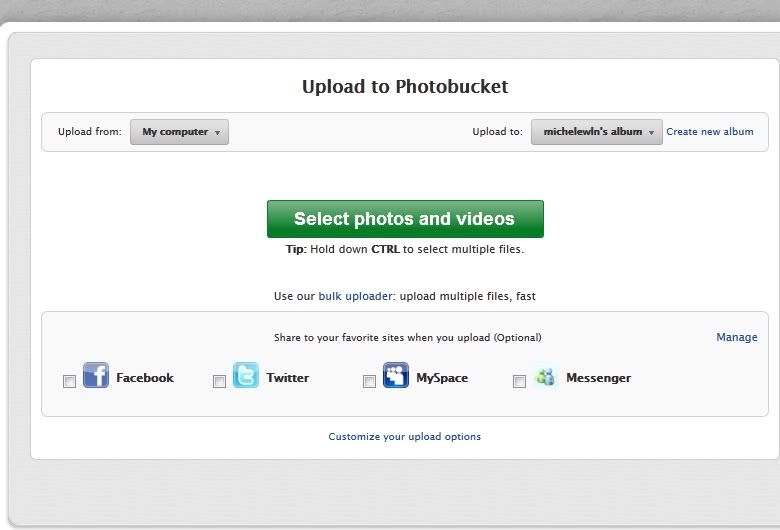
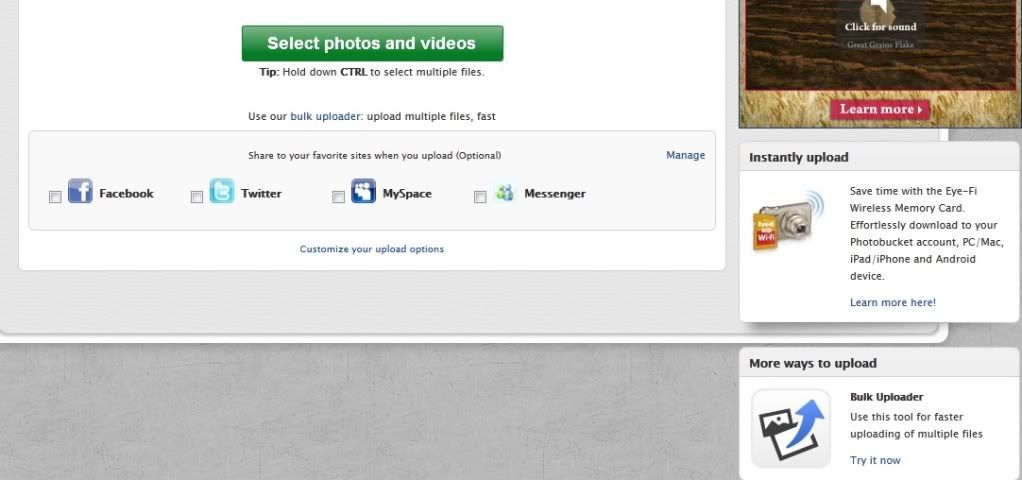
Go to the little green button that says “Upload.” This will bring you to the page where you can upload your pictures. Hit the “Select photos and videos” button. This will take you to your computer.
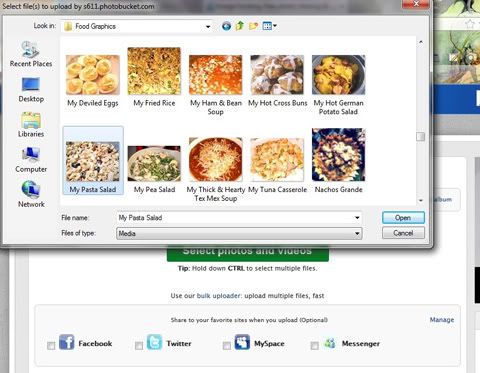
Go to where you have the picture that you want to use. In this case I wanted the “My Pasta Salad” picture. Click on the picture and then click “Open”.
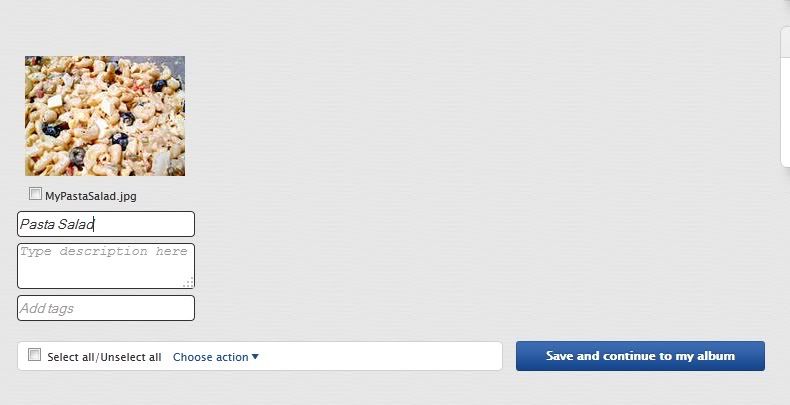
Give Photobucket a moment to upload, ignore the dorky videos (hum loudly to yourself ;-)) When the picture uploads you can put in a name, description, or tags if you wish and push the “Save and continue to my album” button.
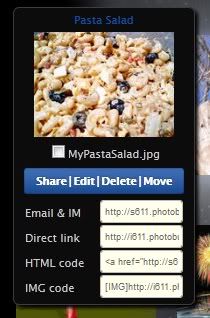
If you move your cursor over the picture it will bring up four choices. Click the “HTML code” button. It will quickly show the word “copied”. In this case faster then I can hit Print Screen. ;-)
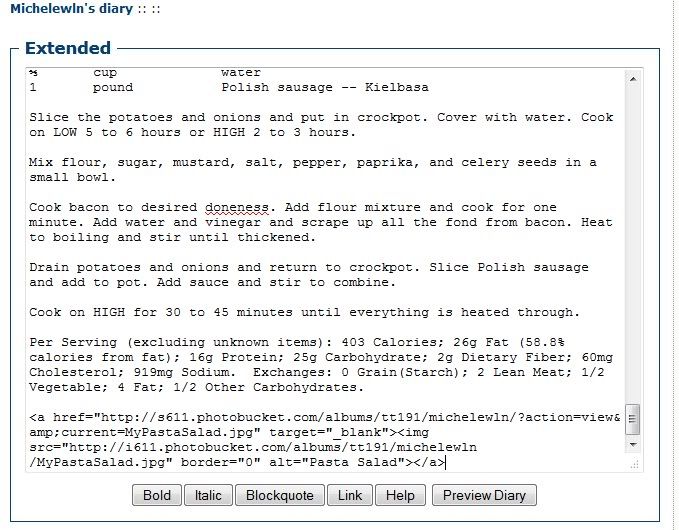
Go back to your diary and hit the keys Ctrl and V. This will copy the code into your diary.
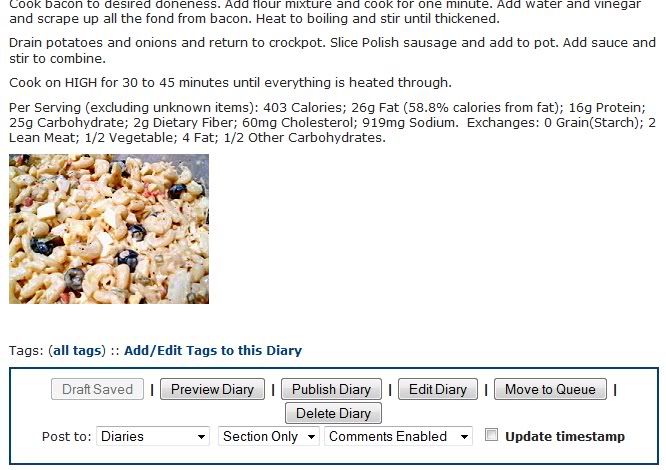
When you preview your diary you should see the picture.
If you have multiple pictures to upload there is a feature that helps. Press the button down on the bottom where it says “More ways to upload” and “Bulk Uploader” that says “Try it now.”
Go to the place in your computer where the pictures are stored.
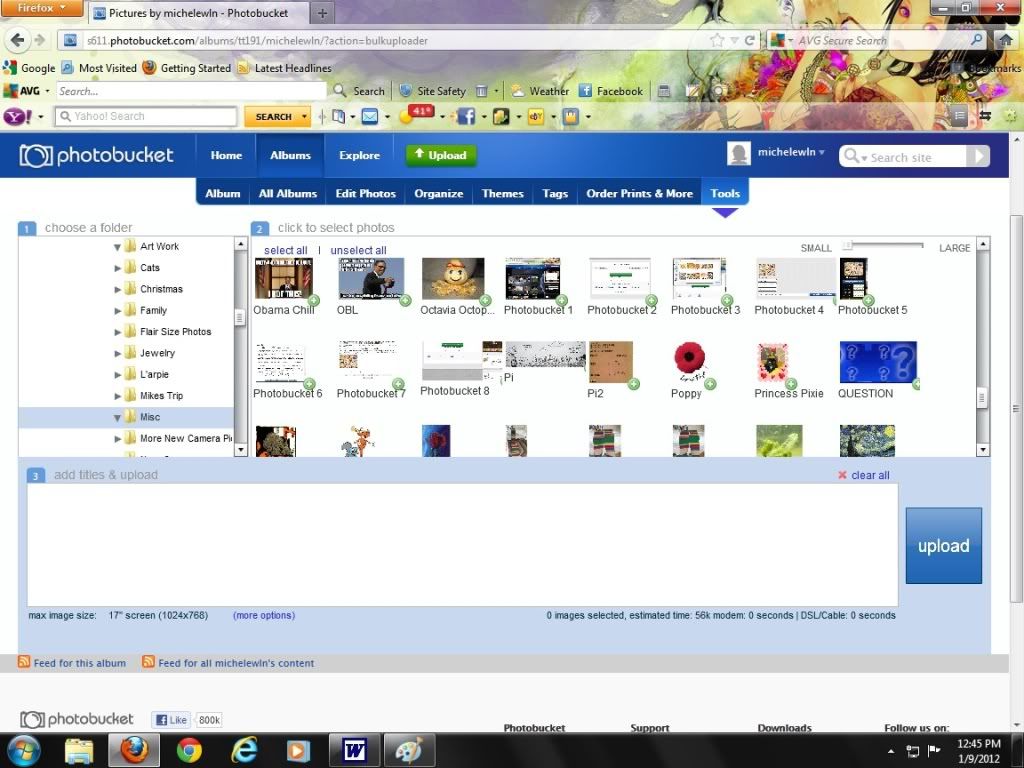
Click on the green + signs underneath the pictures you want to upload.
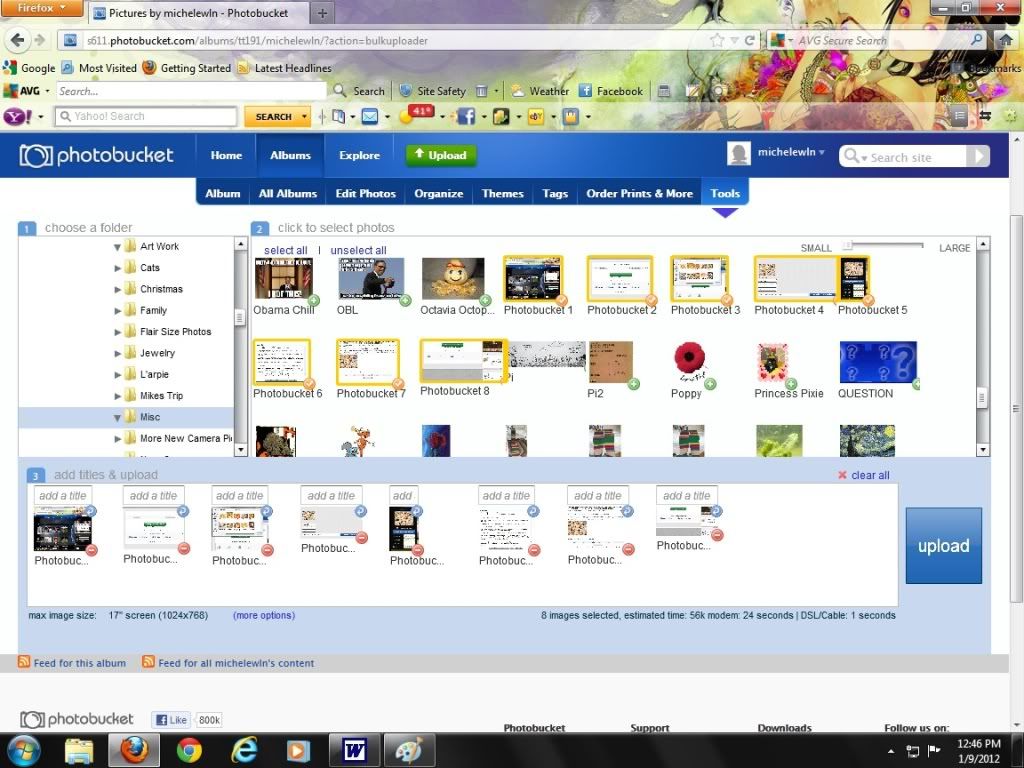
It will show the pictures and you can add titles there and push the “upload” button.
Hope this helps.

