This week we are going to look at some quilt history of the W.C.T.U. that includes a short video on the movement. Also will be learning how to sew curves in a quilt block. I will finish up the Mariner's Compass and also make the Drunker's Path block. The techniques that are used for each block is different. There are videos which will cover sewing curves and how to choose fabrics for scrap quilts. Please come join us after the orange squiggle and enjoy learning about quilts.
DK Quilt Guild: A place for quilters to gather, share ideas, projects, and to make the world a better place, one quilt at a time. Join us and share your thoughts, projects, questions, and tips. Quilters here are at many different levels of skill. Beginners and non-quilters are welcome, too!
How to pick fabric colors from your scraps for a scrappy quilt.
Color choice is sometimes hard for some quilters. So they usually stick to quilt kits and patterns that have the color already designed for them. Then there is some of us that love fabric and love to sprinkle color everywhere on our quilts. I enjoy the process of making a scrappy quilt or sampler quilt. I tend to get board if the quilt is just a few colors and loose interest in it. I have chosen a video on how to chose fabrics for a scrappy quilt. This video also features 19th century reproduction fabrics from several years ago. This type of print fabrics is getting hard to find and the trend right now is mid 20th century modern fabric themes. But the basic way you choose color is the same for all fabrics.
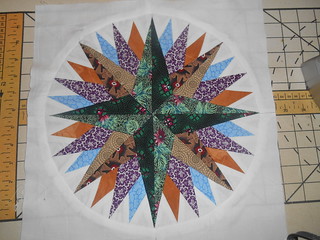
Finishing the curved seam on the Mariner's Compass.
Last time I went over the Mariner's Compass but did not show how to set it in a square. The way you sew this is a little different then the Drunker's Path. Curves can be very intimidating. The Mariner's Compass takes some patients but it is not as hard as it looks. I cut out the four pieces that makes the square. I over sized my cut for extra insurance that I could make sure I would have a large enough circle. There is so many seams and pieces to this block and I have never gotten on to be exactly the same size the pattern says it should be. It always turns out a little larger no matter how careful you sew on the line. There are several reasons why that happens. It can be the thickness of the paper and fabric or the stitch length. It can be your printer is skewed a little when it prints from the pattern. So it is always a good idea to cut the four pieces a little larger.
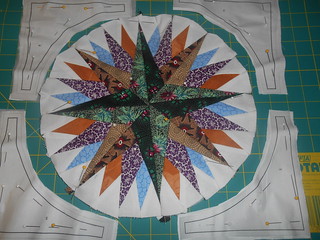
I sewed the four pieces together but I added an eighth of an inch to each piece's seam. This give you a little larger circle to work with. Which I ended up needing. I carefully clipped and pinned the background to the compass. I lined up the 4 large points to the seams in the background to start with then the four smaller one to the corners. After that I clipped and pinned the rest down.
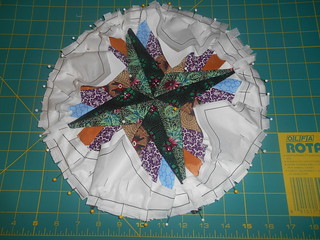
I find it easier to sew if I remove the paper from the background fabric. I find that I get tucks in the background fabric and the paper is just to stiff to mold in a circle even with clips in the seams. I know some quilters who do leave the paper on and do fine with it. I place more pins as I cut the paper away. I leave the paper on the compass. I sew from the compass side using the circle line as a guide.
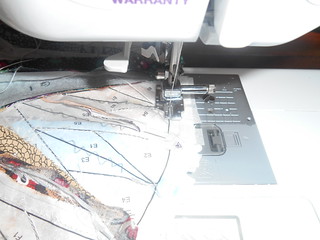
There is usually a few points that need to be fixed because they get cut off. I do this with a seam ripper and a needle and thread. Then I go over the hand sewing with the machine. I have more control by hand. Hand piecing is a good skill to have even though you never intend to hand piece a whole quilt. It is a great tool for fixing points.
You can often run across one that will be a challenge, I just do what I can and hope it will quilt out OK. After the block is quilted the flaws seem to fad away. After you have your points looking as good as you can get them, it is time to remove the paper from the compass back. I do this before I press. The compass will press better and shape nicer without the paper. Before you press check to make sure you are not under size and your compass centers nice.
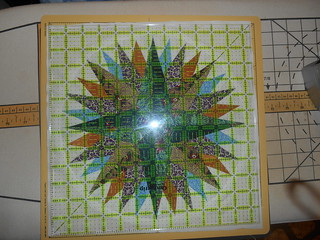
Now you press the compass into submission to she shape it should be. Spray starch can help to hold it shape until it is quilted.
Drunkard's Path and it's historical roots with the W.C, T. U.
The last quarter of the 19th century an movement was started to rid the country of beer and liquor. This led to the Prohibition of the sale and manufacturing of those drinks in the second decade of the 20th century. Families and women suffered from abusive drunk men who spent too much money in saloons. Women's Christian Temperance Union was the force behind getting rid of "the demon rum" and they organized all over the country. The group was organized in 1874 and grew to 350,000 members in 1907. They would march and have demonstrations by busting up pubs while smashing bottles and barrels of liquor. One of the ways they financed and raised money for their cause was raffling quilts. More quilts were used for this cause to raise money then any other time. They adopted the English pattern as their own. W.C.T.U. renamed it the Drunkard's Path. They also adopted the colors blue for water because it was the purist drink and white for purity. So many of the quilt were blue and white in this pattern. We now know that red and white was the most common two color choice for this pattern. This was verified during the late 20th century state's quilt projects that recorded and photographed family heirlooms in all the states. This pattern had several common names today, Solomon's Path and Old Maid's Puzzle. The pattern originated in England and is also known as Mill Wheel, Wanderer in the Wilderness, and Rob Peter to Pay Paul. The W.C.T.U. is also associated with the "T" quilt block. That block was made before the movement started but was also used to symbolize the organization and their cause.
You can read more about the quilts that were done by the W.C.T.U. at Quilt History Tidbits.
http://quilthistorytidbits--oldnewlydiscovered.yolasite.com/...
I have chosen this block for my 19th century quilt to demonstrate sewing curves also because it's role in quilt history. It takes a little practice in sewing curves but after that it should be easy to do.
You can find the pattern for Fons and Porter pattern at their web site. Also there is a great picture of a antique quilt with some of the history.
http://www.fonsandporter.com/...
The following video will show you a no pin technique for the next block Drunkard's path. I do pin mine in the center and the end because it works well for me keeping the two pieces together and not sliding around.
The pattern that I am using for this block came from McCall's Quilting. They have laid the block out in a wedding ring lay out but the blocks can also be laid out as a Drunkards Path.
http://www.mccallsquilting.com/...
The pdf file is here for the pattern:
http://www.mccallsquilting.com/...
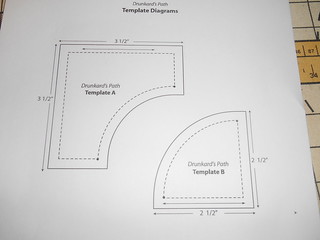
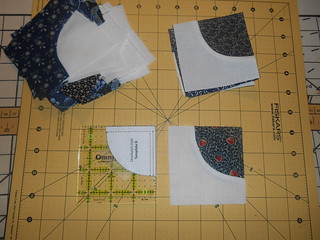
To make this you will need to cut:
8 quarter circles of dark fabric
8 quarter circles of light fabric
8 corner pieces of dark fabric
8 corner pieces of light fabric
You will make sixteen blocks of 3 1/2 squares that will be laid out in a 16 patch block. You will alternate between light and dark fabrics.
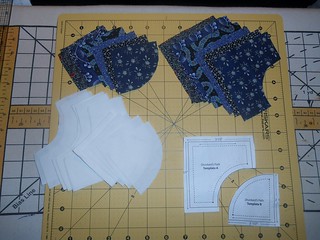
I chose the traditional blue in shades of indigo and white muslin. This would have been the choice in the late 19th century. Many women wore dresses of indigo calico to work in around the house because it was a stable color that didn't fade very fast. In fact many wash day dresses were indigo because of the abuse a wash day dress took from splashed water and strong soap.
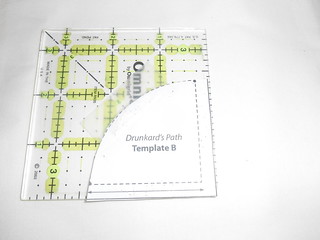
The pieces were cut out by hand from the template. I cut the straight sides of the template with an additional 1/4 inch on each side. This is extra insurance for wonky blocks. I didn't want to have to sit and rip out curved seams. I would rather square them up. I pin mine like demonstrated in the video and sew them taking one white and print pieces and putting the right sides together.
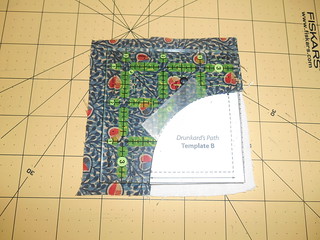
The pieces are each ironed, pressing to the seam allowance to the dark side. In this case the pieces are to be squared up to 3 1/2 inches square. I used a square up ruler that size and I trimmed the paper template on the curve to the sewing line and the flat sides were trimmed to the cutting line. I taped the paper template on top of the square up ruler.
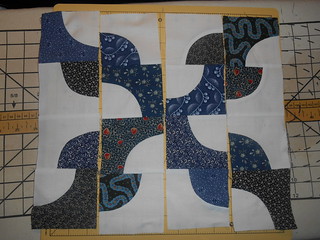
To square up the block I would line up on the curve, then trim with the rotary cutter. As you can see in the next picture, my blocks were wonky. I needed that extra i/4 inch to square up on.
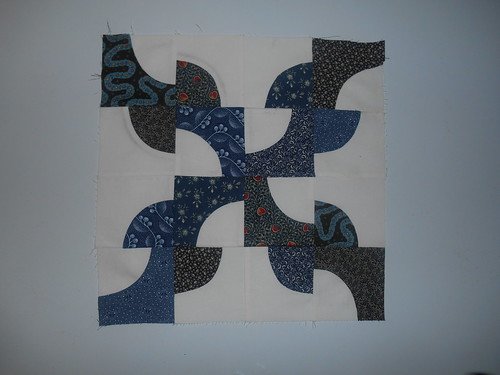
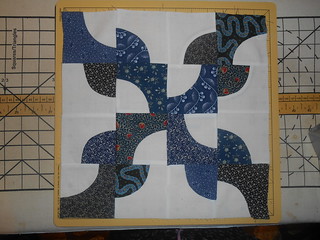
After all the blocks were squared up, I laid them out in a Drunkard's Path pattern. I can see why the Amish liked to call this the Old Maid's Puzzle. I had to fiddle with it a little bit to get it to cross in the center.
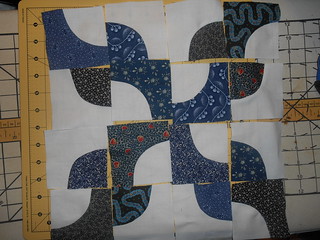
I chose to sew the pieces in four strips but you can chose to sew them in four square sections if you are inclined too. Sew it the way your are the most comfortable working with. Make sure you check your seam allowance is an 1/4 inch after each seam is sewed. This helps you to maintain the correct size so it all fits together easily when you sew the strips together.
The last step is sewing the four pieces together. Your block will be 12 1/2 inches when you are done.
Next Time.
So far we have covered 26 different patterns for blocks. There is only 4 blocks to go to have enough for a queen size quilt. I am not sure what the next 4 blocks will be. I will lay out the blocks that are finished on the bed and see what I need to make the quilt look nice. I will probably need a few more novelty blocks to balance out with basket, tree and mariner's compass. In July we will get into the quilting.
