I just tore out the bedroom carpet and put in Pergo-type flooring. I've never done this before. It turns out to be a breeze to do. The carpet was installed 10 years ago. It's the first and only time we had carpet installed. It will be the last. Carpet is just gross.
I ripped out the carpet and the padding. I decided to do about 1/2 the room at a time so I didn't have to move everything out of the bedroom. I got half the furniture out and left the rest because I was home alone over the weekend and I figured it would be much easier to do this project 1/2 of the room at a time. You have to pull all the staples out of the bare floor and remove the spiky strips that hold the carpet down all around the edges of the room.
 The rolls of old carpet and padding ready to go in a dumpster
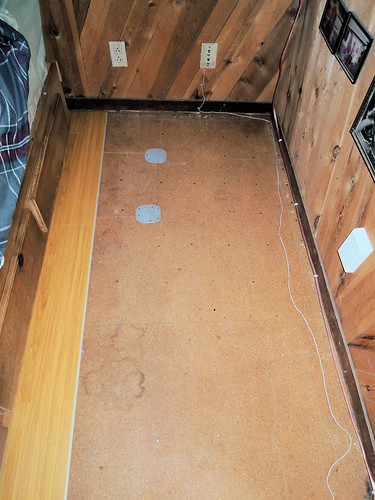 The bare floor which is particle board over plywood
More after the Kitchen Table Kibitzing orange doily
The Pergo-type flooring is snap-together with tongue and groove. You just angle the ends together and then use a hammer and a plastic tapper to make the seams tight.
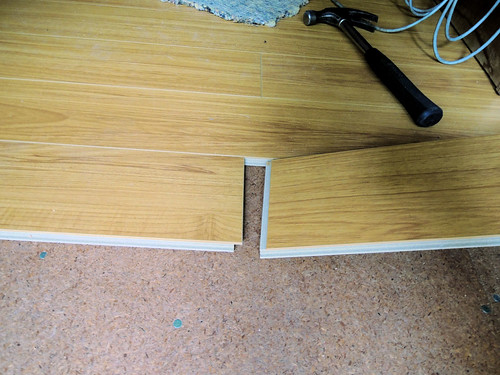 Demonstrating how you angle the pieces to snap in place
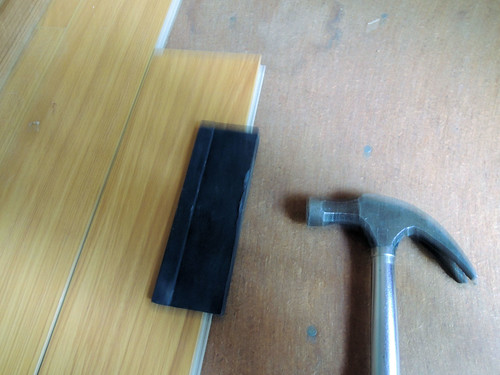 I took this pic while hammering. It got the movement (cool)
You start the project going from left to right. The best way to orient the flooring is to place them lengthwise along the longest part of the room. When you get to the end you need to cut a piece. In order to cut it correctly, you flip the piece 180 degrees to make your cutting mark. This way once the cut is done and you flip it back 180 degrees the tongue and groove parts match up. You use a fine-toothed saw blade to cut laminate so it won't mar the edges.
 Showing how you flip the piece 180 degrees to make your cut. You then mark a line on the bottom of the laminate and saw with the bottom up
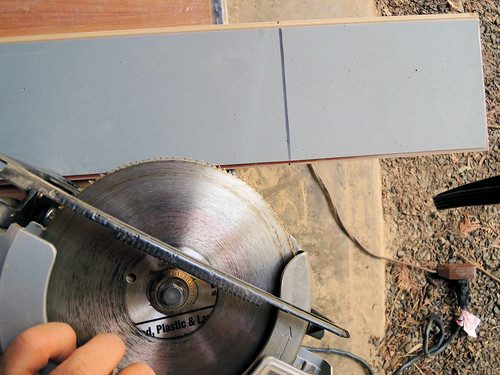 Showing the cut mark on the bottom of the laminate and the fine-toothed saw blade used
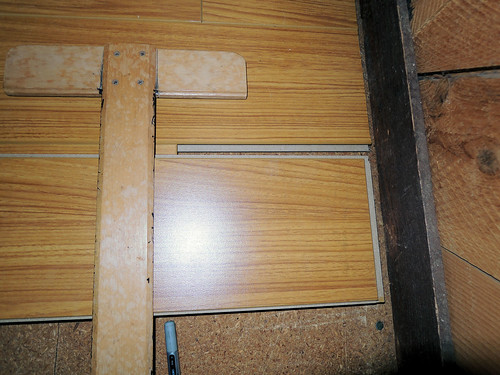
You have to buy one special tool. It's used to slide along the back edge at the wall so you can then use your hammer to bang it nice and tight against all the pieces in the row you just laid down.
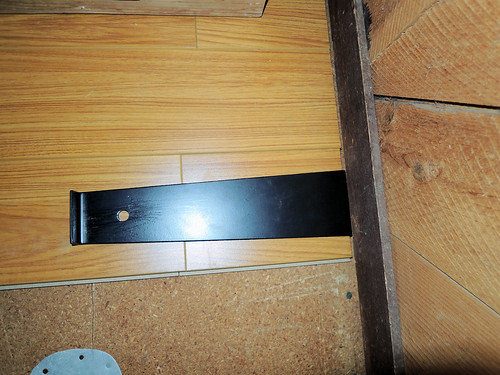 This is the special tool. It cost me $10
I did run into an unexpected problem, which you always do when you do a project. Where the sliding glass door opens to the deck from the bedroom, a tiny leak must have been working away at the floor board. This had been going on for 38 years. As you can see the particle board is rotted. I had to remove this section and replace it with plywood. A piece 48 inches by 16 1/2 inches did the trick.
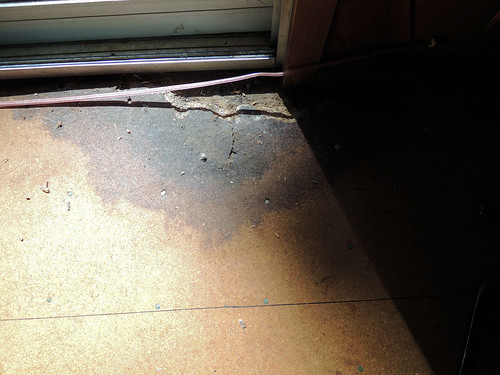
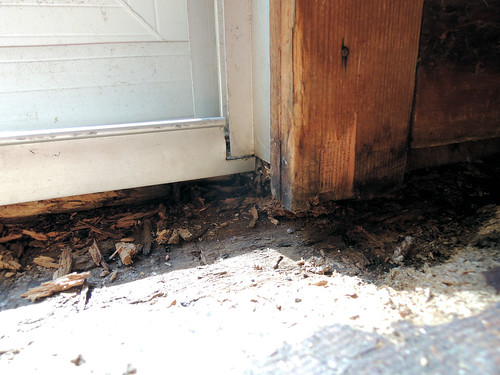 You can see what caused the leak. The guy who built this house had to have cut the sliding door's metal guide but didn't put any silicone over the small crack he left behind. I call that just plain dumb
 The new piece of plywood in place so I could continue installing the flooring
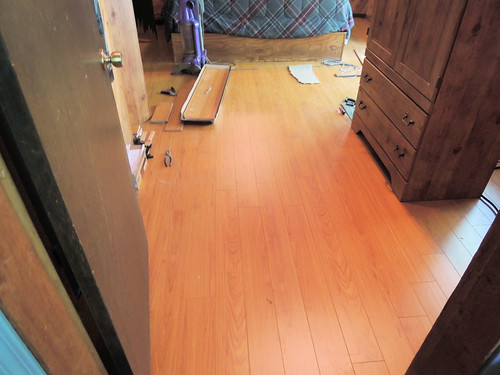
The floor looks great! In the picture below you can see how lovely it looks. All I have to do is clean up some stuff laying around and put furniture back where it belongs.
What do you want to kibitz about tonight?
|
|
|
|
Kitchen Table Kibitzing is a community series for those who wish to share part of the evening around a virtual kitchen table with kossacks who are caring and supportive of one another. So bring your stories, jokes, photos, funny pics, music, and interesting videos, as well as links—including quotations—to diaries, news stories, and books that you think this community would appreciate. Readers may notice that most who post diaries and comments in this series already know one another to some degree, but newcomers should not feel excluded. We welcome guests at our kitchen table, and hope to make some new friends as well.
|
|


